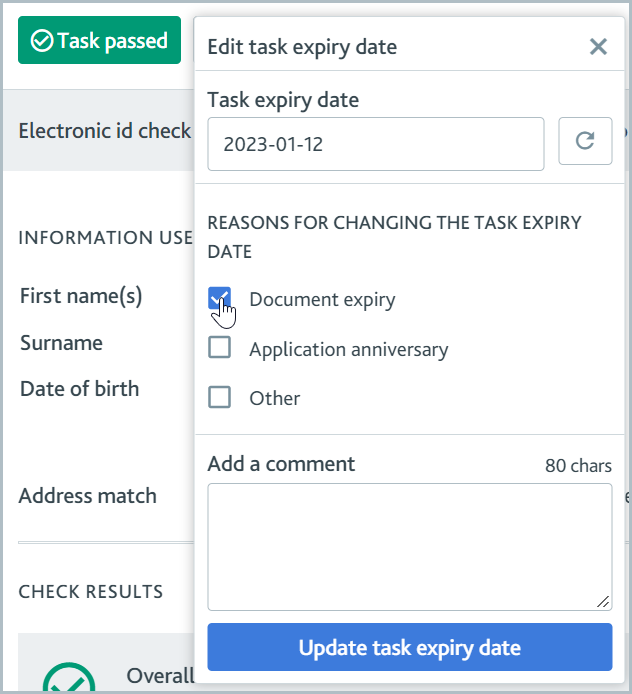
Set a custom task expiry date
If needed, you can set a custom task expiry date on completed tasks with default expiry configurations. Custom task expiry dates can be used to give your team more time to review an existing customer’s details during periodic reviews or to expire a task to match a customer’s document expiry date.
To set a custom expiry date:
Select the task expiry date to open a dialog.

Enter a date in the future for the task to expire or click into the date field and select a date from the calendar. Selecting the
 icon sets the date to the default date and clears selected reasons or comments.
Select a reason for choosing this task expiry. Optionally, add a comment.

Select the button.
Your change to the expiry date is logged in the audit trail and you can set up notifications to alert you when a task expiry date is changed.
Custom task expiry interacts with the default task configuration in different ways.
Note the following behavior:
Setting the custom expiry date applies to this task version only. Future versions of the task revert back to the default task expiry.
If you mark a completed task back to incomplete and then pass the task again, that task resets to a default expiry configuration.
Unlike default task expiry, a custom task expiry date persists even if the risk level has changed.