Set up decision reasons
From the Policy Builder tab, you can create standardized lists of reasons that can be used to approve, reject, or cancel product applications. Using these standardized lists allows you to track trends in product application lifecycles and take action based on these trends.
Once you've created a list of reasons, you can apply them to individual products. You can continue to add additional or disable existing reasons for selection so that you can react to changes in trends or new data points that need to be captured in future product application decisions.
In order to make these reasons available for other users to select and apply to product applications, resolve any errors and publish your new policy.
If you require Passfort's support to configure decision reasons for you, they'll need the following information for each decision reason:
Name of the decision reason.
A description of the reason.
The desired developer name to use as its unique identifier. If this is not provided, the developer name can be automatically generated.
Which products we should enable the reason for.
The type of decision reason. It can be an approval reason, rejection, or cancelation reason.
Create decision reasons
Make sure that you have permissions to create decision reasons.
From the Passfort portal, use the following steps to create a new decision reason.
Sign in to the Passfort portal and go to > .
Select the Add
 icon near the Search bar.
In the New decision reason dialog box, enter a meaningful name for your decision reason.
Choose whether or not to automatically create the developer name that is used as a unique identifier for the decision reason. If you integrate with Passfort's API, you will need the developer name to access the value of a decision reason.
If you deselect , the Developer name field appears.
Enter a name for your unique decision reason identifier. This name can't be edited once the reason has been created.
Add a description for the decision reason.
Select the button to add your decision reason to the list of reasons that can be applied to a product application.
After creating a new reason, you can click on the decision reason and edit the decision reason name and the description fields when needed. You can also deactivate the decision reason, but only when it is not assigned to a product.
Enable decision reasons
After you have created a decision reason, you will need to enable the reasons to make them visible to users or teams who are approving, rejecting, or canceling product applications.
Sign into the Passfort portal and go to > .
Select an existing product or add a new one.
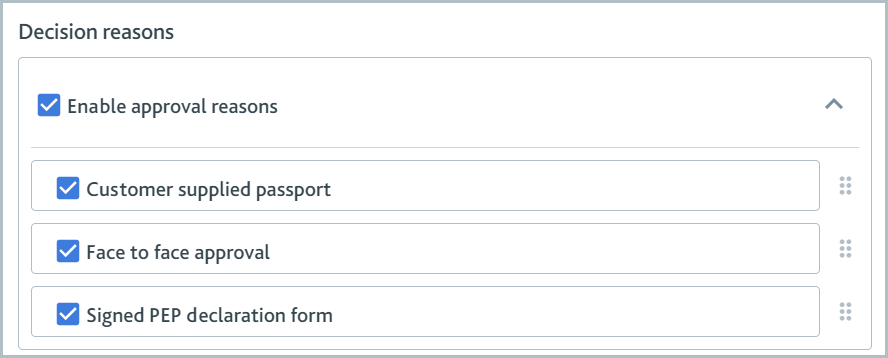
In the Decision reasons section, select to allow users to select from the standardized list of reasons when approving a product application.
Select the reasons you want users to assign to product applications.
Re-order them as needed by using the
 icon and dragging them into the correct order. The order shown here is the order that users will see them in when choosing an outcome for a product application.
If needed, select and repeat steps 4 and 5. These reasons will be used to reject or cancel an application.

Enable and add reasons for other products.
After creating and enabling decision reasons, you will need to publish the changes you have made to your policy in order for these changes to take effect.
Once you have set up your decision reasons, they can then be applied to product application outcomes.