Add, review, and approve company associates
The associates verification list provides a place to verify, approve, and monitor a company’s officers, shareholders, beneficial owners, trustees, or authorized persons.
This topic covers how to add associates to a verification list, review and approve associates on a verification list, and pass a task with a verification list. Learn more about company associates in these topics:
Add company associates to a verification list
Associates can be added to a verification list manually or from an imported list. They can be individuals or companies.
It is not possible to import a list of authorized persons. Authorized persons are always added manually. You can add up to ten levels of associates to a company profile.
Adding associates manually
Whether using automated checks or not, you can always manually add an associate.
To add an associate to a verification list manually:
Select the add button before the verification list. On the Officers verification list, the button is . On the Shareholders and Ownership verification lists, it’s . On the Trustees verification list, it’s . On the Authorized persons verification list, it’s .

If the associate is a person, select . If the associate is a company, select .
Authorized persons are always individuals.
Complete the fields provided. Any required fields are marked required.
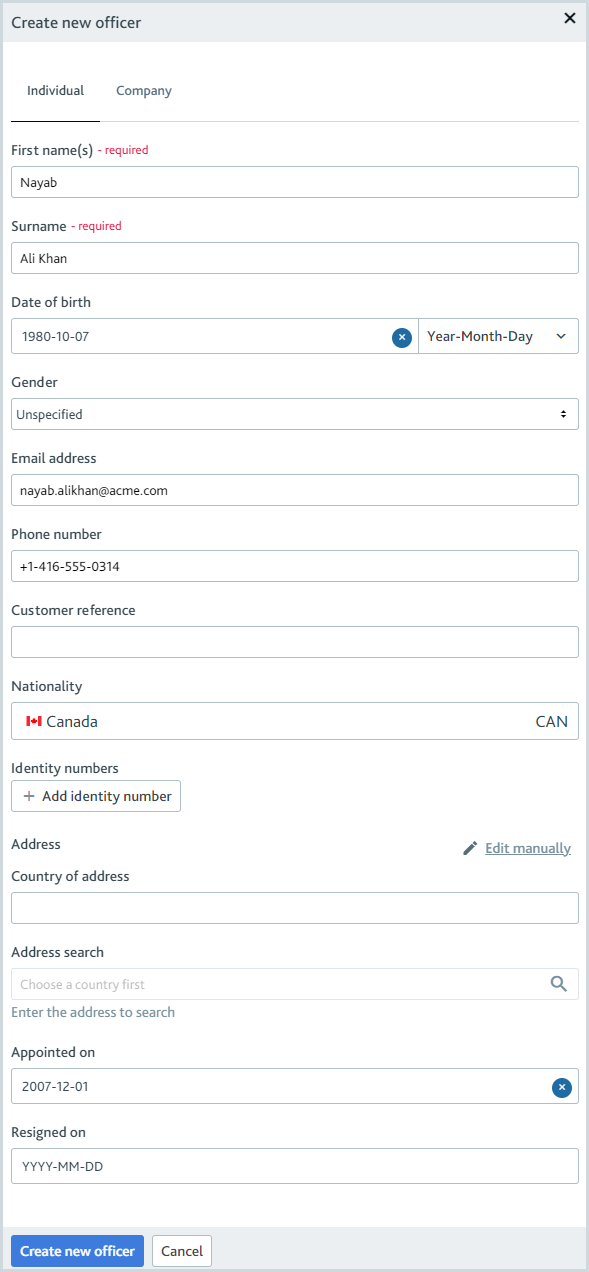
Select the button.
On the Officer verification list, the button is .
On the Shareholder and Ownership verification lists, it’s .
On the Trustee verification list, it’s .
On the Authorized persons verification list, the button is .
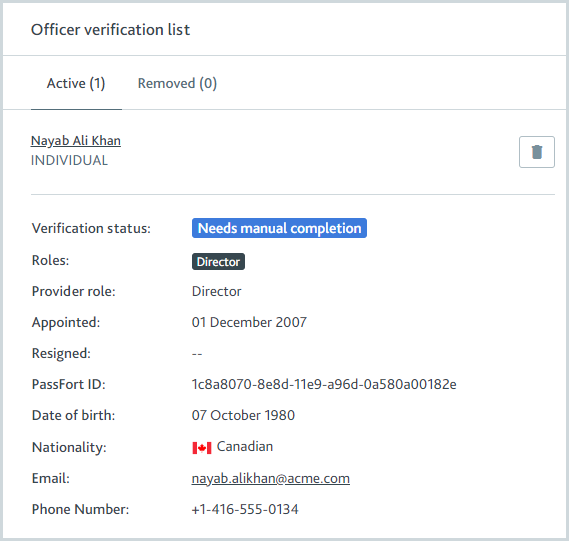
The associate is added to the verification list.
A profile is created for the individual or company so they can be verified and approved as an associate. To learn more, see Approve/reject company associates.
If a similarly named profile is already linked to the parent profile, the Resolve possible duplicates dialog is displayed. For more information, see Resolving possible duplicates.
If you're adding an officer with a resignation date, you'll be asked to confirm that you want to add them.
Once you’ve added an associate to the verification list, you can copy details from an imported associate to the associate you added. To learn how, see Copy information from imported associates.
Adding associates from an imported list
You can run a check that returns a list of officers, shareholders, beneficial owners, or trustees from your data provider and any available information about them.
Once associates are imported into Passfort, they can be added to a verification list automatically or manually.
Import a list of associates
The type of check you can use to import associates depends on the task.
Identify officers: Use the Company data check or the Company registry check to import a list of key decision-makers at the board level, for example, directors and company secretaries, and any available information about their roles, the dates they were appointed, the dates they resigned, and their dates of birth. Active officers are displayed at the top of the results and resigned officers at the end.
Identify shareholders: Use the Company data check or the Company ownership check to import a list of key shareholders with significant voting rights and control, plus any available information about the percentage of shares each one holds. Shareholders with the greatest share percentage are displayed at the top of the results.
Identify trustees: Use the Company registry check to import a list of key decision-makers at the board level, for example, chairs and secretaries, and any available information about their roles, the dates they were appointed, and the dates they resigned.
Verify company ownership task: Use the Company data check or the Company ownership check to import a list of entities with ownership and control of the onboarded company.
Note
Authorized persons cannot be imported using a check.
When associates are imported, they're displayed on the left side of the task.
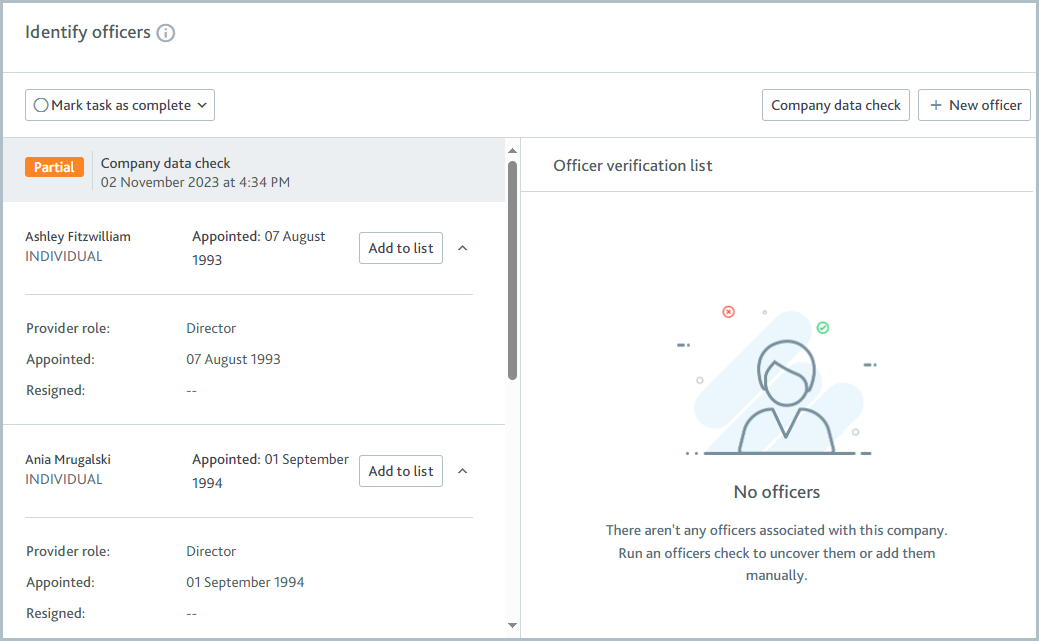
In the case of the Identify officers task, each officer only has either their appointment date or resignation date displayed next to their name. The appointment date is displayed when the officer is still active. The resignation date is displayed when the officer has resigned. To see a resigned officer's appointment date and provider role, click the officer's name to expand their details.
If an officer has multiple roles, note that you'll only see a resignation date if the officer is resigned from all roles. If the officer is active in any role, the appointment date is displayed. For example, if the officer was the company director from 1980-1990 and the corporate secretary from 1985 to the present day, you'll see Appointed: 1980. To see the appointment dates and, if available, resignation dates for all roles, click the officer's name.
If some of the information can't be found, for example, if the associate does not have a resigned date because they're still active at the company, -- is displayed.
You can configure a task so its checks run automatically when the task is first added to a profile and whenever a new version of the task is added.
When you run a check, a permanent record of the results is kept on the profile so you always have a "snapshot" of what happened. This means if you re-run a check to import a list of company associates, the new list is displayed before the older lists. The same associates may appear on both lists.
Add associates from an imported list automatically
You can configure tasks to add associates from an imported list to a verification list automatically.
When you configure the task, you choose which associates from the imported list are added:
Add all profiles: Every associate returned by the data provider is added to the verification list (up to a maximum of 100).
Add up to a specific number of profiles: When configuring the task, you specify a number. This number of associates is added to the verification list. For the Identify officers task and the Identify trustees task, the officers and trustees who have been elected/appointed the longest are added; in the case of officers, resigned officers are only added if there are no more active officers. For the Identify shareholders task, the shareholders with the highest percentage of shares are added, then shareholders with no known share percentage.
Add profiles with a percentage of shares greater than or equal to a threshold: When configuring the task, you specify a percentage of shares. All shareholders who own this percentage and above, and shareholders with an unknown share percentage, are added. This configuration is for the Identify shareholders and Assess company ownership tasks only.
Add profiles with selected roles: For the Assess company ownership task only, you can add associates imported from the data provider with a selected role - beneficial owner, global ultimate owner, or controlling shareholder - to the verification list.
If the check returns a Partial match, no associates are added to the verification list automatically.
When an associate is added to a verification list automatically, Passfort checks the associate’s full name to see if they already have a profile as part of the product application. Associates already have profiles when they're on other verification lists. For example, an associate may be a Director on the Officers verification list and a Beneficial Owner on the Shareholders verification list for the same company. If an associate has an existing profile for the application, a second profile is not created. Instead, the verification list links to the existing profile.
Add associates from an imported list manually
To add an associate from the imported list manually, click the button next to the associate’s name.

The associate is added to the verification list.
A profile is created for the individual or company so they can be verified and approved as an associate. To learn more, see Approve/reject company associates.
If a similarly named profile is already linked to the parent profile, the Resolve possible duplicates dialog is displayed. For more information, see Resolving possible duplicates.
Resolving possible duplicates
If an individual or company has two profiles, they may need to complete the same due diligence tasks more than once.
Associates may already have a profile when they are on multiple verification lists for the same product application. For example, if an associate is a Director and a Beneficial Owner of the company, they will appear on the Officers verification list and the Shareholders verification list.
If an associate you’re adding to the verification list is closely matched to one or more individuals/companies with similar details, when you add the associate to a verification list manually, the Resolve possible duplicates dialog is displayed so you can ensure only one profile is created for the associate.
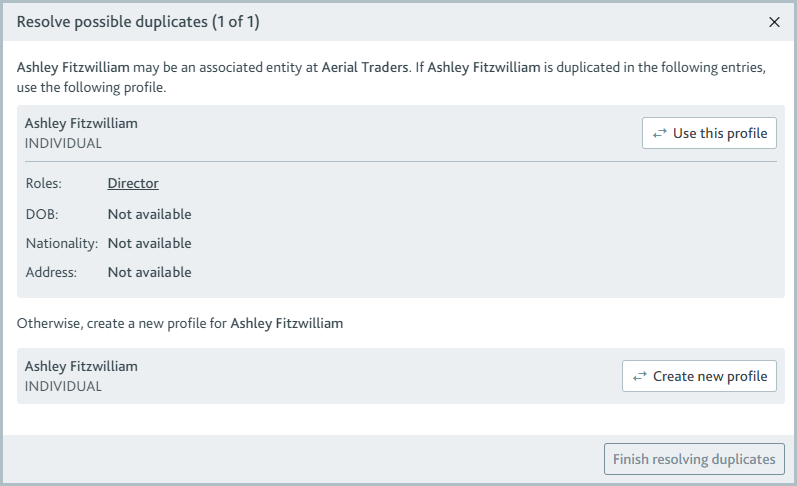
This dialog is only displayed for associates added to the verification list manually. When associates are added to the verification list automatically, their duplicates are resolved automatically. For more information, see Add associates from the imported list automatically
In the dialog, a checkmark is displayed next to any profile data that are the same, and an X is displayed next to any profile data that are different.
If the associate is a duplicate of one of the associates listed, select next to the duplicate, then select . The verification list links to your selected profile and no second profile is created.
If the associate is not listed here, select , then . A new profile is created for the associate. The verification list links to the new profile.
To learn how to use a profile to verify and approve associates, see Approve/reject company associates.
To learn how to edit company associates on the verification list, see Edit company associates on a verification list.
To learn how to remove company associates from the verification list, see Remove company associates from a verification list.
Approve/reject company associates
Every associate on the verification list has a Verification status.
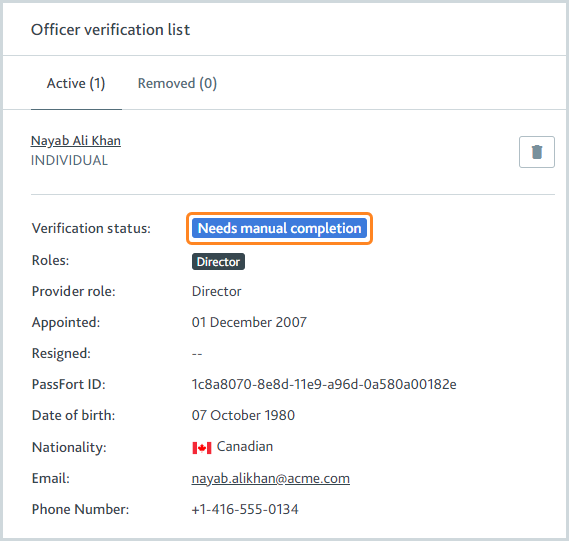
The verification status shows what stage the associate’s verification is at.
Associates are verified through the following process:
The verification begins when the associate’s profile is created.
If you have Risk configured, the associate inherits the product application’s risk level.
If your risk model uses an Associates risk factor, at this point the associate's details are checked against the rules of the risk factor and the product application’s total risk score is re-calculated. The risk level is reassigned to the product application based on its total risk score. All company associates inherit the new risk level.
If you have Risk configured to automatically reject profiles based on risk level and the re-calculated risk level matches your specifications, the product application is rejected and the subsequent steps do not take place. Learn more about rejected product applications.
The product’s associate smart policy is applied to the associate. If the product’s associate smart policies are specific to associate roles, the associate smart policy is selected according to the associate’s role.
The associate smart policy rules are applied to create a list of onboarding tasks for the associate’s profile.
If any onboarding tasks have verification lists, the associate smart policies for those tasks are applied now. The process for this associate verification is paused and remains with the Automating status until any automated processes for the other associate smart policies are complete; that is, their risk is evaluated, their tasks are created, and their checks configured to run automatically are performed.
Any checks that have been configured to run automatically are performed and the results are displayed in the associate profile’s tasks.
The associate’s verification status is displayed based on the status of any remaining tasks. For example, users may need to pass tasks manually, or customers may need to complete forms. You can pass/fail tasks manually on the associate’s profile.
Once all tasks are passed, the associate’s approval status is determined by the smart policy. If automatic approvals are configured, the associate is approved automatically. If not, the associate’s approval status is displayed as Ready for decision, indicating a user must manually approve/reject the associate.
If you reject or cancel a profile for a company with associates, you should reject/cancel the profiles for the associates too. If you do not, the associates' profiles will remain in ongoing monitoring.
Seeing an associate’s profile
Click the associate’s name to open their profile.
The associate's relationship with the company is displayed at the bottom of the profile.

Select the name of another associate to jump to their profile.
The profile’s tasks are displayed under Due diligence tasks. Select any task to see it and see what checks have been run for it.
To see the associate’s approval status for the product application, go to their Applications section. Every role that the associate has is displayed as a separate product application.
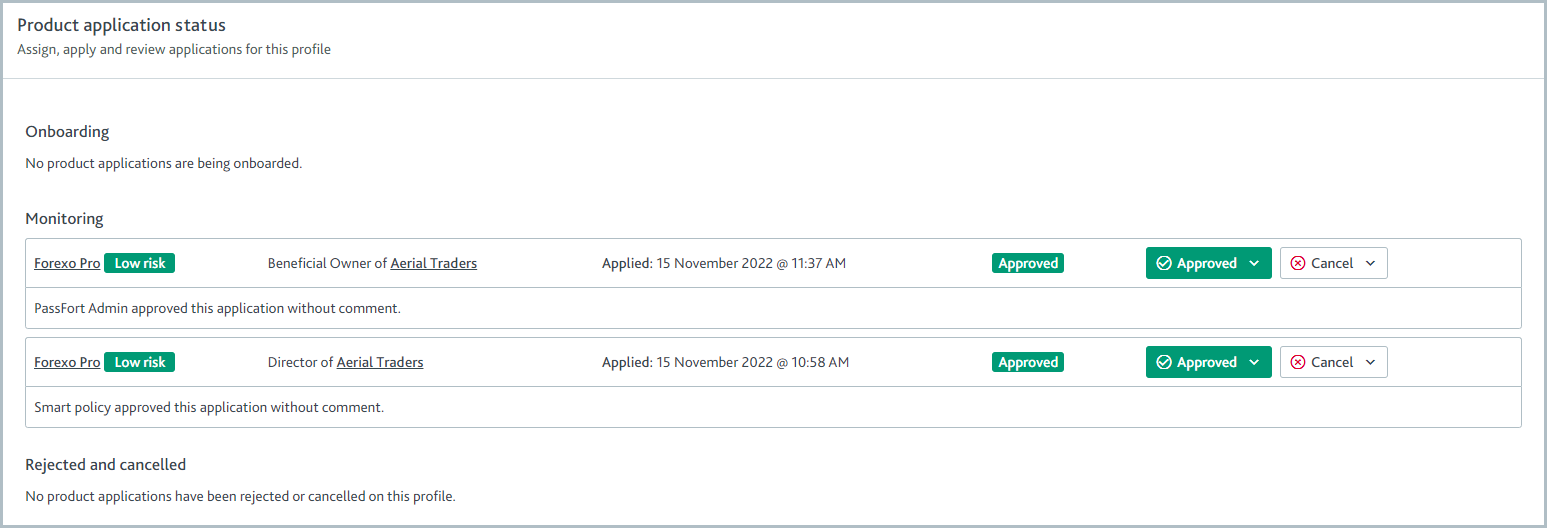
Associate profiles are not displayed on the Profiles tab. When you search for the name of an associate, the company’s profile is returned as a search result.
Approving or rejecting an associate
Product applications for associates work in the same way as all product applications: there are one or more due diligence tasks they need to pass, and you can run checks to help pass those tasks.
To approve or reject the associate, approve or reject their product application.
Pass/fail the task
You can configure the Identify officers, Assess company ownership, Identify shareholders, Identify trustees, or Identify authorized persons task to pass automatically when all associates are approved or when a specified number of associates are approved.
At least one associate must be approved for the task to pass automatically. This means if you have the task configured to add associates to the verification list automatically and pass automatically when all associates are approved, the task will not pass automatically if the check returns no associates because zero associates can be approved. Tasks with verification lists can always be passed manually, even if there are associates on the verification list who are not approved.
To pass the task manually, click and select . The task is displayed as Task passed and its indicator displays a check mark.

To fail the task manually, click and select . Optionally, explain why you're failing the task in the Task notes.