Screen fraudulent merchant accounts
You can run the Merchant fraud check to learn whether a company or its associates may have fraudulent merchant accounts.
Confirm associates are on the profile's verification lists
A minimum of one company associate is required to run this check, so the first step is to confirm that at least one of the company's verification lists contains an associate who is an individual with an address.
Only the five first associates who are individuals with addresses added to any of the verification lists will be used in the check. For example, if one associate is added to the Identify authorized persons list and then ten associates are added to the Identify shareholders list, the authorized person and the four shareholders added first will be used for the check.
When you run the check, you can see which associates were used in the check results.
Go to a verification list
To see a verification list, go to the company profile and click one of the following tasks:
The smart policy determines which tasks the profile will have. If the profile has more than one of these tasks, you may wish to repeat these steps for each task because each one has a distinct verification list. If the profile does not have any of these tasks, contact your Passfort administrator.
When you select the task, the verification list is displayed on the right, except for the Identify authorized persons task, where the verification list takes up the whole task.
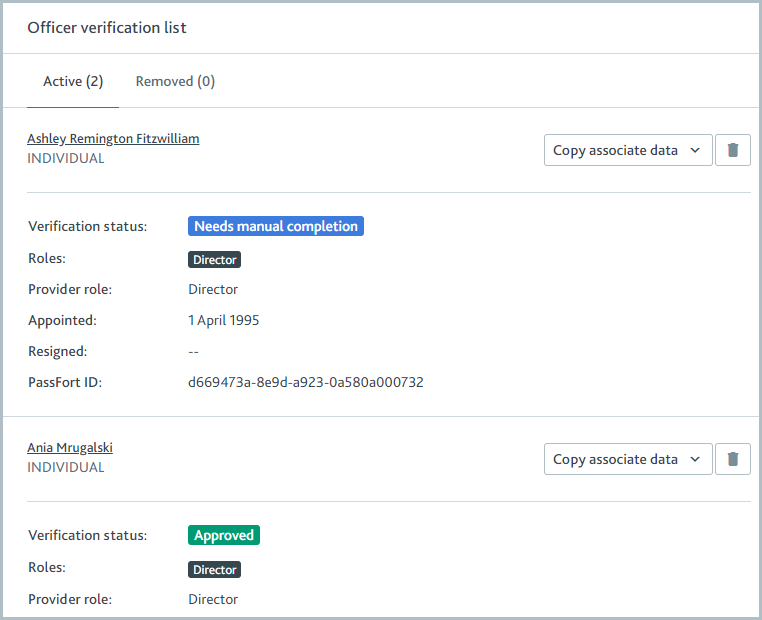
Find an associate who is an individual
To see which associates are individuals, look for the Individual label after the associate's name.

Learn how to add associates to the verification list.
Confirm the individual has an address
To confirm an associate has an address:
Select the associate's name. You are redirected to the associate's profile.
Select . If an address exists on the profile, it's displayed under Information.
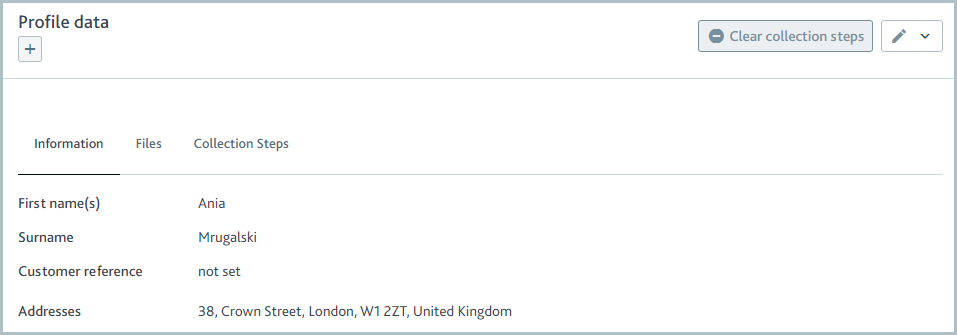
To add an address, select the Edit  button.
Run the check
To run the Merchant fraud check:
Go to a company profile's Assess merchant fraud risk task.
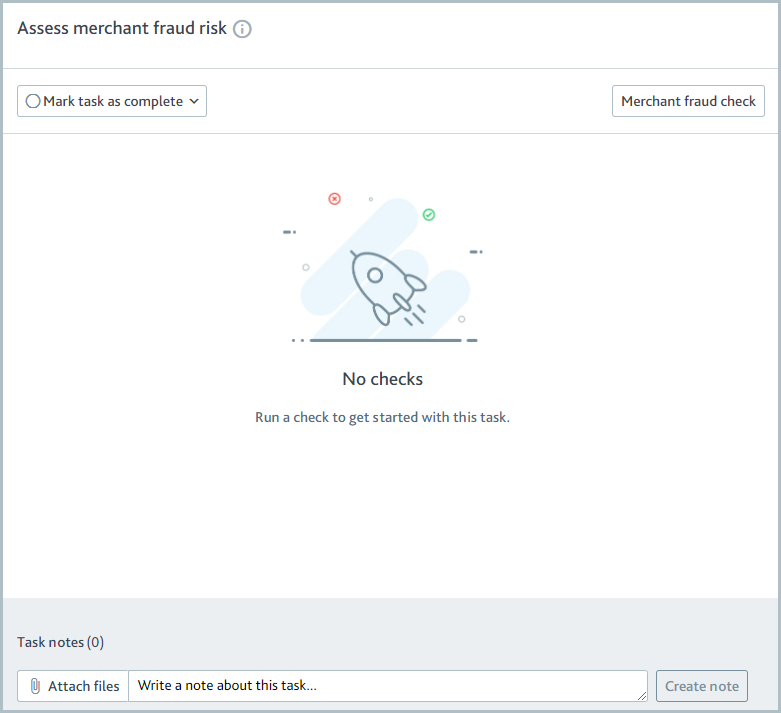
Select . The screening results are returned.
The company profile requires an address for the check to run successfully.
You may find that there are already matches in the check results. This is because your smart policy is configured to return results automatically. If there are check results and you run the check now, any monitoring on the old results will stop and monitoring will begin for the new results.
Read the results
The check returns any matches for the profile and associates and displays them in the Potential matches list.
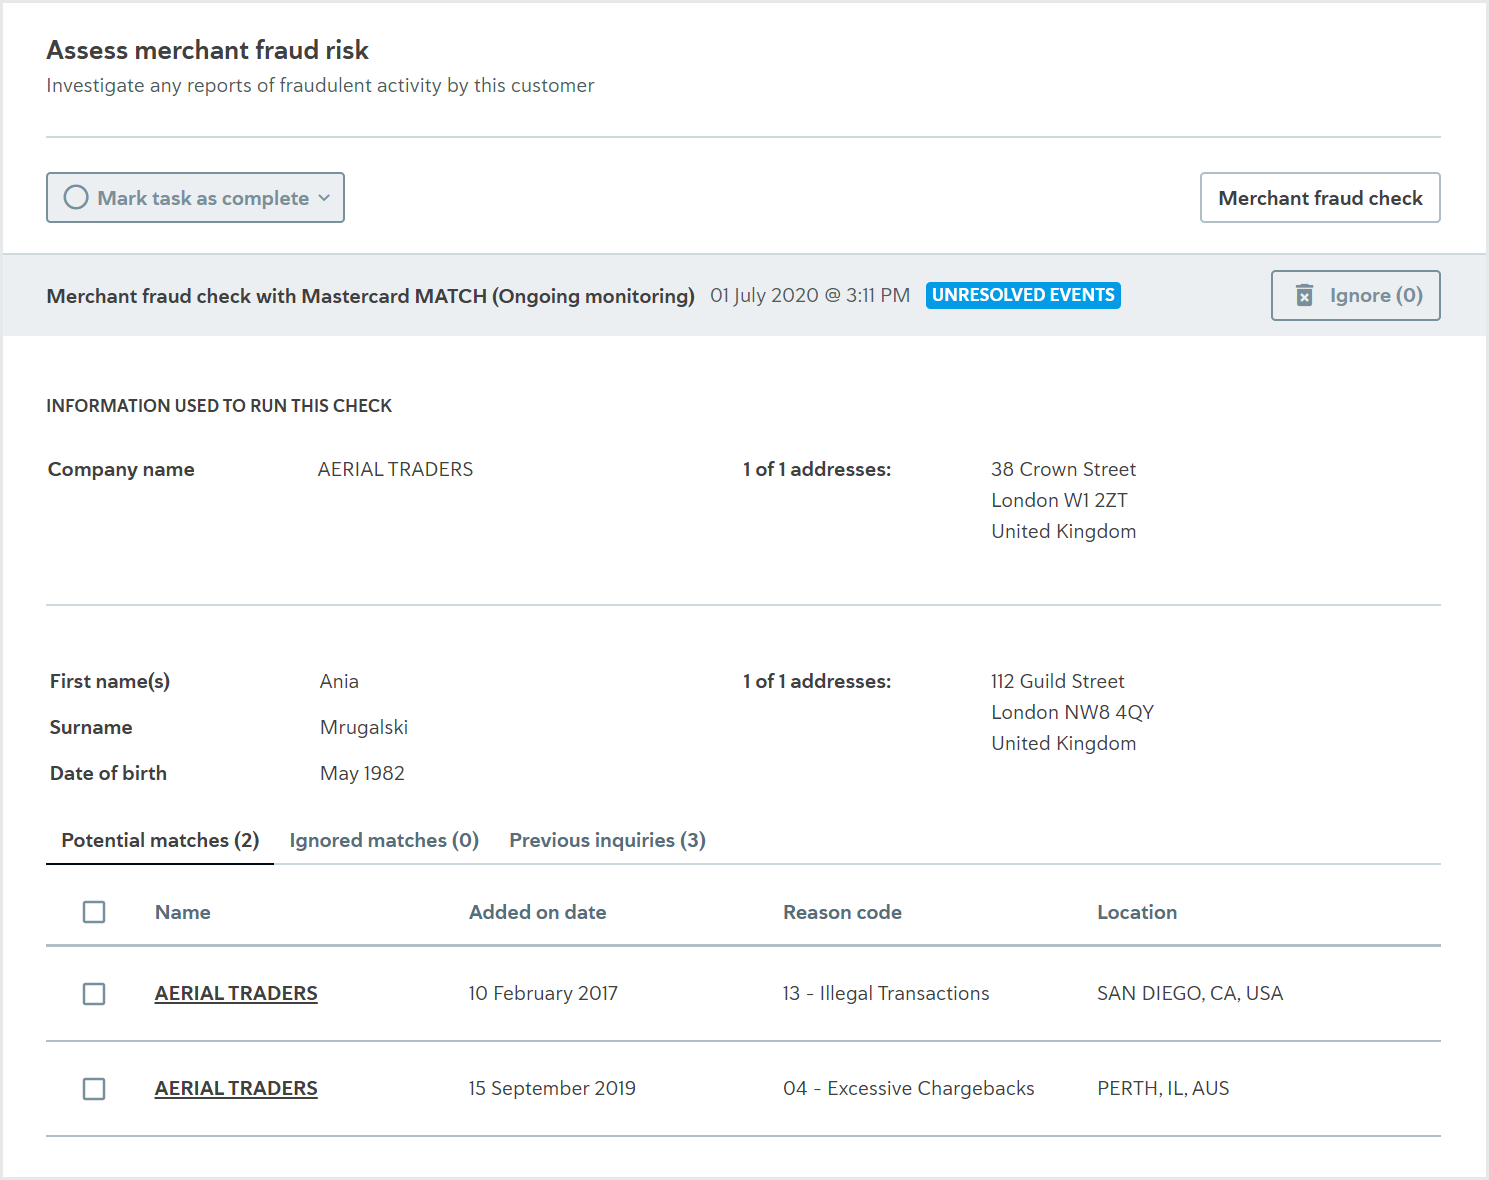
Any results that have been searched recently by other members of the TMF network are displayed in the Previous inquiries list.

Previous inquiries have not been reported by members of the TMF network, and their accounts have not been terminated. These matches are for information purposes only; it is not possible to confirm or ignore them, and no action is required on them to progress the application.
Select the match name for more information about a potential match or previous inquiry.
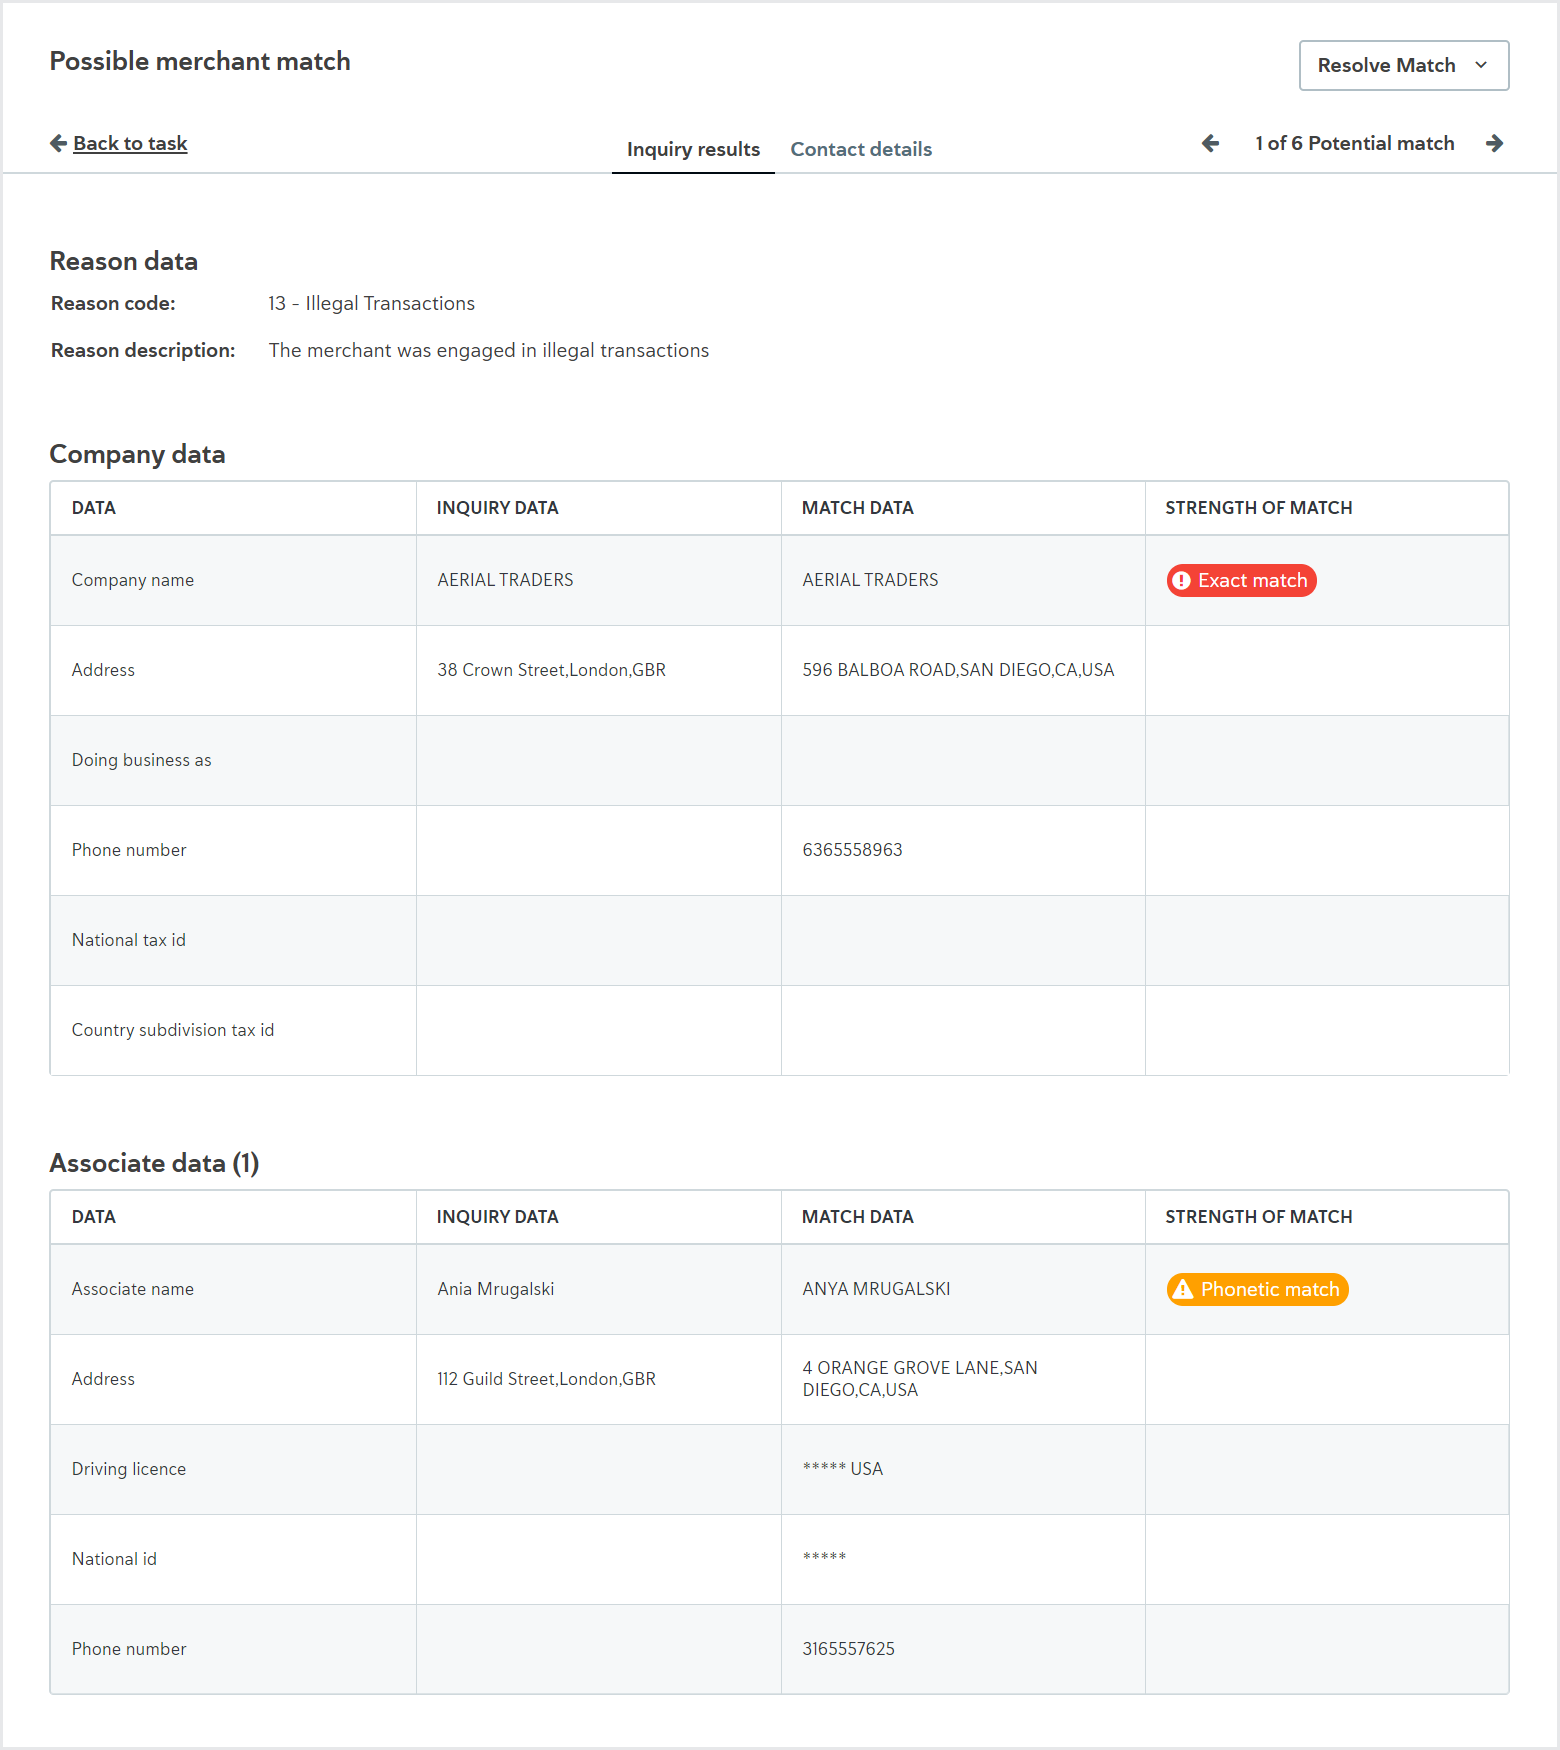
The match details display all available information from the data provider about the company data, the associate data, and the reason the merchant is on the list.
For potential matches, the reason the match's account was terminated and the contact details of the merchant that filed the report are also displayed.
Confirm or ignore the potential matches
To confirm or ignore a potential match, select , select your decision, then select .
Optionally, you can add a comment to explain to your colleagues why you've made the decision.
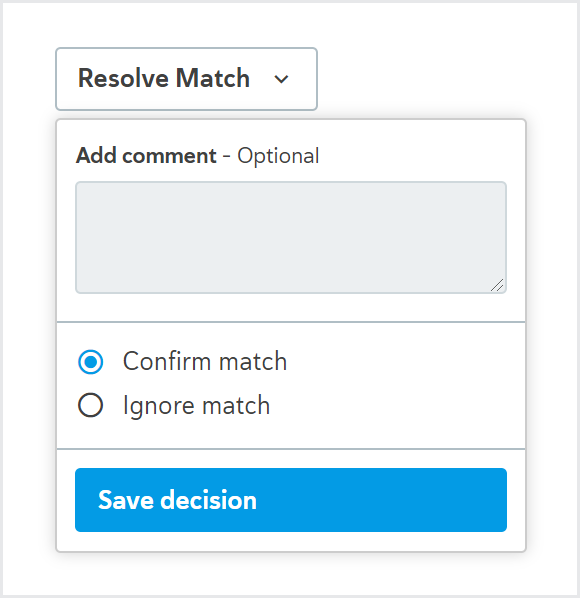
Confirmed matches are displayed on the Matches list, which is created when you confirm the first match.
Ignored matches are displayed on the Ignored matches list.
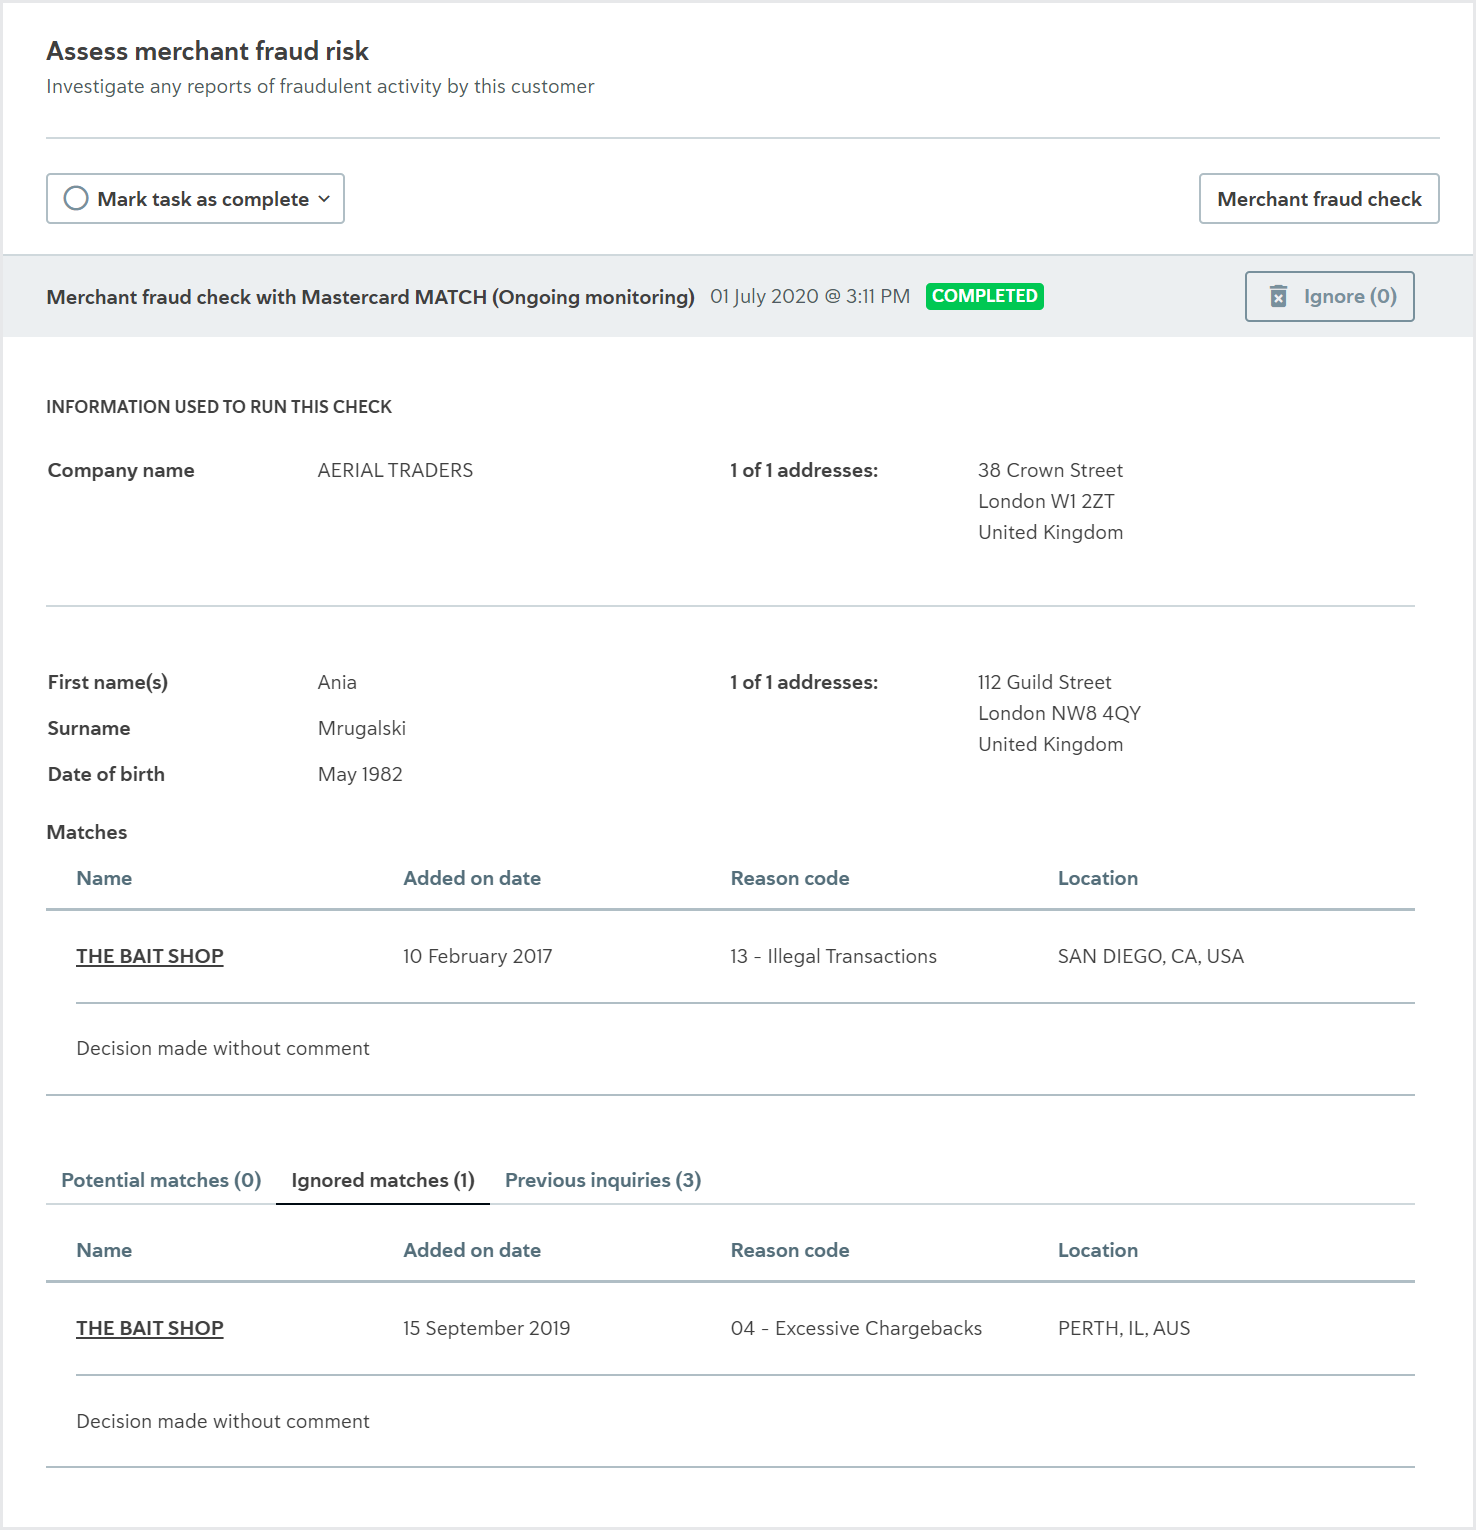
To return a confirmed or ignored match to the Potential matches list, select the match name and click .
To mark all potential matches as false positives, select the checkbox at the top of the Potential matches list, then select .