Manage product applications
When you view a profile, you can see all the information about the applicant and take action on their product applications.
See who is applying to the product
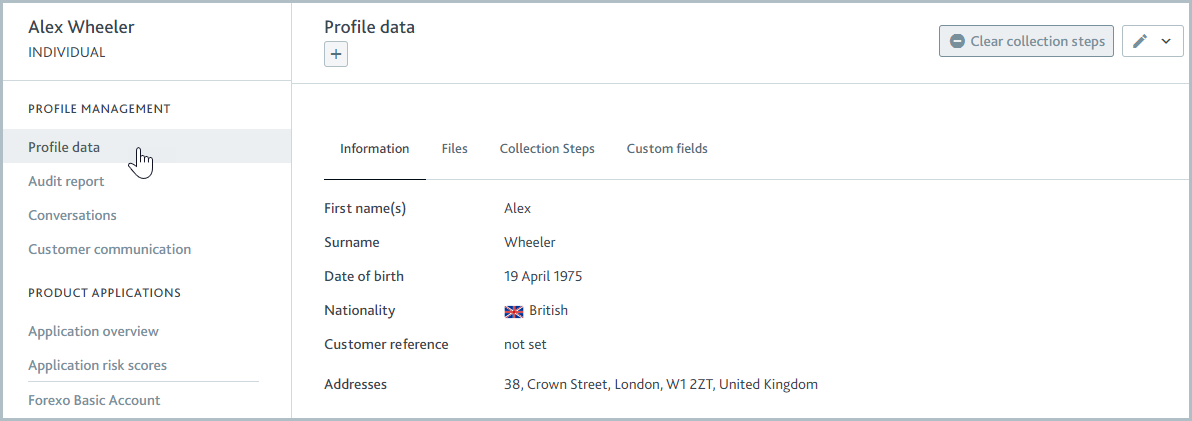
You can see all information about the applicant and any documents that have been gathered in Profile data.

To add or edit profile data, click the Edit  button.
You may want to check Conversations, too, to see if your team has left any comments about the profile.
Find out the current status of their applications
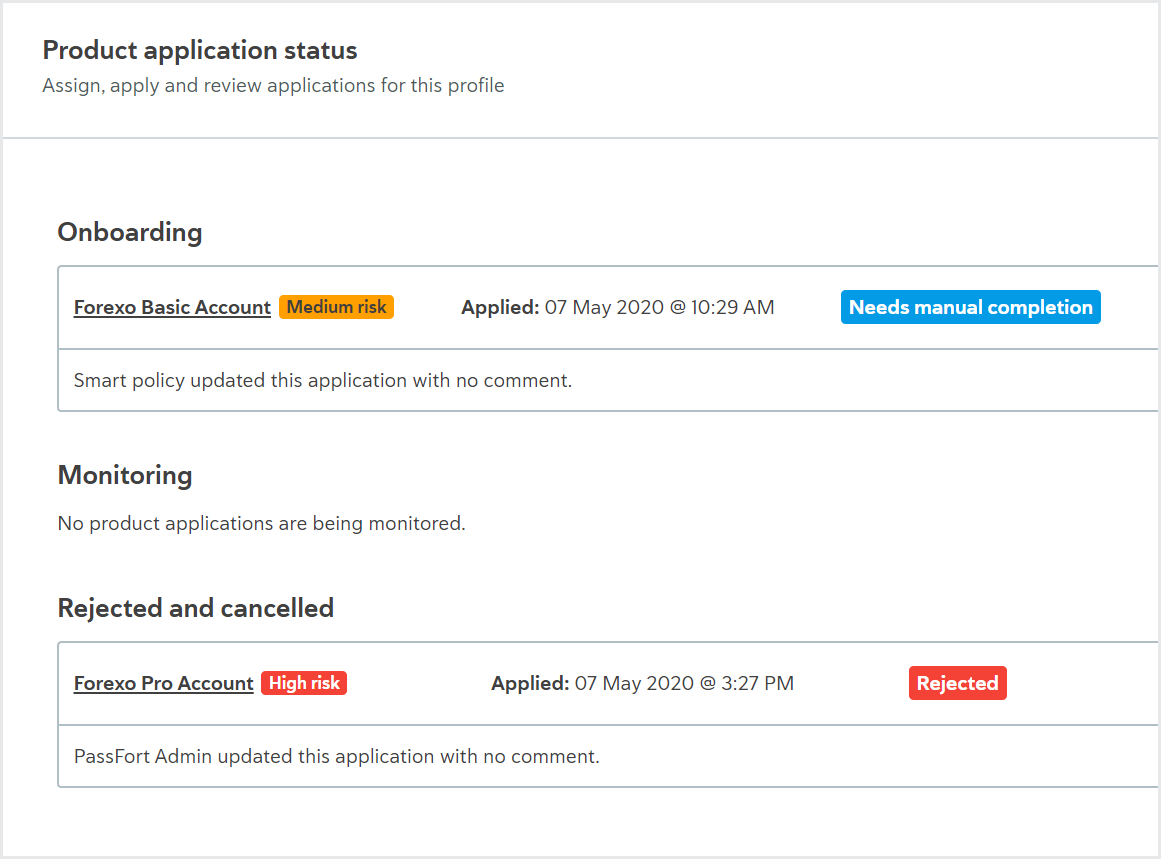
The Application overview shows all product applications that the profile has made.
Learn more about the product application life cycle by watching the video.

Applications can be in any of these stages:
Onboarding: This stage begins as soon as the product application is created and continues until the applicant is either approved to use the product or their application is rejected. During this stage, the applicant is undergoing due diligence. A series of due diligence tasks are created, for example, to verify the applicant's identity or bank account, which will need to be passed for the application to be approved.
Monitoring: The monitoring stage starts when the applicant is approved to use the product and becomes a customer. During this time, the customer is monitored to see if they no longer meet the requirements of any of the due diligence tasks or if the risk level of the product application changes, which may mean additional due diligence tasks need to be completed.
Rejected or canceled: A rejected or canceled product application means the applicant or customer is not authorized to use the product. If the application was in the onboarding stage, it is rejected. If the application was in the monitoring phase, it is canceled. Either decision can be reverted.
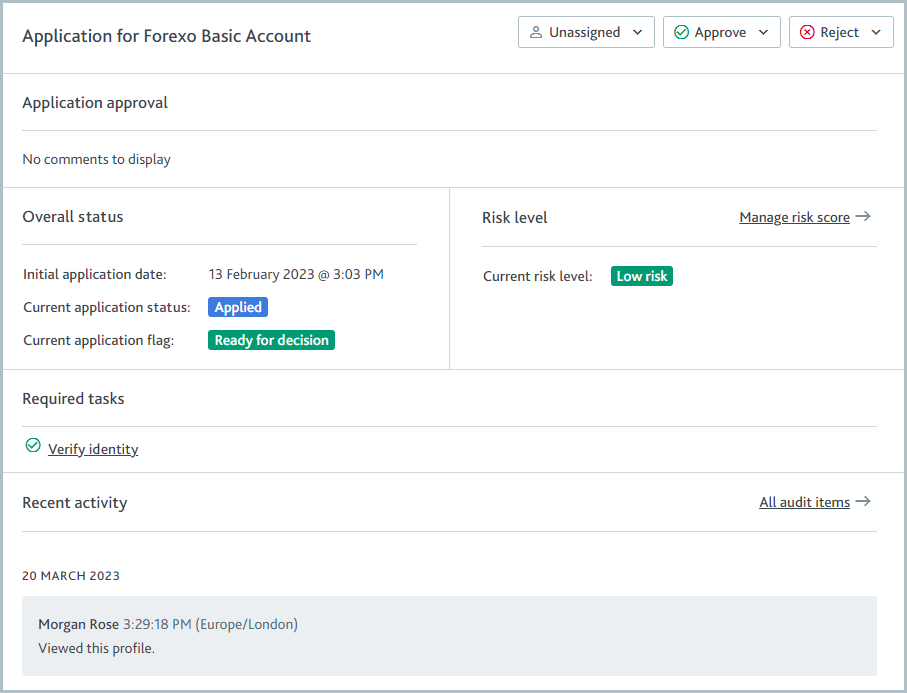
If your company is using Risk, the risk level indicates what kind of risk the product application poses to your company: Low risk, Medium risk, or High risk. Typically, a higher risk level means that the profile will need to pass more due diligence tasks for their application to be approved.
If the risk level is Undetermined, more information is required before the risk can be calculated. To see which information is missing, go to the application and select .
To help you understand what's going on with the product application, you'll also see the application's status or flag, for example, Needs manual completion, Rejected, or Automating. Learn more about what each application status and flag means.
Choose the product application you want to work on and select the application name.

The Required tasks show what due diligence is required for the product application.
When the task has passed, it has this icon:

When the task has failed, it has this icon:

When the task is incomplete, it has this icon:

All tasks must be passed for the application to be approved.
You can reject tasks at any time to indicate the applicant hasn't met the due diligence criteria, and reject their application.
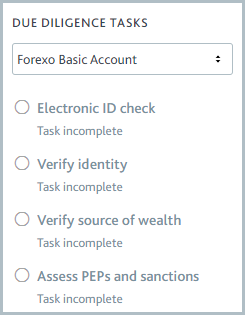
Navigate between tasks from the application page or using the navigation panel.

If the profile has more than one product application, the left navigation shows tasks for all open applications by default. You can use the drop-down menu to see tasks for a specific application.
The Recent activity section on the application page shows what action happened on the product application, like if a task was completed or a team member left a note on a task.
If you want to see the audit log of everything that happened on the profile, visit the from the left navigation.
Why couldn't the application be approved/rejected automatically? The application's processing state indicates what needs to happen for it to progress to the next stage. For example, Requires risk score indicates more profile data is required to calculate the risk score.
Why are some tasks completed already? This can be because someone else completed the task manually or because the task was completed automatically according to the product's smart policy. Check the recent activity to see when and why tasks were completed.
A task was completed but is now incomplete. What happened? Tasks can become incomplete for any of these reasons:
A new PEPs, sanctions, or adverse media match was found.
A user marked a task as incomplete manually.
The task expired.
A company associate's application is in review.
Why was a new task added to the application? Further due diligence can be required for many reasons. For example, new profile data may have been added or changed, or the risk level may have changed. The product's smart policy determines when tasks are added.
Complete any open tasks
When you go to a task, there are three things that will help you understand what's happened so far:
The Task status shows whether the task has been passed, failed, or is still incomplete.
After this, you can see whether any checks were run and the results. Note that for some tasks, you may see a form instead of check results.
Task notes, at the end of the task, are where you and members of your team can leave comments and add files.
The actions you take on a task depend on the nature of the task and your company’s compliance policy.
You might:
Review information obtained from checks or run more checks.
Complete a task form.
Upload files, for example, a PEP declaration form, to the Task notes.
Record conversations or actions that took place outside of Passfort by adding a note to the Task notes.
To complete the task, choose and select or .
To mark a passed or failed task as incomplete, select or .
When you follow these steps, you can leave a note explaining your decision.
Learn which task types you might see.
Tip
Want to work faster? Select to mark the task as passed and jump to the next incomplete task. If all tasks are complete, the Applications section of the profile is displayed so you can approve the product application.
Approve or reject the product application
If you think the applicant should have access to your product, approve the product application.
If you think the applicant should not have access, reject the product application.
To approve or reject a product application, select the application name from the navigation options, then select . Get the full steps to Approve a product application.
Note
You can only approve an application when all tasks are passed.
Why was the application approved or rejected automatically?
An application may be approved or rejected automatically according to the product's smart policy. For example, your smart policy may be configured to approve the product application automatically as soon as all tasks have passed. Check the application's recent activity to see when and why it was approved or rejected.
Not ready to approve or reject the application?
If the product application needs another pair of eyes, you can assign it to a colleague or a team. To do so, select the application name from the navigation options and select the button that says or . The colleague or team members will receive a notification to let them know the application's with them.