Manage IP addresses and allow listing in Passfort
When you enable allow listing, only requests from an IP address on your authorized list can sign into your account's portal and make calls to your API.
Add an IP address
To add an IP address:
Sign in to the portal and go to > .

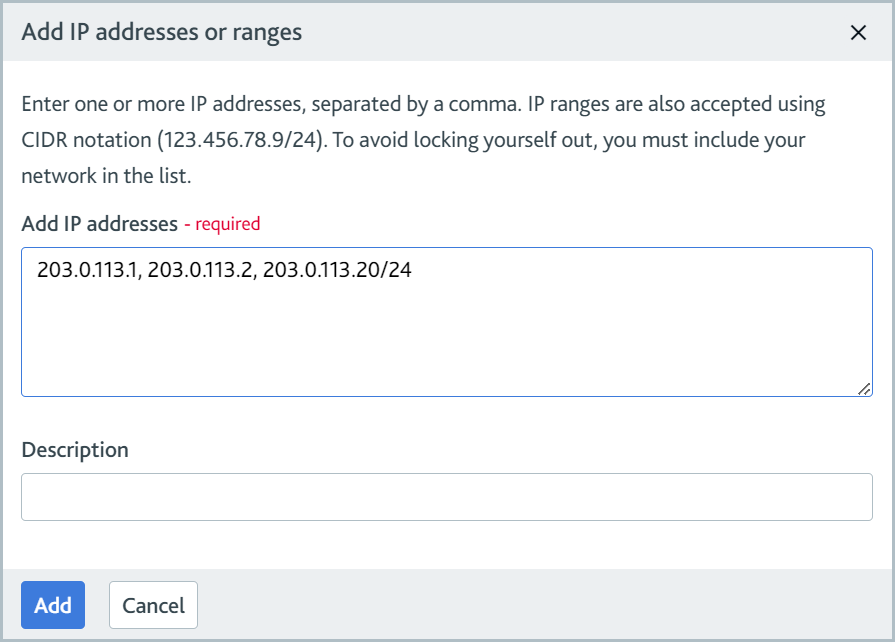
Select . The Add IP addresses or ranges dialog is displayed.

In the Add IP addresses field, type the addresses and/or ranges to add to your allow list. Separate multiple addresses and ranges with a comma.
Optionally, use the Description field to give the IP addresses and ranges a description. If you choose not to add a description, the description next to the address will be blank.
Select . The addresses and ranges are added.

Tip
Passfort supports classless inter-domain routing (CIDR) notation.
Edit an IP address description
To edit an IP address description:
Sign in to the portal and go to > .
Select the Edit
 icon next to the address or range description you want to edit.
The Edit IP address dialog is displayed.

Modify the description.
Select . The new description is displayed for the IP address or range.
Remove an IP address
To remove an IP address:
Sign in to the portal and go to > .

Select the
 icon next to the IP address or range you want to remove.
A confirmation dialog is displayed.

Select . The IP address or range is removed.
Enable allow listing
To enable allow listing:
Sign in to the portal and go to > .
When allow listing is disabled, a notification is displayed on the page.

Ensure you've added your own IP address to the allow list. Otherwise, when you enable allow listing, you'll no longer have access to your Passfort account.
If you're using SSO, ensure you don't have Okta's allow listing feature enabled. Otherwise, both the Okta allow list and the Passfort allow list will apply for SSO logins, and unexpected behavior may occur.
Select . A confirmation dialog is displayed.

Select . Only requests from an IP address on your authorized list can sign into your account's portal and make calls to your API.
Once you've enabled allow listing, any user signing in from an unauthorized IP address will see these errors:
Portal: You can't sign in from this IP address. Contact your administrator. If you're unsure who the administrator is, contact the Client Service team.
API: 403 Forbidden. You can't access Passfort from this IP address.
If you are locked out of your account, contact us and we'll help you regain access.
Disable IP allow listing
To disable allow listing:
Sign in to the portal and go to > .

Select . A confirmation dialog is displayed.

Select . A notification is displayed on the page to say that allow listing is now disabled. Users from any IP address can sign into the portal or make requests to your API.