Work with check variants
Similar to data providers, each instance of a check is considered a new check variant.
The variant is the combination of the check type and configuration options, as well as the data provider variants used to run the check.
It is possible to add multiple check variants for the same check type.
To get a list of all the check types and which data providers you can use for each one, see About Passfort's checks.
Add a check variant
To add a new check variant:
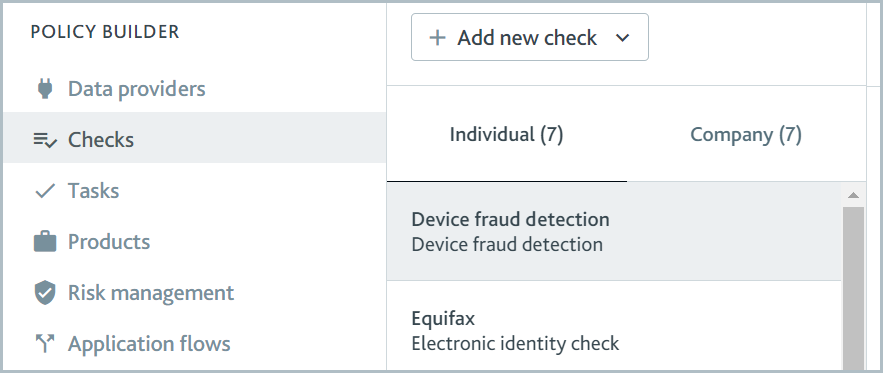
Log into the Passfort portal and go to > .

Select . A drop-down is displayed.
If the check will be run on individuals, select .
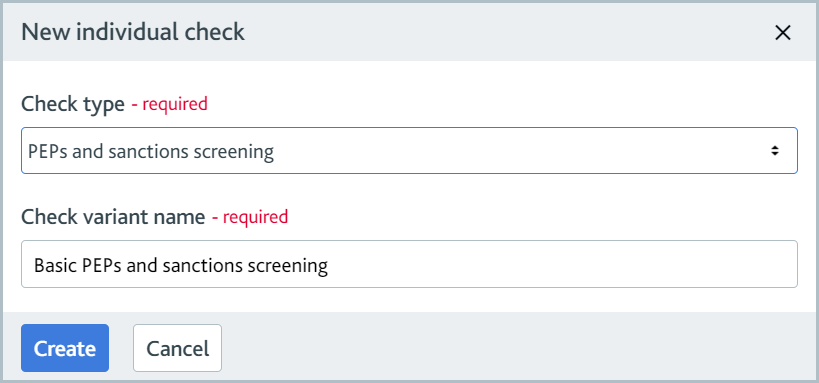
If the check will be run on companies, select . The New check dialog is displayed.

If the check will be run on individuals and companies, you should add two variants, one as an Individual check and one as a Company check.
For the Check type field, select the type of check.
For Check variant name, enter a name for this variant. Users will see this name in the portal.
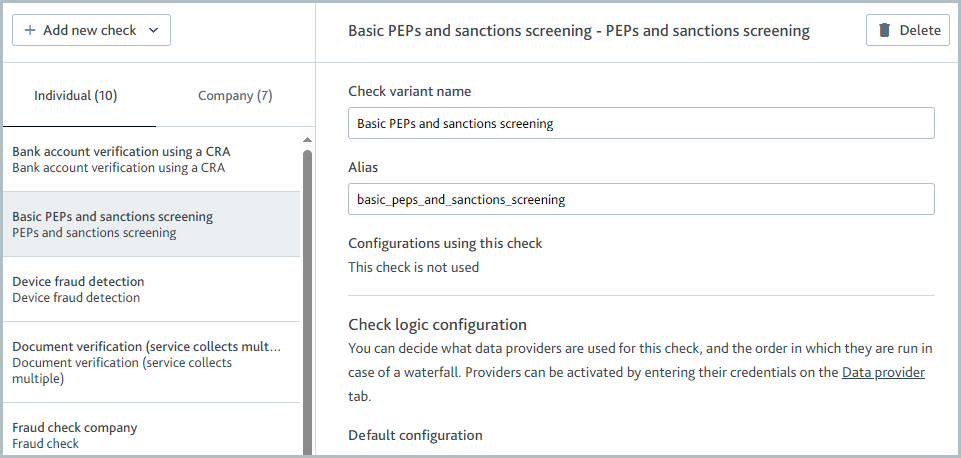
Select . The check variant is added to the checks list, and the variant details are displayed.

Optionally, for the Alias, write a name that will be used when making calls to the API. The name should not include any spaces, for example, "basic_peps_and_sanctions_screening." Learn more about aliases.
If you are adding a company check, select the option if you want to use the data providers configured here for the company search in the Add a new profile dialog.

This option is available for either a company data check or a company registry check.
In the Check logic configuration section, select . A drop-down is displayed with the name of every data provider variant that matches the check type.
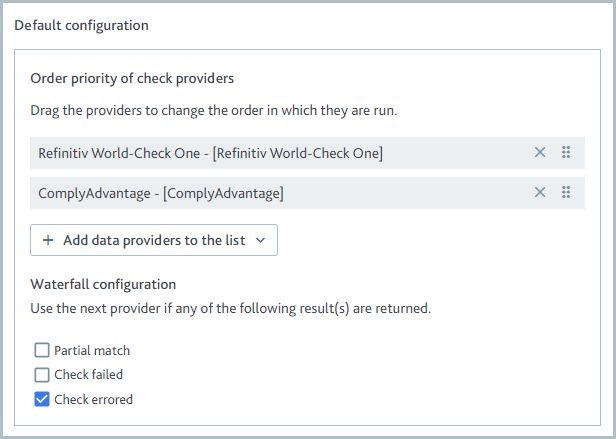
Select one or more data providers from the list. The data providers are displayed in the Order priority of check providers section.

If you add more than one data provider variant, the first variant in the list will be tried first when the check is run. If the check does not pass with the first variant, the next variant in the list is tried, and so on. This behavior is called waterfalling.
To change the waterfall order, select the Reorder
 icon next to the provider and drag the provider into the new position.
If the expected check outcome is more complex than Pass/Fail, as in the case of a PEPs and sanctions screening, an additional section is displayed called Waterfall configuration. This section determines which result will cause the next data provider variant to be tried.
For example, in this case, Refinitiv World-Check One will be tried first. If the check errors, ComplyAdvantage will be tried. If Refinitiv World-Check One returns any other match, including a full match, a partial match, or a failed match, the waterfall will stop, and ComplyAdvantage will not be tried.
To use specific data providers based on the profile's country:
In the Country-based configuration section, select .
If the check is for individuals, for Country of residence, enter the name of a country.
If the check is for companies, for Country of incorporation, enter the name of a country.
Select and select one or more data provider variants that match the check type. For more information about selecting data provider variants and configuring the waterfall, see step 10. To add specific data providers for another country, follow these steps again.
To remove an entire country configuration, select .
Edit a check variant
To edit an existing check variant:
Log into the Passfort portal and go to > .

By default, the check variants for individuals are displayed. To see the variants for companies, select .
Select the name of the check variant. The variant details are displayed.

Edit the details. Your changes are saved automatically to the latest version of your draft policy.
Delete a check variant
To delete an existing check variant:
Log into the Passfort portal and go to > .

By default, the check variants for individuals are displayed. To see the variants for companies, select .
Select the name of the check variant. The variant details are displayed.
Select . A confirmation message is displayed.

Select . The check variant is removed from the current version of your draft policy and is no longer displayed in the checks list.