Testing the default smart policy
When you get a PassFort demo environment, we'll add a default smart policy to it.
You can use the default smart policy to start testing immediately, try out different policy behaviors, and get an idea of what changes we can make so your smart policy fits with your compliance procedures.
We've prepared test scenarios for the default smart policy. This guide will show you how to run them.
If you have any questions or concerns, contact your Customer Success Manager or email us - we'll be happy to help.
What are the API and the portal?
When you're testing smart policies, there are two interfaces you can use:
PassFort's application programming interface (API)
The portal
The API provides a way to send instructions directly to our software. For example, you could use the API to tell PassFort to create a profile, run a check, or approve an application.
The portal, which you might be more familiar with, is a visual counterpart to the API. You can use the portal to perform the same actions (e.g. create a profile, run a check, or approve an application).
The Portal and the API both get their source of truth from PassFort's software, so you'll see exactly the same data, whether you get it from the portal or the API.
For example, if you create a profile via the API, you'll be able to see it when you log into the portal.
Equally, you could run a check on that profile via the portal and get the check results via the API.
Tip
New to APIs? If you've never used an API before, don't worry. Running these tests is as easy as clicking a button and going to a web page to view the results. If you have any questions, we'll be on hand to help.
How to use the portal
You can log into the portal at https://identity.passfort.com/login.
It's important to log in with the same account you'll use for the API. You should use your demo environment credentials.
How to use the API
To use the API, you'll need a tool called Postman. This is the tool to send the instructions (a.k.a. requests) to the API as well as see the API's responses.
The first step is to download Postman and import PassFort's test scenarios.
Get Postman and set it up
Download the app and install it
Avoid downloading the Postman web version. Our tests can only be run on the Postman app. Most Windows users have the 64-bit version.
Opening the app for the first time
When you open it for the first time, you'll be asked to create an account.
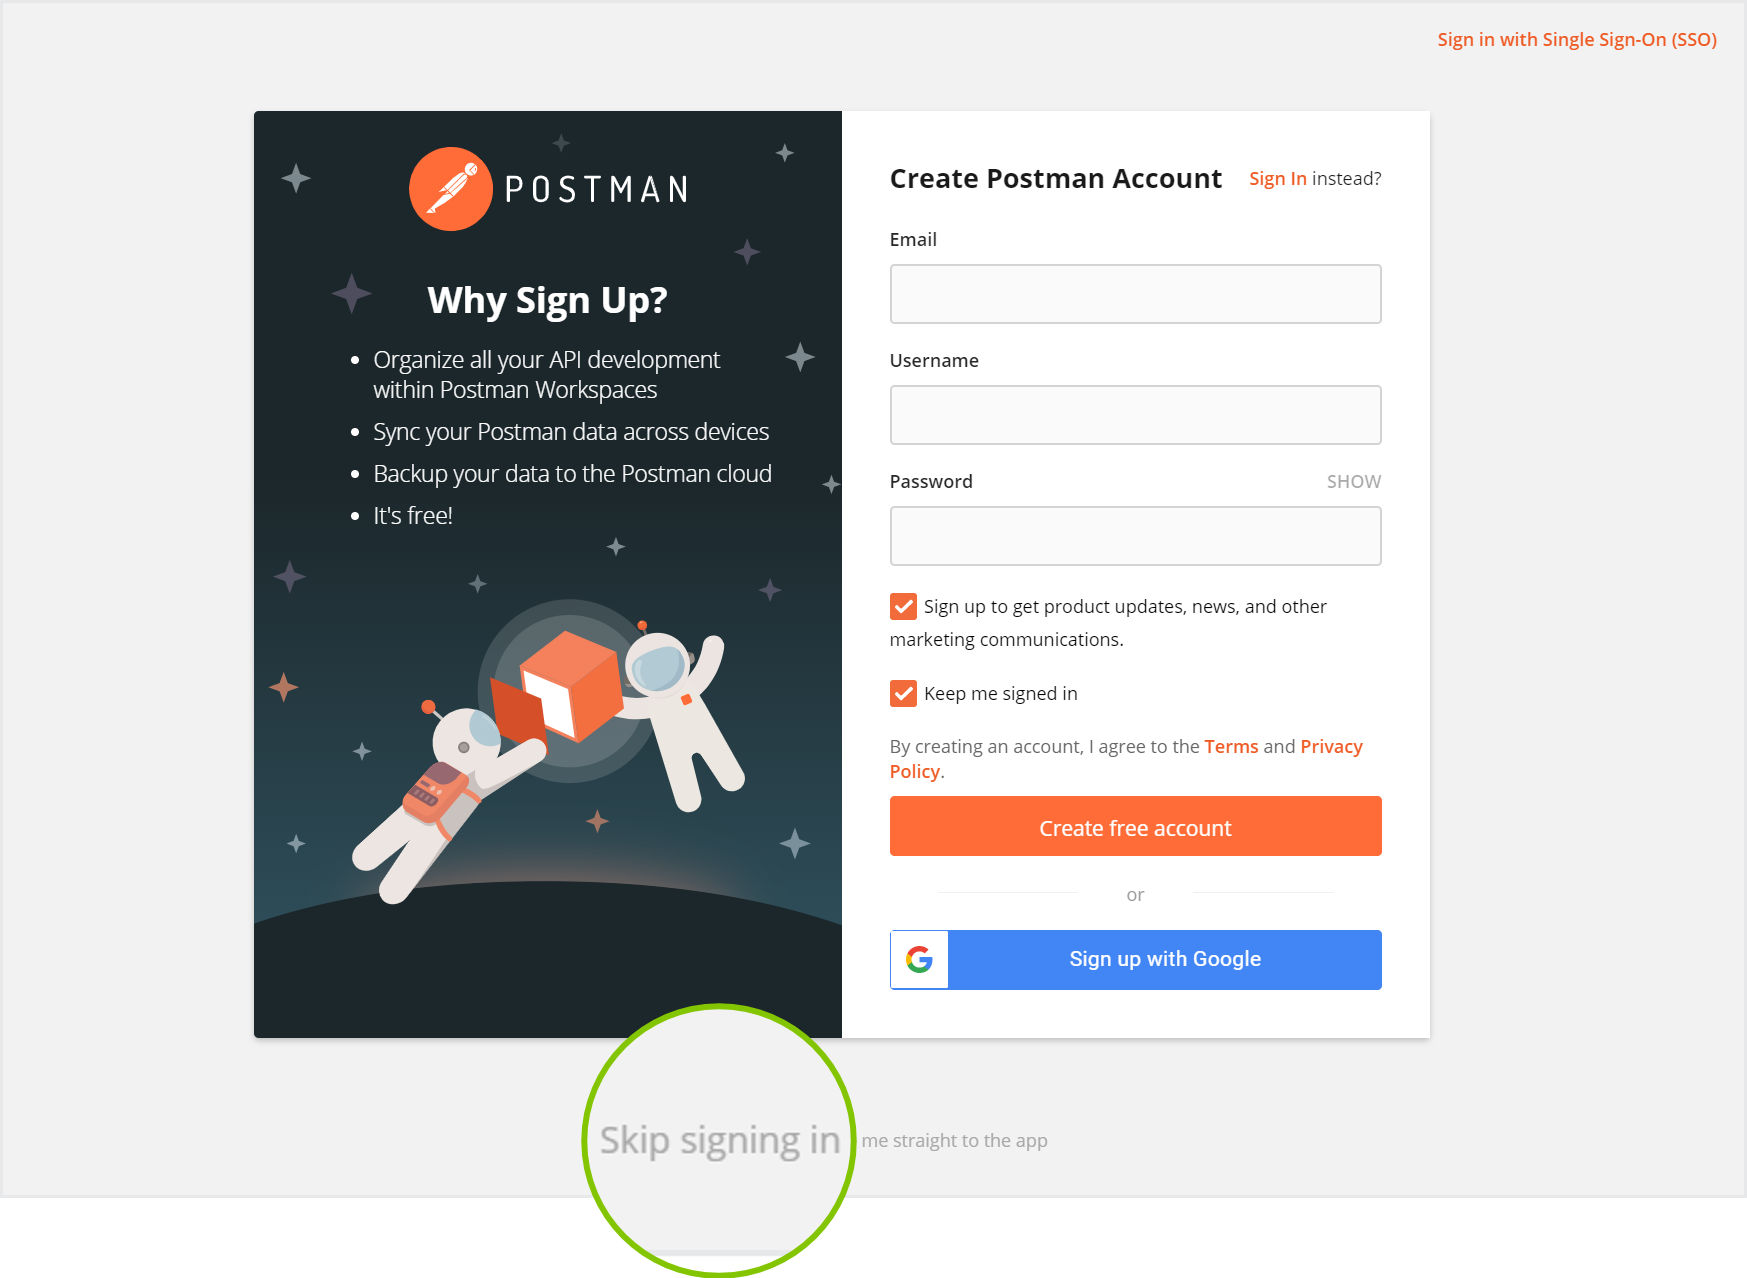
If you don't want to create one, click Skip signing in and take me straight to the app.
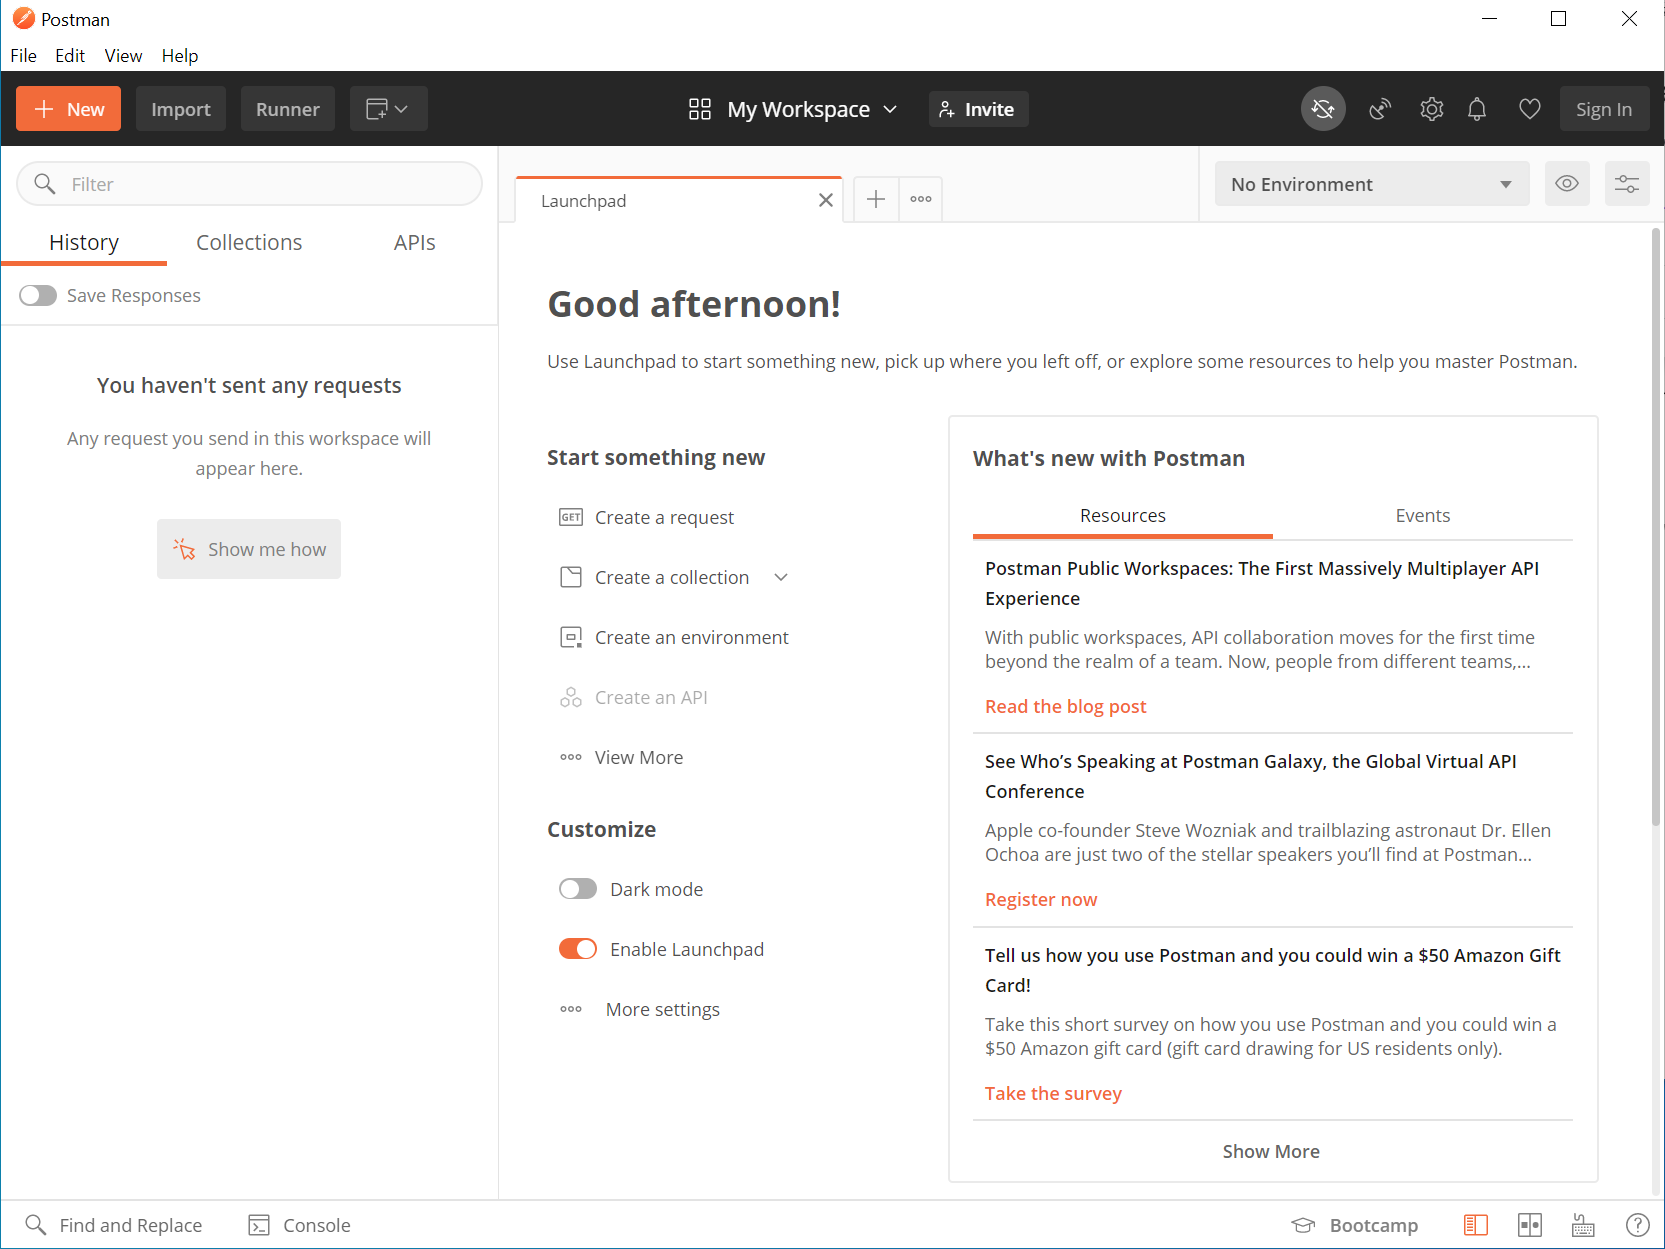
Once you're past the sign in page, you'll see your workspace. This is where we'll be running our tests.
Import PassFort's test scenarios
We've pre-made test scenarios for you to use. Postman calls this group of files a collection. You'll need to import the collection to use it.
To import the collection for PassFort's test scenarios:
Click Import. The Import dialog is displayed.
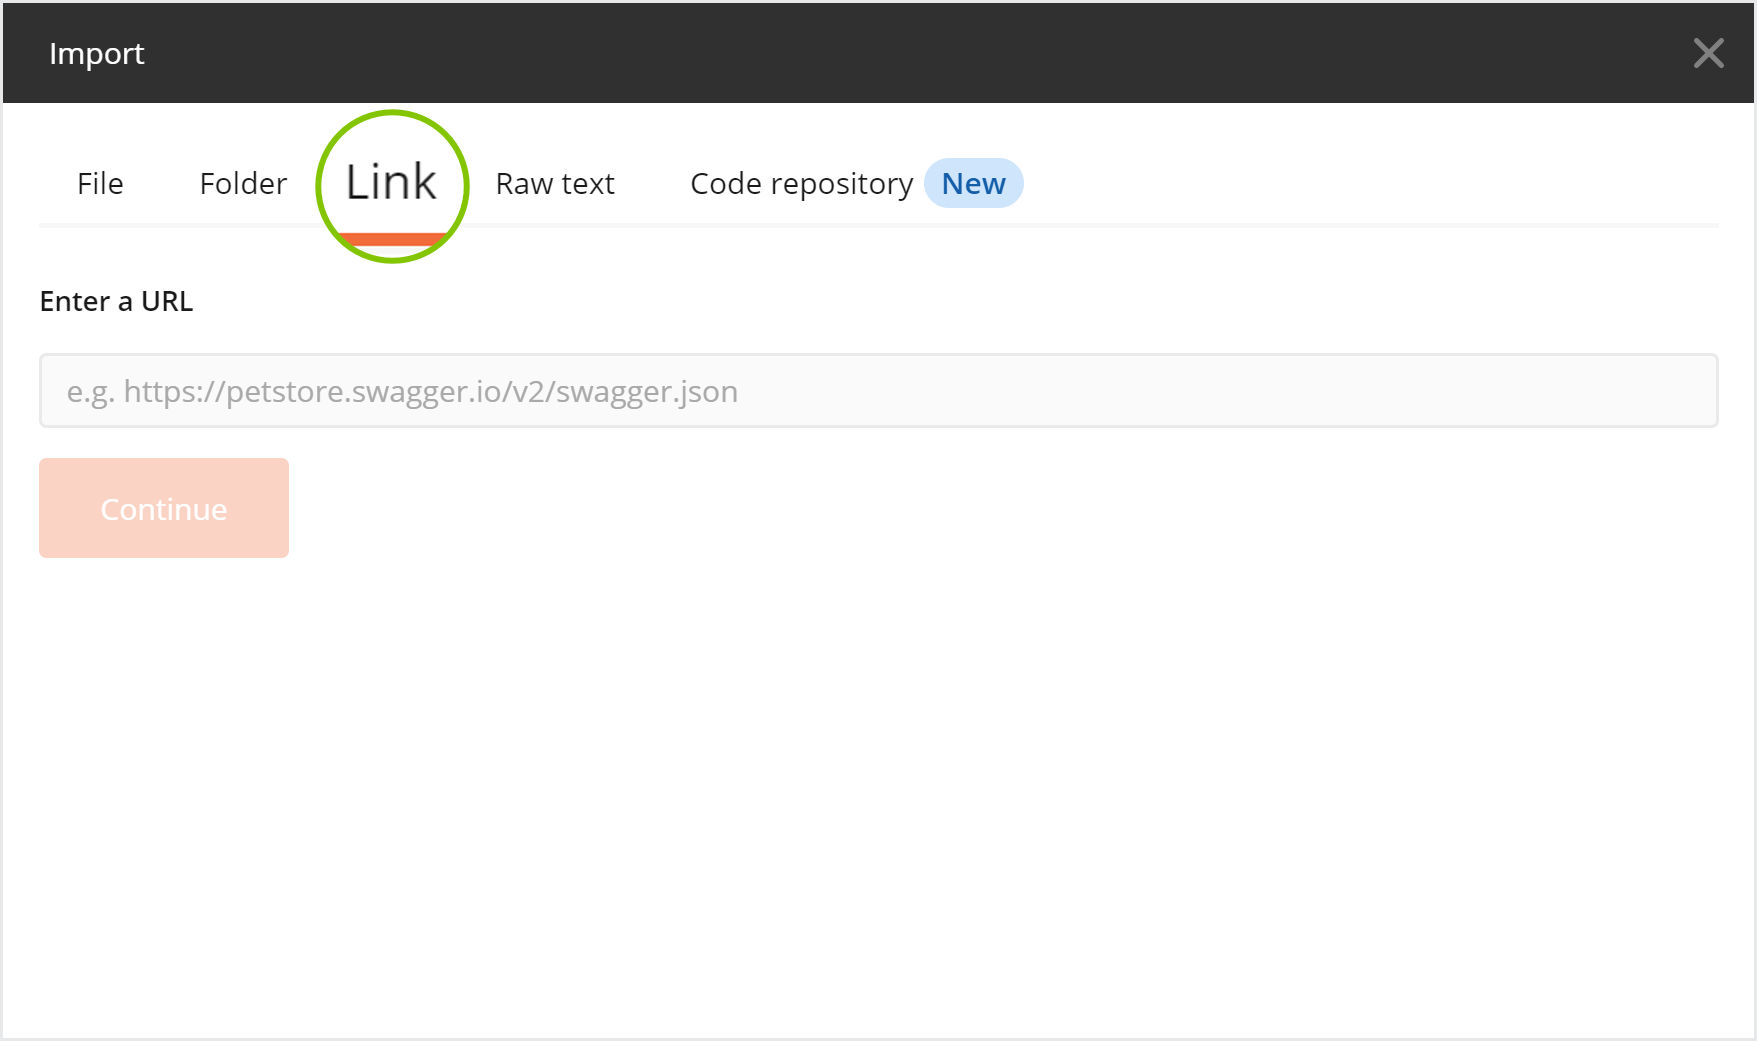
Click Link.
In the space provided, paste the following URL: https://www.getpostman.com/collections/a661ac5bc570ad3a0a38
Click Continue.
Click Import. The collection is imported.
To see the imported collection, click Collections. The collection is named PassFort Test Scenarios.
Get your API key
The API key is used to make your requests secure. It lets PassFort know that the request is coming from you - and not a malicious third party.
Follow these steps to get the API key for your demo environment.
When you follow the step to log into the Portal, remember to use your demo environment credentials. This ensures you get the API key for your demo environment.
Add the API key to the collection
Now that you have the API key, you can add it to Postman.
Note that if you don't add the API key to Postman and you try to send a request to the API, you will receive an error that says Invalid API key. It's the same error a malicious third party would see if they tried to send requests to your account.
To add the key:
Click Collections.

Hover your cursor over the PassFort Test Scenarios collection. Additional options are displayed.
Click the View more actions
 option and select Edit.
The Edit collection dialog is displayed.
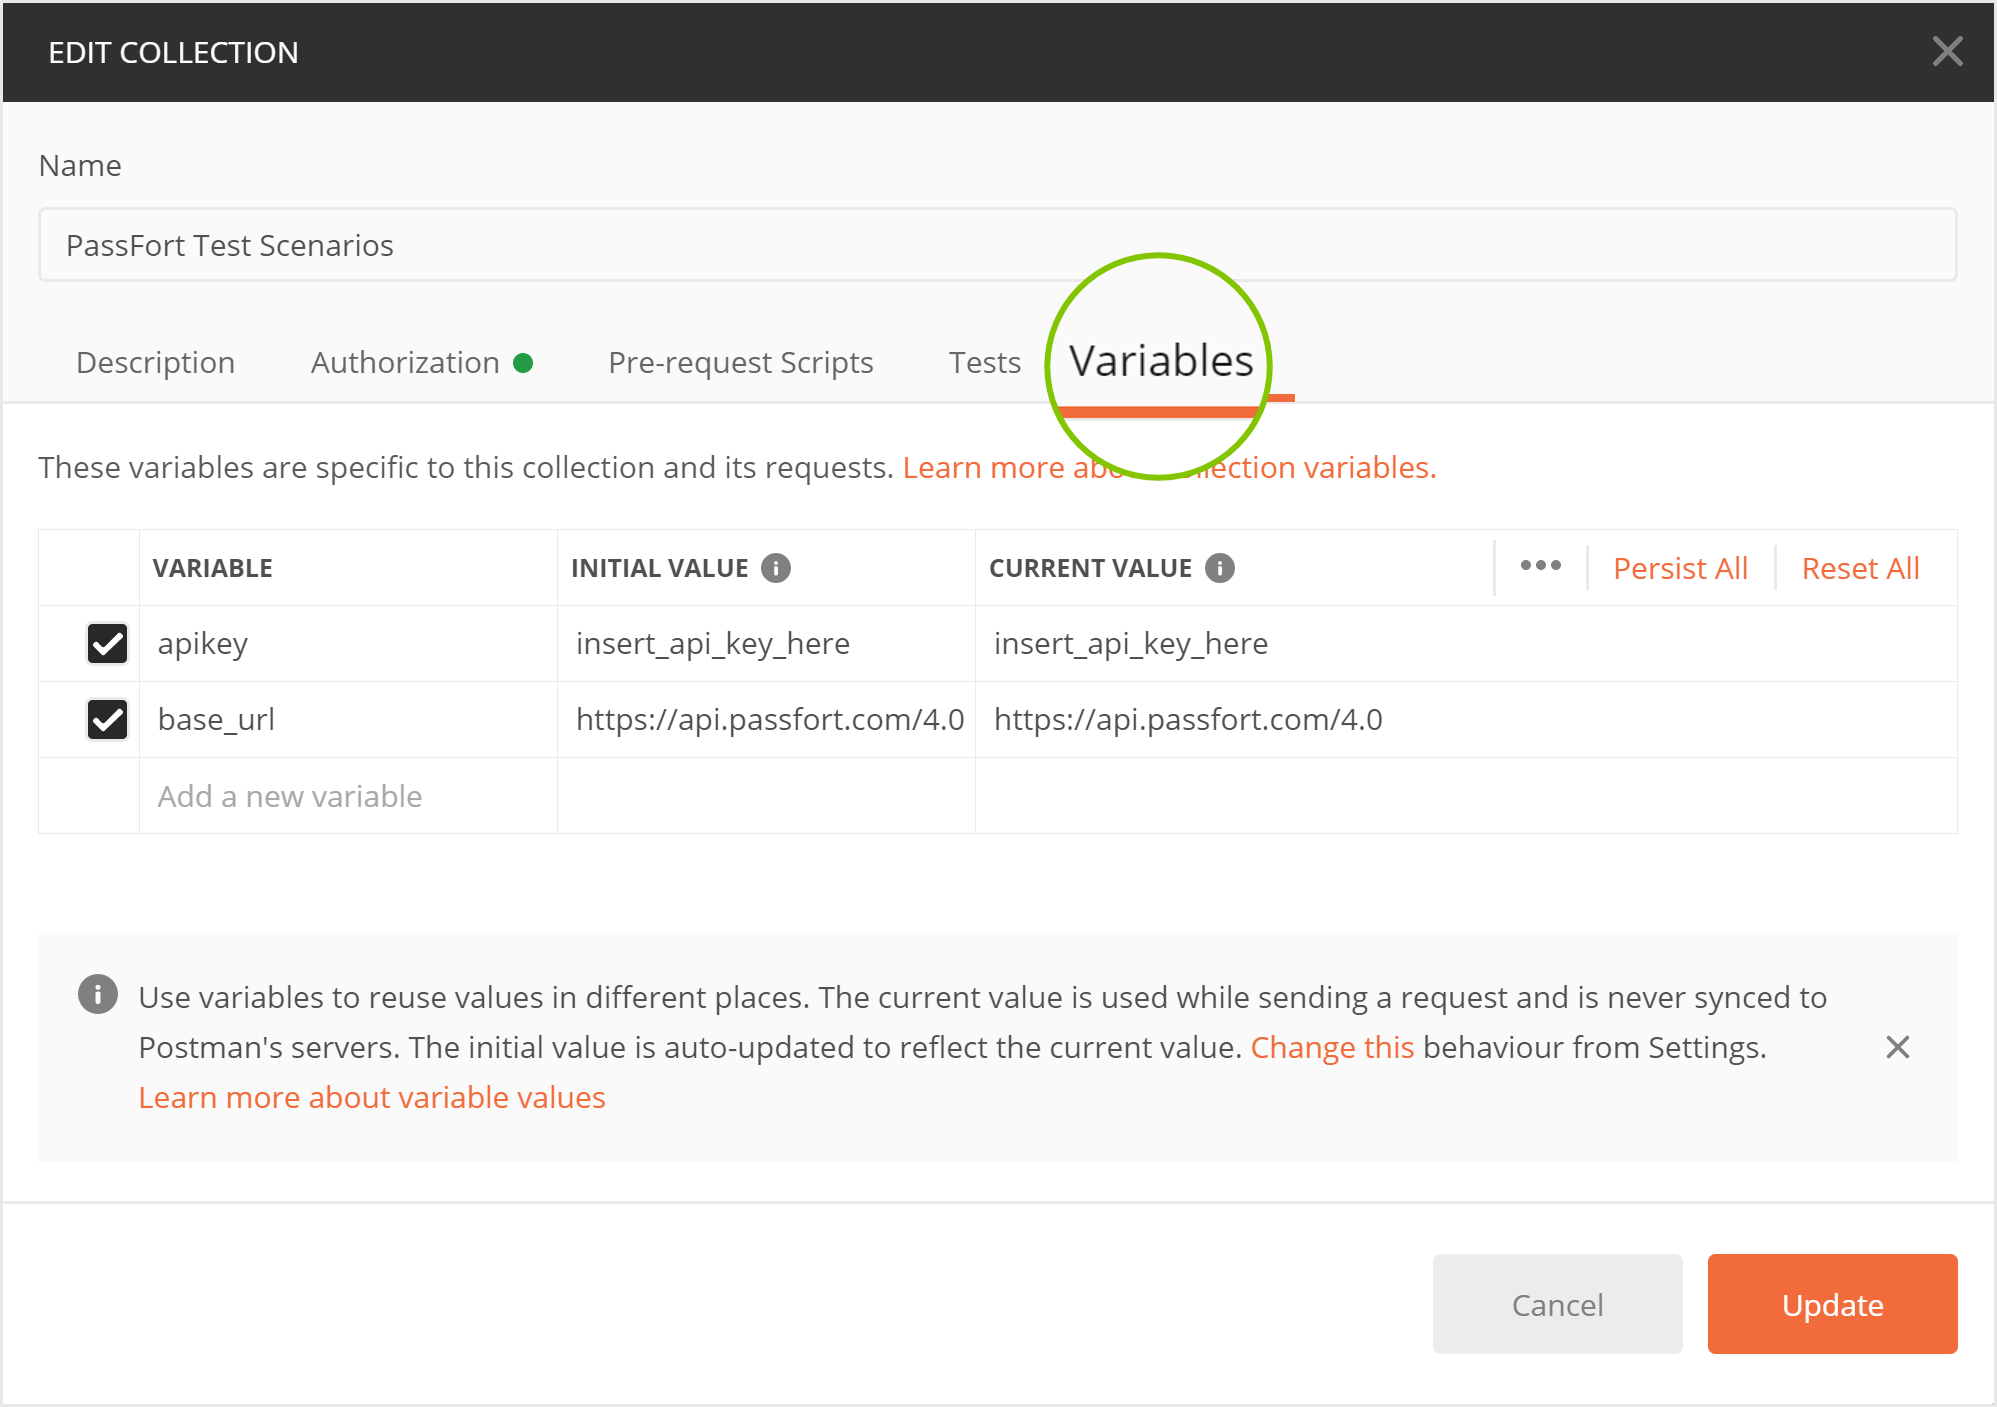
Click Variables.
Under Current value, replace
insert_api_key_herewith your API key.Click Update.
Test your setup
To make sure your setup is correct, run the following test. Its purpose is to confirm you can make calls to the API successfully.
To see the test, select PassFort Test Scenarios > Who am I. The call request is displayed on the right.
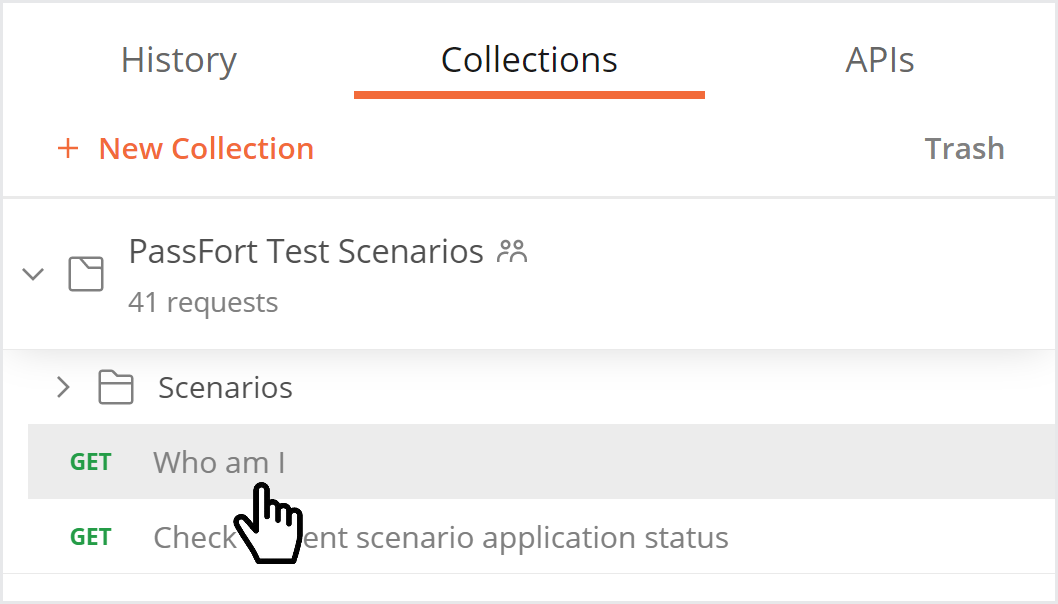
To send your request to the API, click Send.
When the API returns a response, it's displayed below the request.
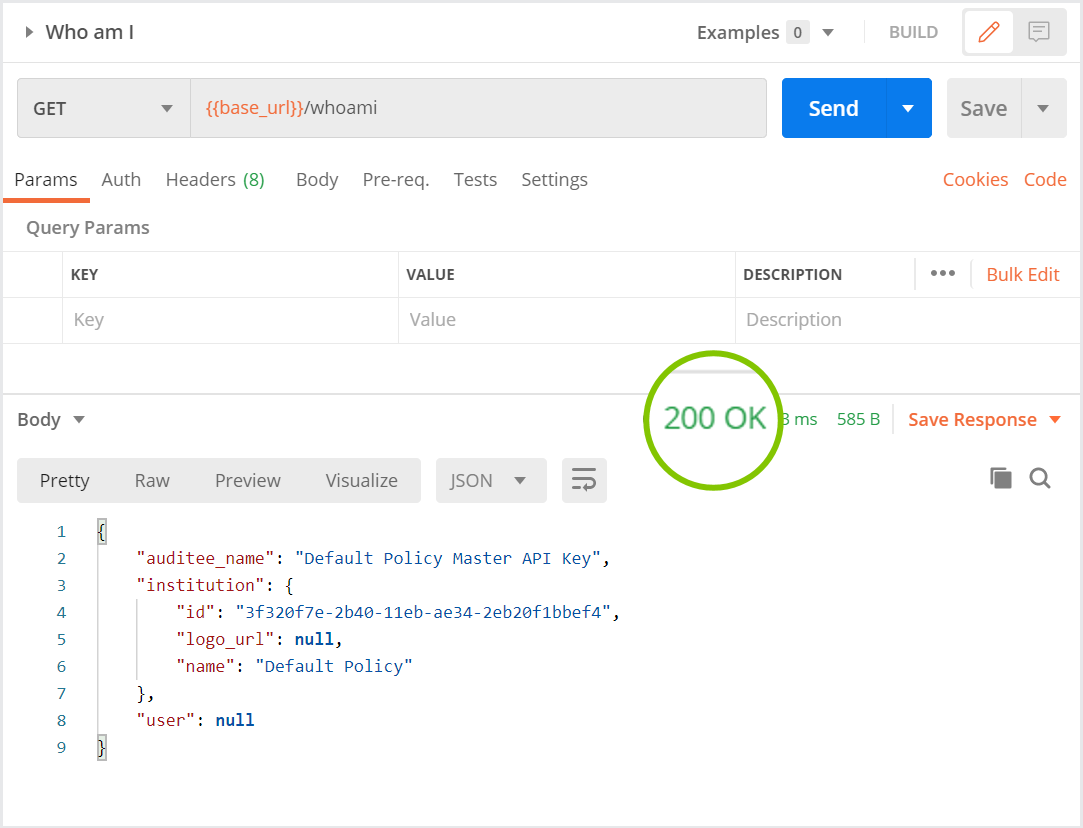
A successful response has:
200 OK displayed at the top of the response
A response Body that includes
auditee_name(with the name of your API key),institution(with technical details about your company), anduserset to null.
Any other response means the test was unsuccessful.
When you have a successful response to this test, you're ready to start testing your smart policy.
The most common unsuccessful message is one that says error and Invalid API Key. It means that the API key wasn't the right one for your account. If you see this message, follow the steps to add the API key to the collection again.
Testing your smart policy
Getting the tests
To see the smart policy tests:
Click Runner. The Collection Runner dialog is displayed. The PassFort Test Scenarios collection is displayed on the left.
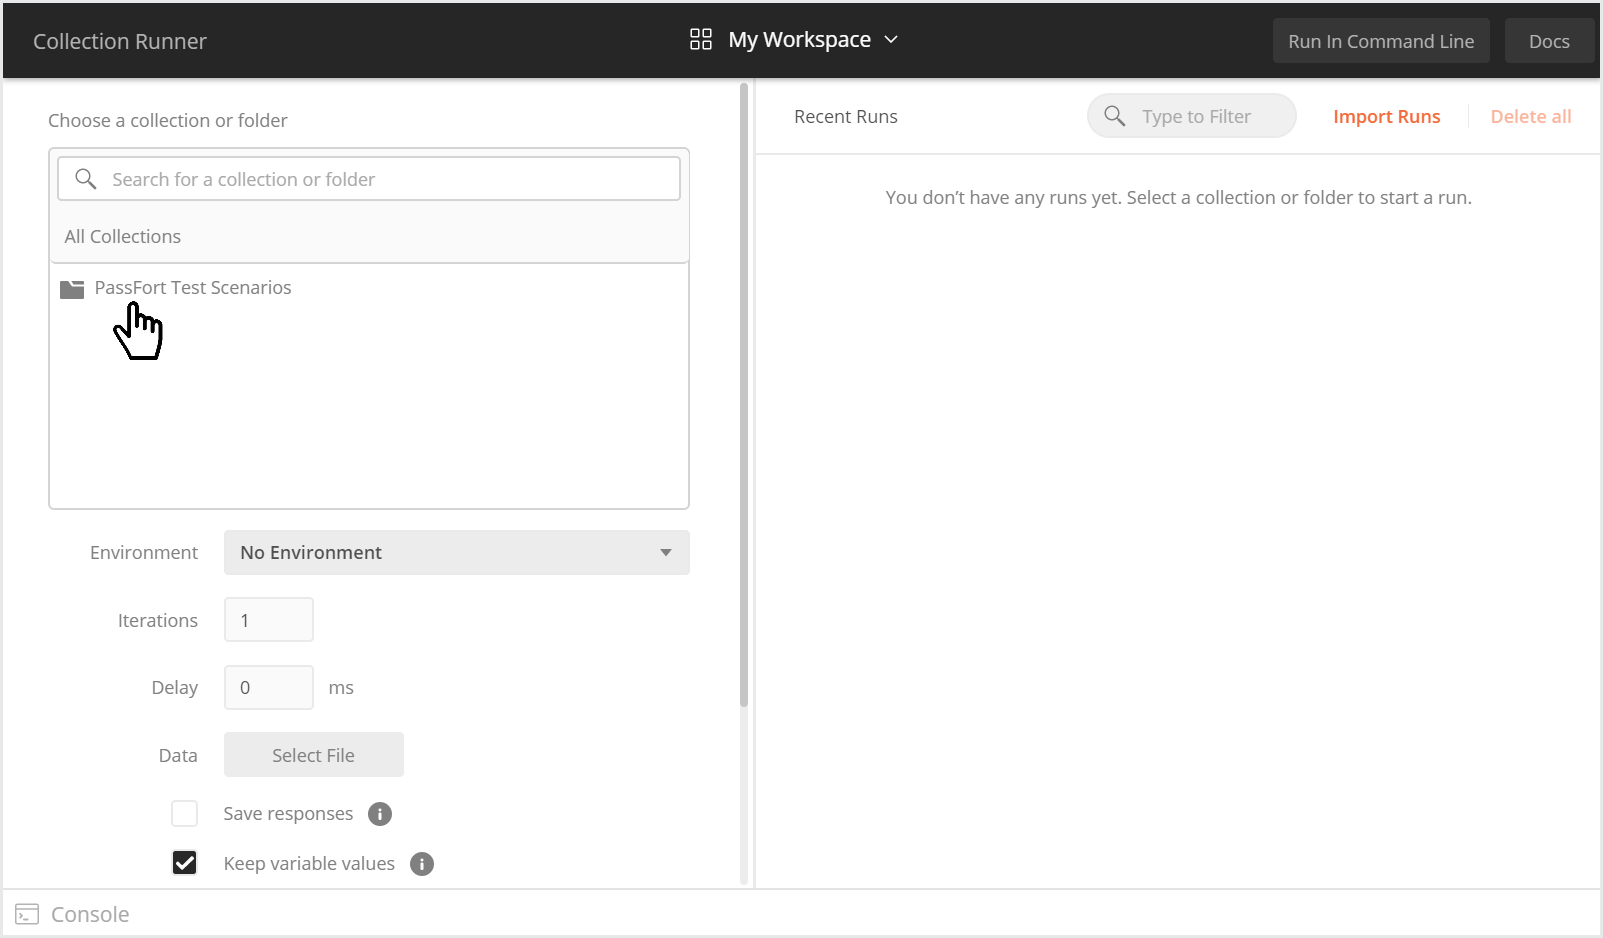
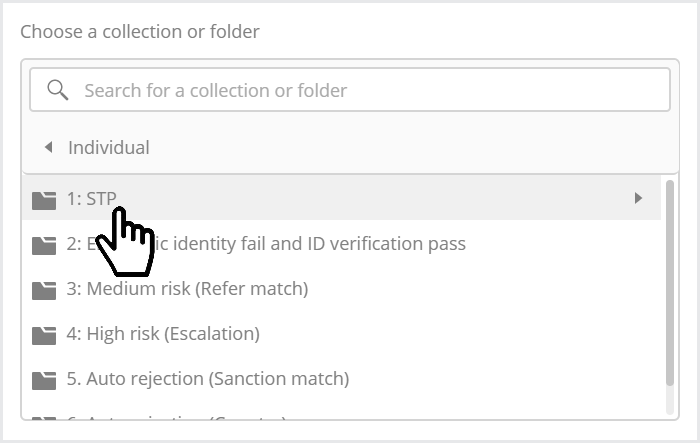
Click PassFort Test Scenarios > Scenarios.
Your smart policy has one flow for individuals applying to your product and/or one flow for companies applying to your product. This is why there's one set of tests for individuals and another for companies.
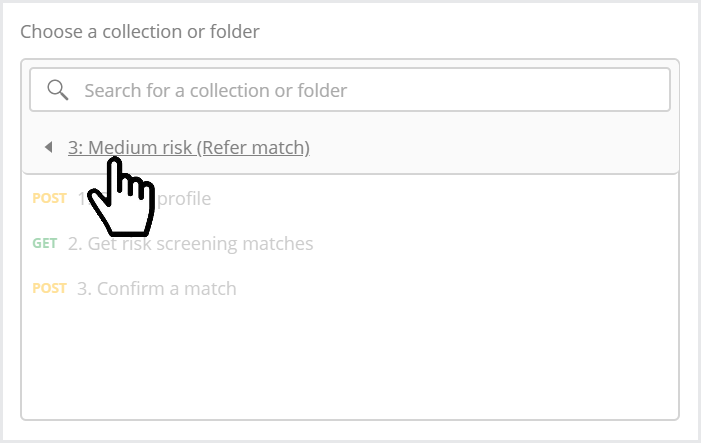
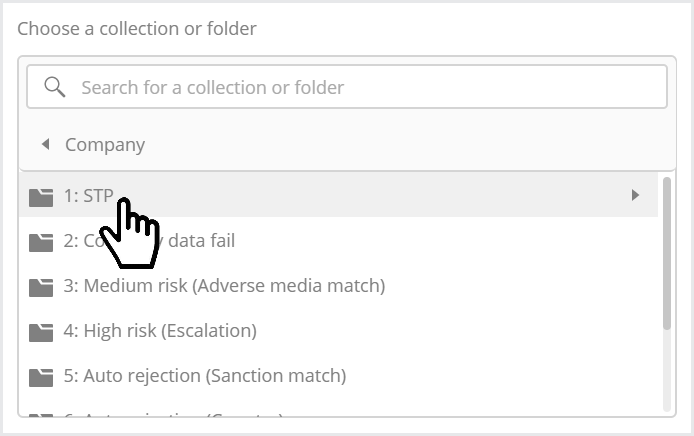
Click Individual or Company to see the relevant tests.
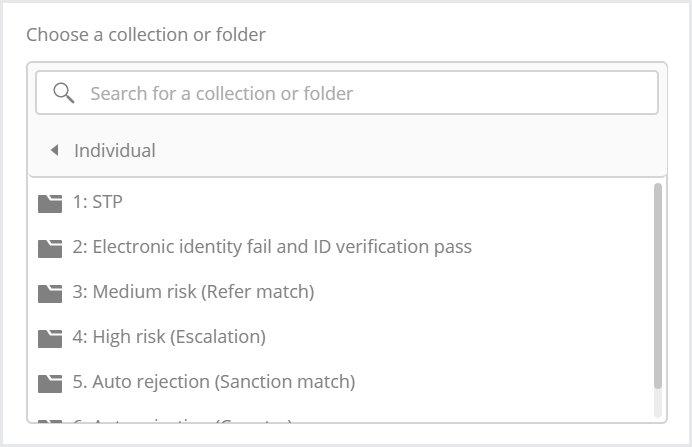
Click a test name to see it.
Running a test
Each test is made up of one or more calls to PassFort's API. When you view a test, you'll see its calls on the right, under Run order.
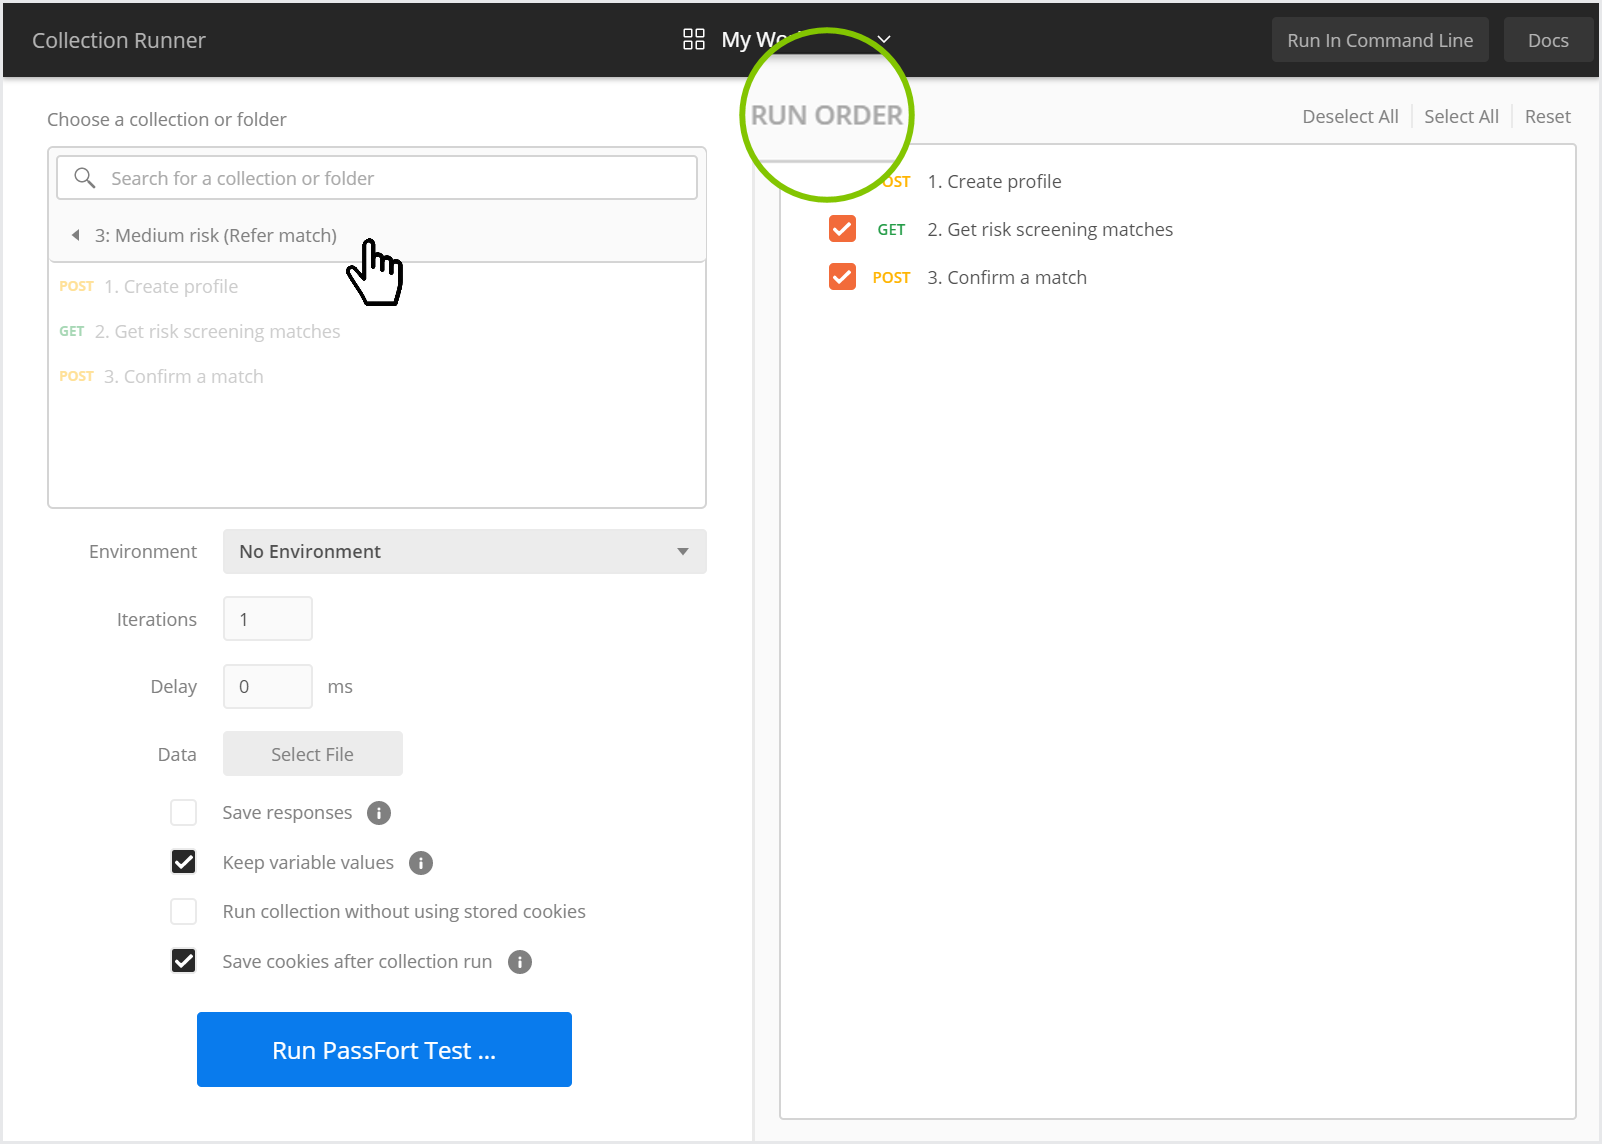
For example, the Individual > 3: Medium risk (Refer match) test has 3 calls:
Create profile
Get risk screening matches
Confirm a match
To run the test, simply click Run PassFort Test. The call requests are sent to the API in order.
If you can't see the Run PassFort Test button, scroll down the left panel.
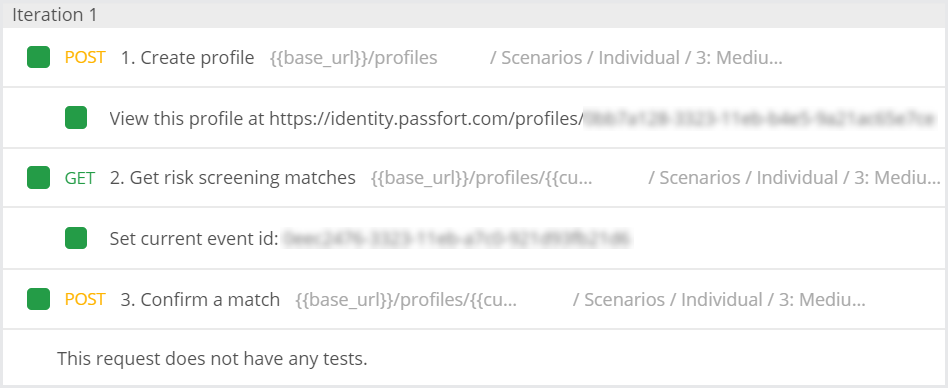
The results are displayed automatically. They show each call request that was made. A green box is displayed next to the call if the API was able to receive it without error.
If you see any failed calls, that's OK. The tests are created so they rerun any failed calls automatically and you'll still get accurate test results.
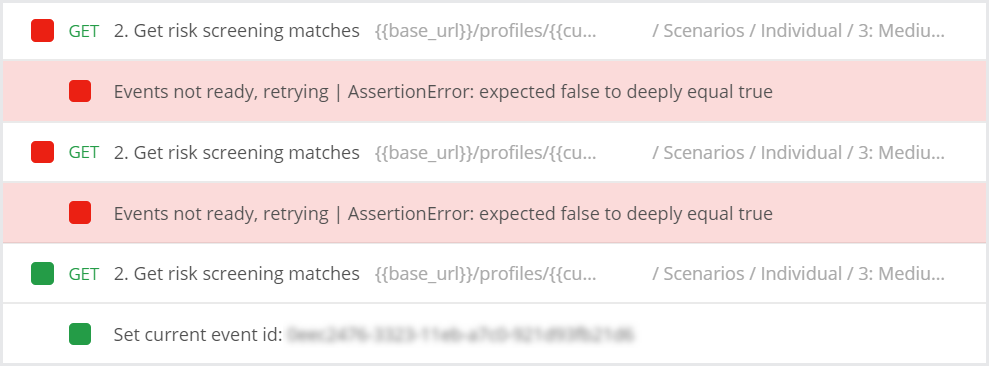
In the example above, the second call was run twice, each time with an error, then ran successfully.
The descriptions of the tests below will let you know exactly what information to look out for and how to see the test results.
To view test results in the portal, you'll need to be logged in.
Returning to the tests
If you're on the test results page and you want to return to the test, click Collection Runner.

To go back to all tests for individuals/companies, click the name of the current test.
Tests for individuals
STP
Tests whether an individual's application can be approved with straight-through processing (STP). An application is decided with STP when it does not have any manual intervention between the time it's created and the time it's approved.
To run the test:
Go to Individual > STP to view the test.
Click Run PassFort Test. The results are displayed.
Copy the URL under Create profile (e.g. https://identity.passfort.com/profiles/33bae6b8-5689-b96b-143c-06e93ab8527e).
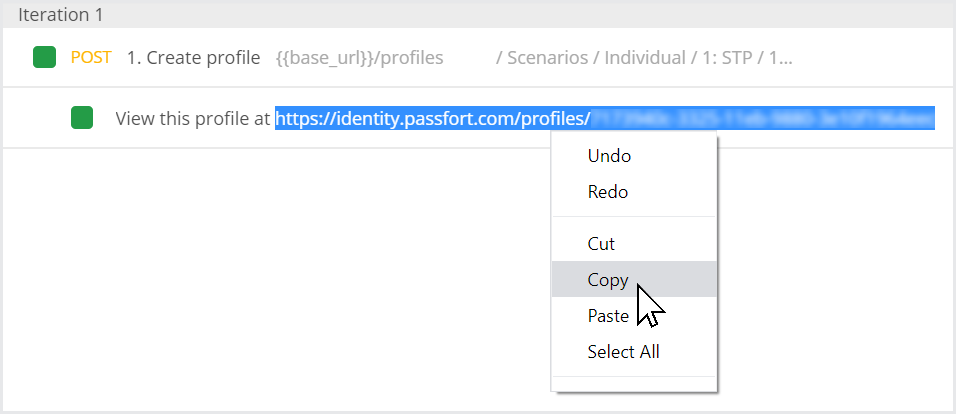
If you're having trouble highlighting the URL to copy it, start from https rather than the end of the URL.
Paste the URL into a browser. This shows you the profile via the Portal.

In the Portal, notice that the profile's application for Default Policy Product is Approved.

In the Postman app, return to the list of individual tests.
Electronic identity fail and ID verification pass
Tests whether, when an Electronic identity check fails, you can pass the Verify identity and Verify address tasks with an ID verification check. This is useful to ensure that an individual's application can still be processed when it's not possible to run an Electronic identity check.
To run the test:
Go to Individual > Electronic identity fail and ID verification pass.
Click Run PassFort Test. The results are displayed.
Copy the URL under Create profile and paste it into a browser. This shows you the profile from the portal.
In the portal, click the Verify identity and Verify address tasks in the left-hand navigation. Notice that the tasks have been passed based on the result from an ID verification check.
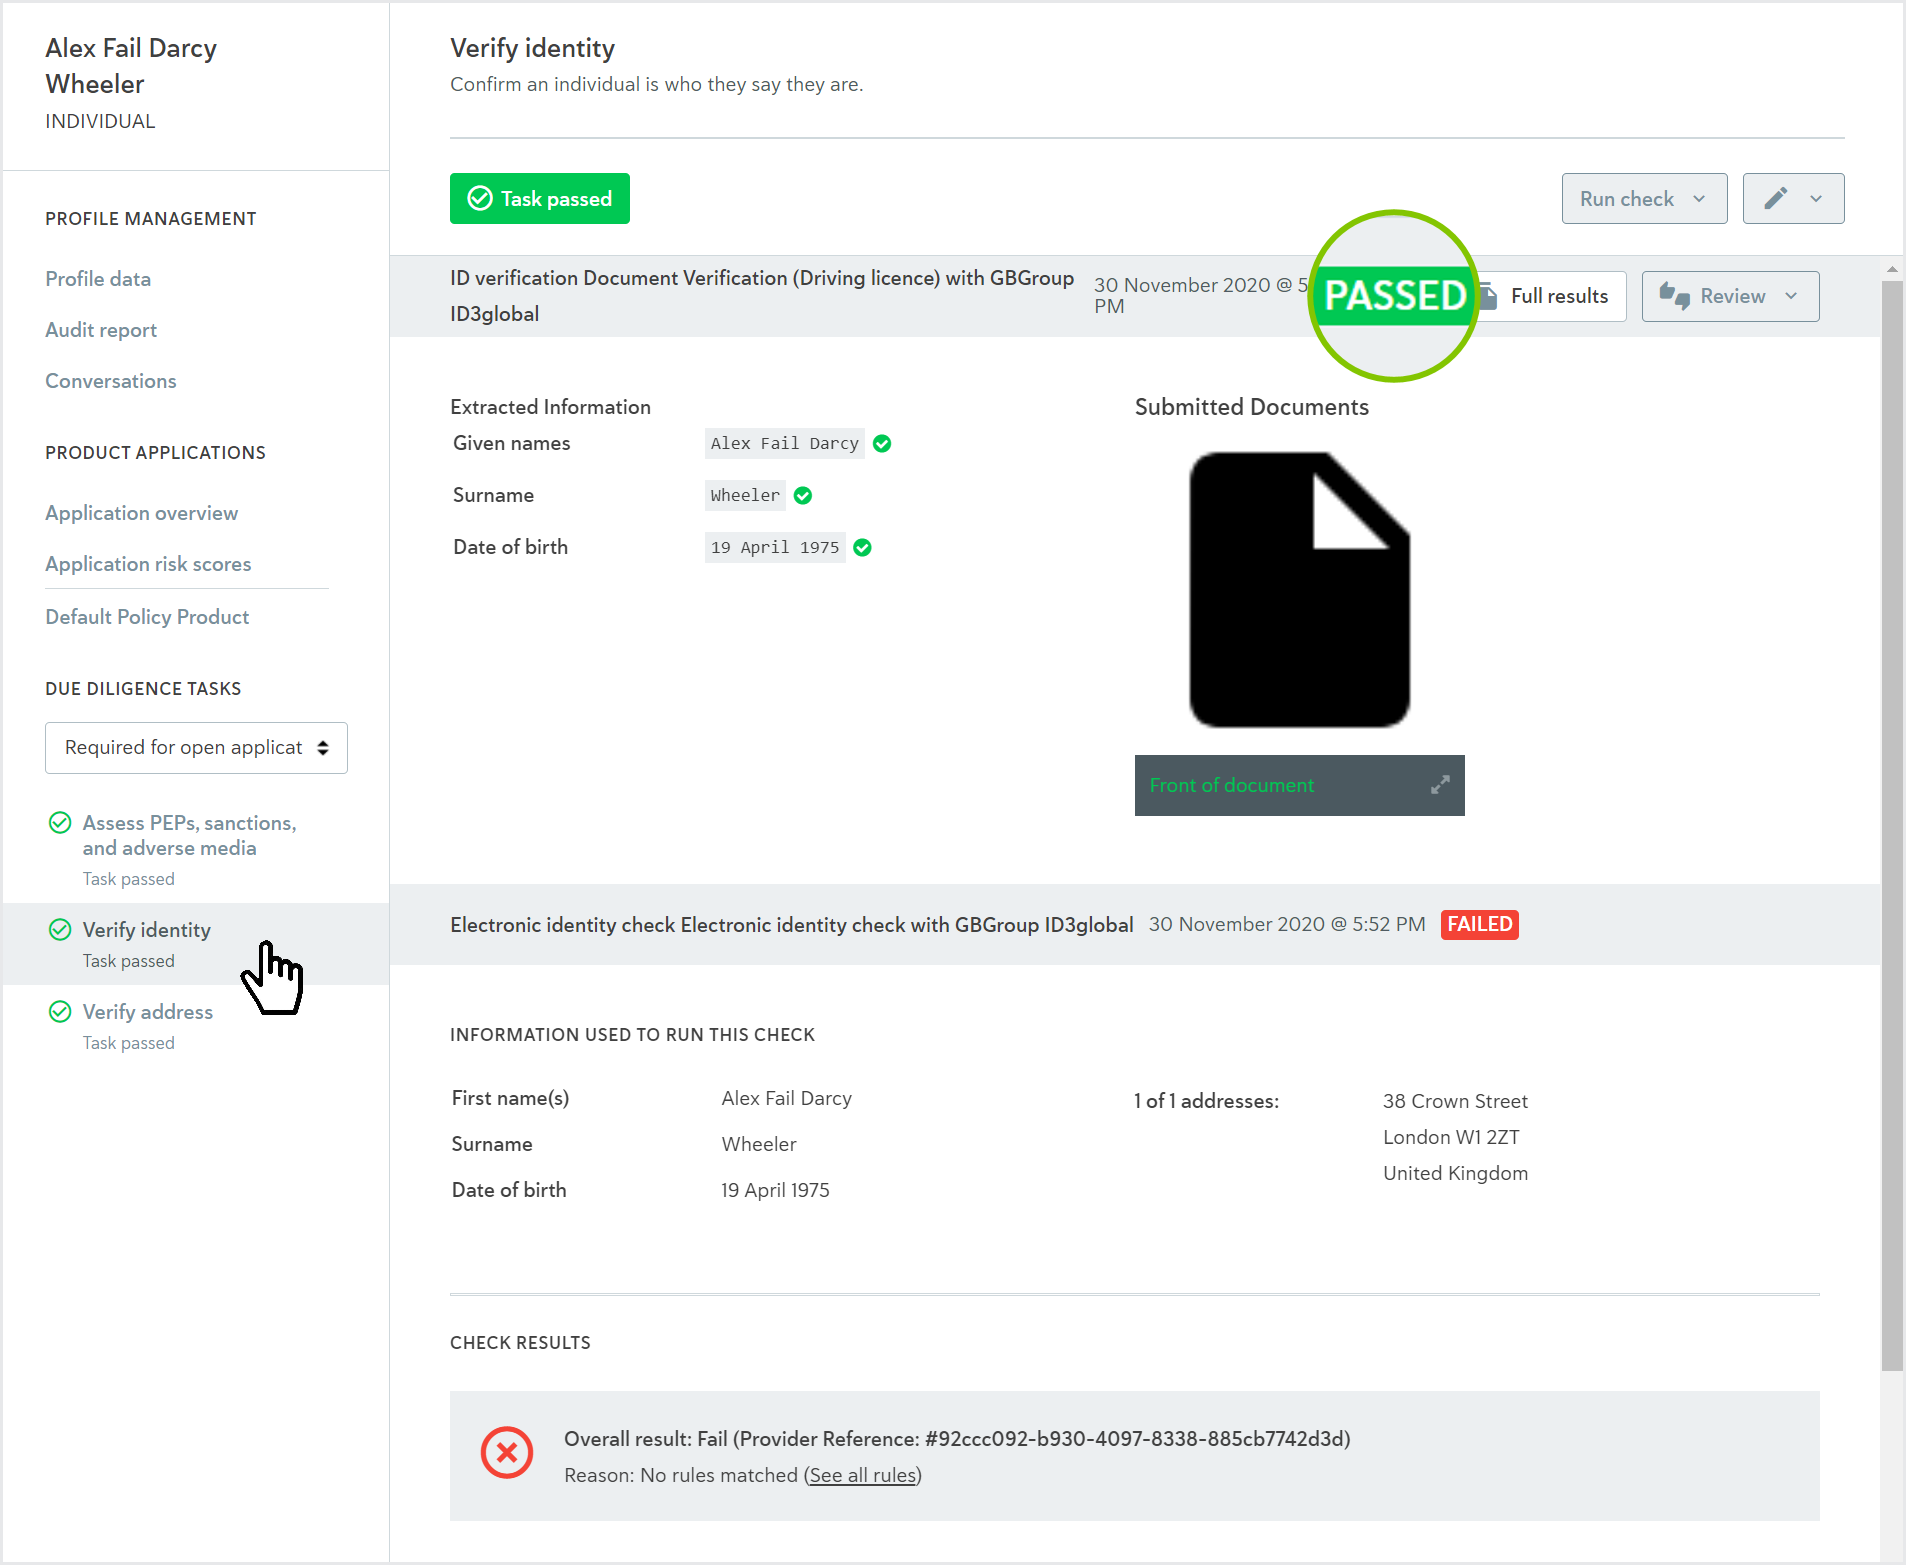
Scroll down the check results (for either task) and notice that an Electronic identity check was run on the task first, but it failed.
In the Postman app, return to the list of individual tests.
Medium risk (Refer match)
Tests whether the application is classified as Medium risk when a Refer match is returned from a PEPs and sanctions screening. When this test is complete, the only way to approve the application is with manual review.
To run the test:
Go to Individual > Medium risk (Refer match).
Click Run PassFort Test. The results are displayed.
Copy the URL under Create profile and paste it into a browser. This shows you the profile via the portal.
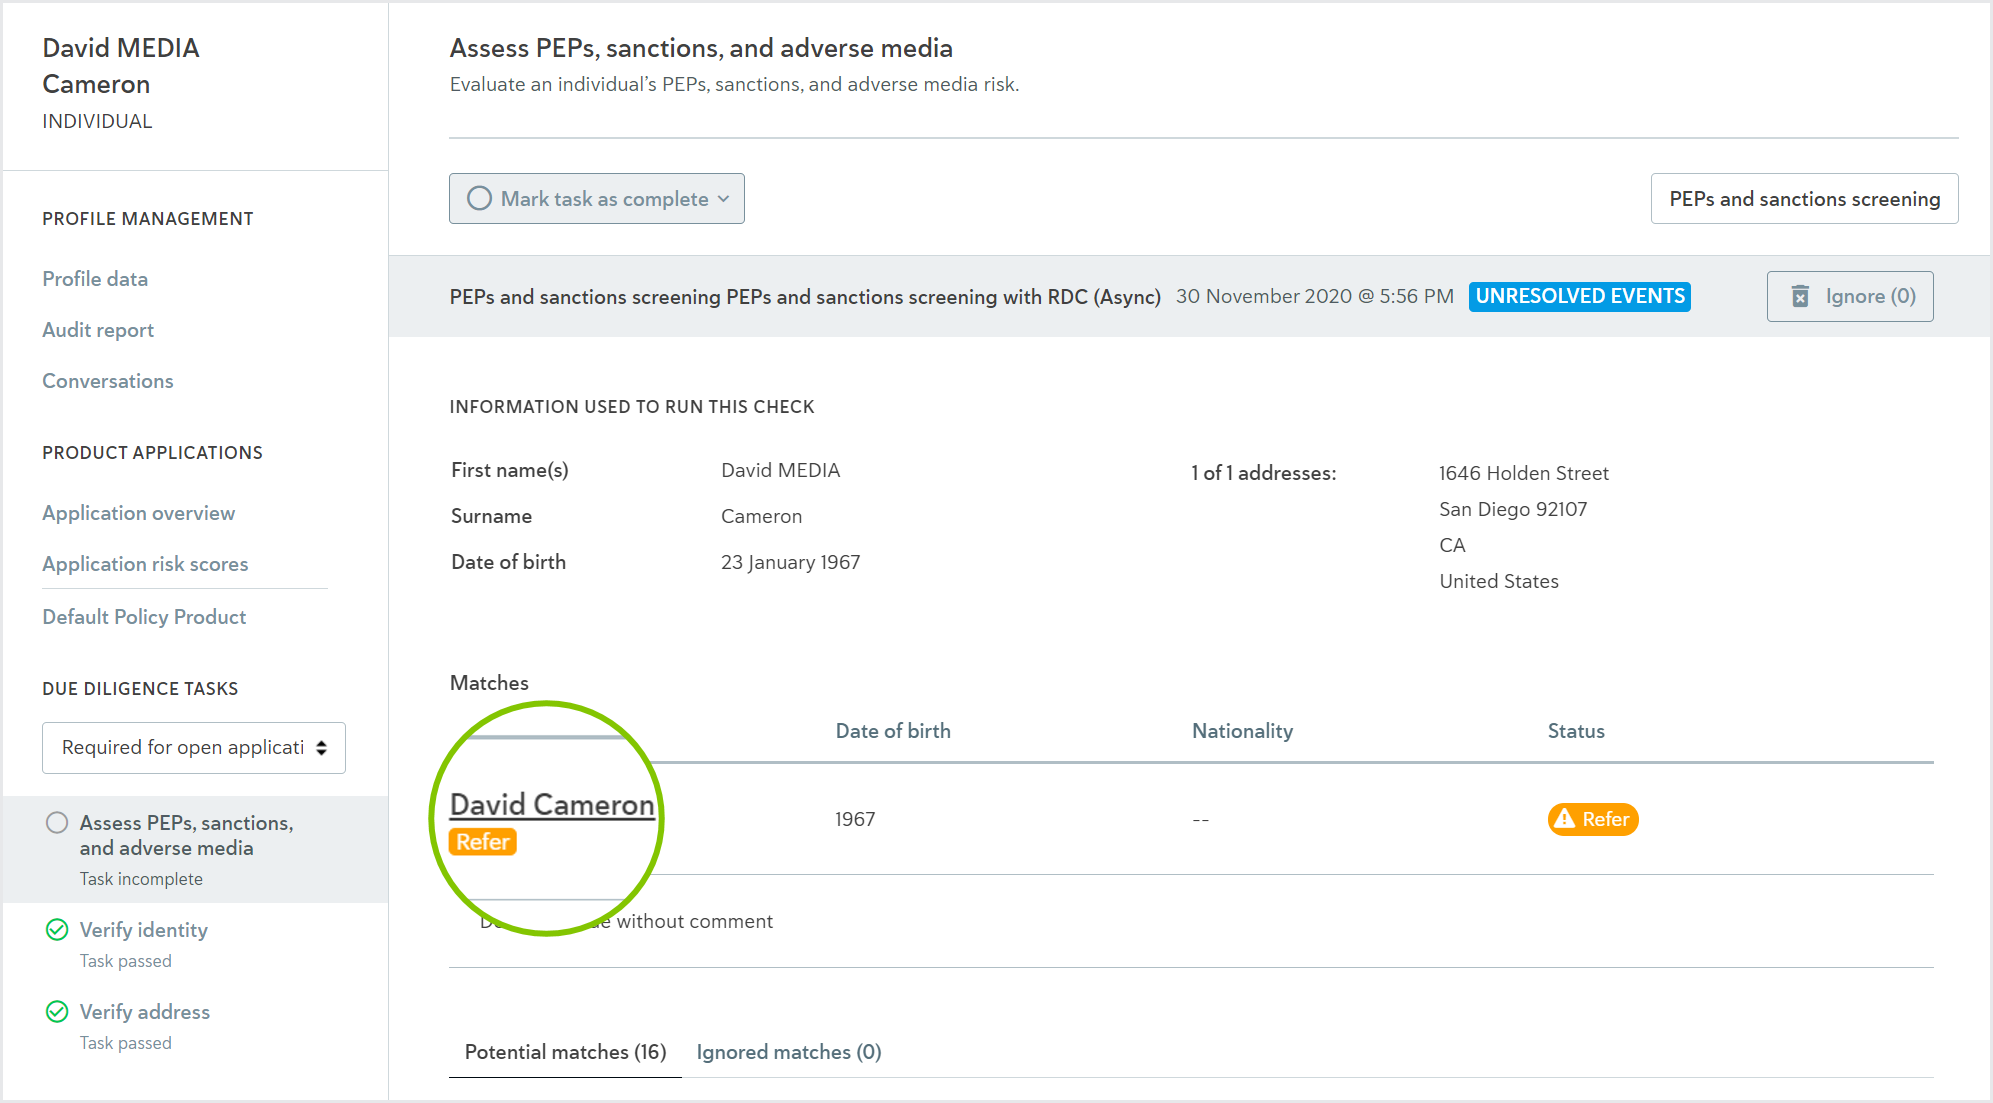
In the portal, notice that the application is Medium risk and it has not been approved automatically.

Go to the Assess PEPs, sanctions, and adverse media task. Notice that there is one confirmed Refer match for David Cameron.
In the Postman app, return to the list of individual tests.
High risk (Escalation)
Tests whether high risk applications can only be manually approved with oversight from a member of the Senior Team.
To run the test:
Go to Individual > High risk (Escalation).
Click Run PassFort Test. The results are displayed.
Copy the URL under Create profile and paste it into a browser. This shows you the profile via the portal.
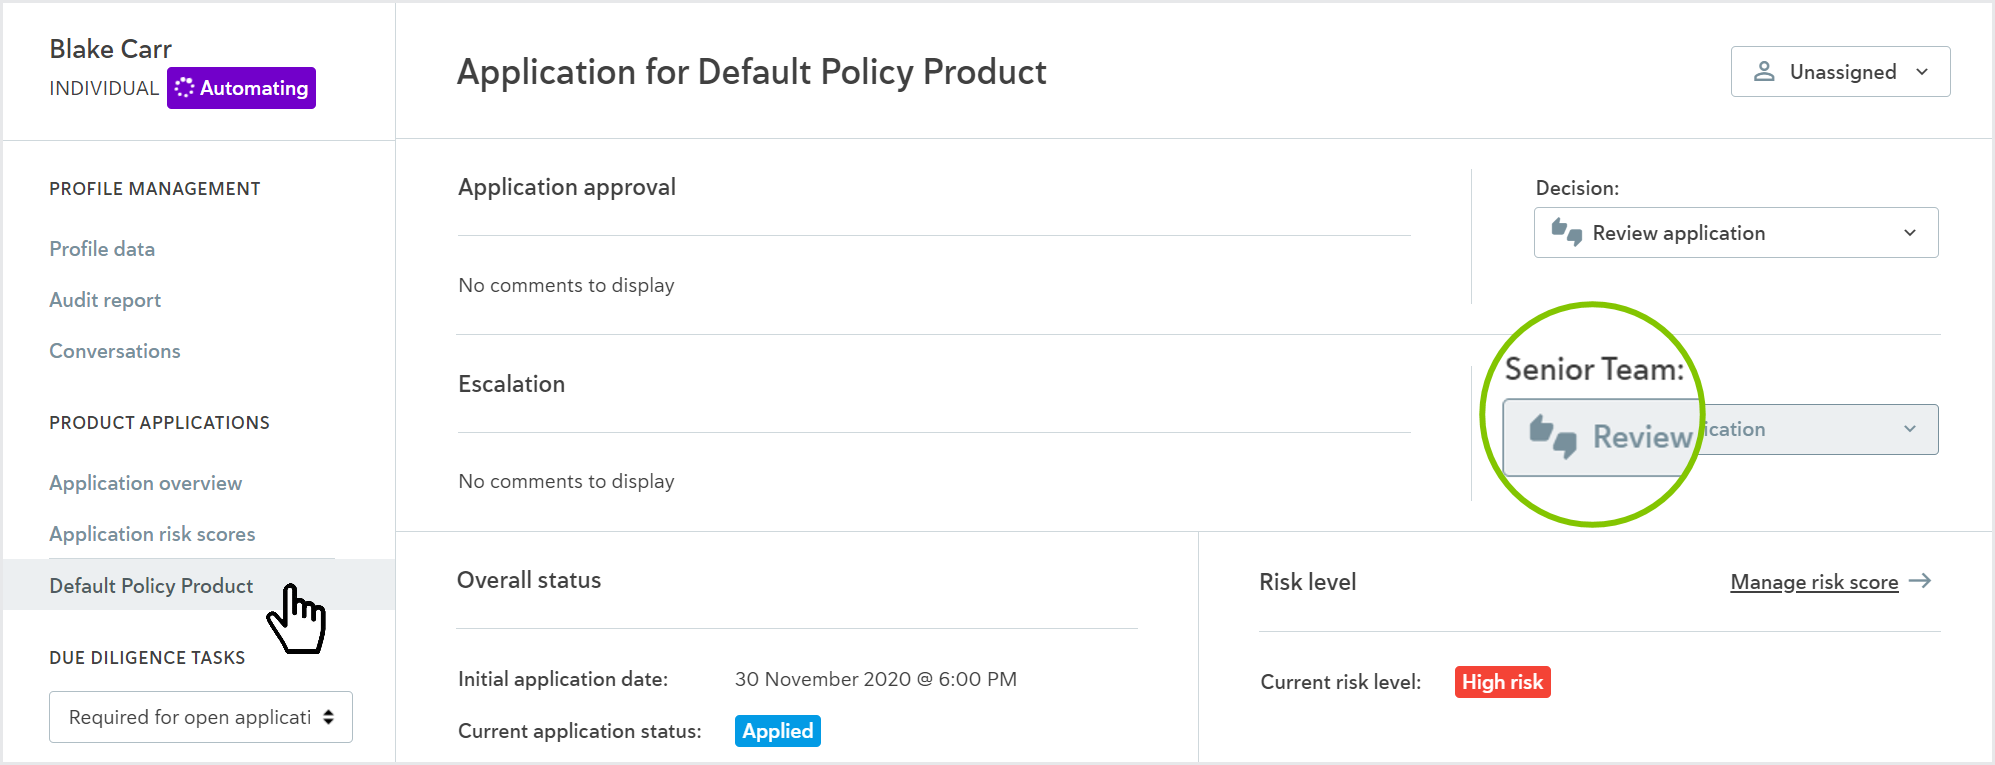
In the portal, notice that the application is High risk and it's Waiting on escalations.
Click Default Policy Product from the left-hand navigation and notice that the escalation is waiting on a member of the Senior Team.
In the Postman app, return to the list of individual tests.
You won't be able to select an option from the Senior Team drop-down in the portal unless you are a member of the Senior Team. It's not important to select the drop-down for this test; it only matters that the drop-down is displayed.
Auto rejection (Sanction match)
Tests whether an individual profile can be automatically rejected based on a confirmed sanctions match.
To run the test:
Go to Individual > Auto rejection (Sanctions match).
Click Run PassFort Test. The results are displayed.
Copy the URL under Create profile and paste it into a browser. This shows you the profile via the portal.
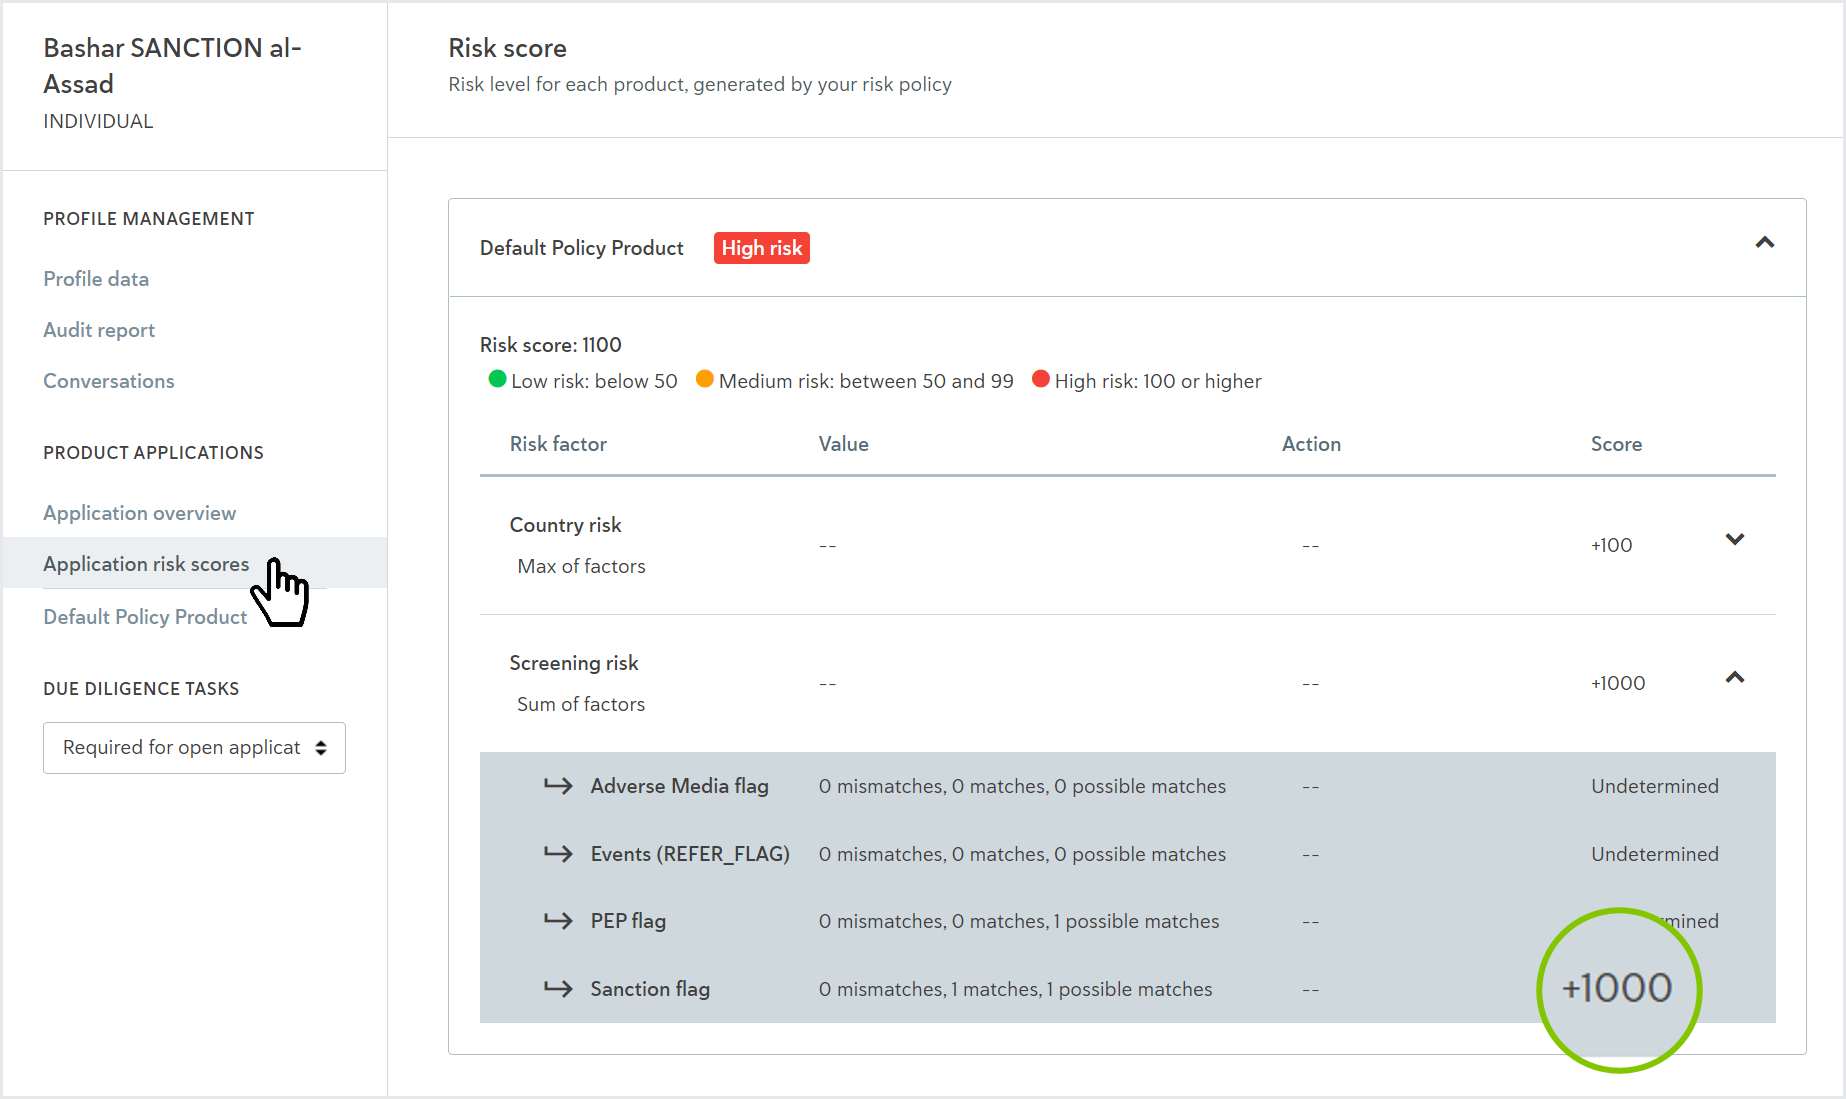
In the portal, notice that the application is High risk and it has been Rejected because the smart policy risk score is higher than 999.
Click Application risk scores from the left-hand navigation and expand Screening risk. Notice that the risk score is +1000 because of the Sanction flag.
In the Postman app, return to the list of individual tests.
Auto rejection (Country)
Tests whether an individual profile can be automatically rejected based on the country of nationality.
To run the test:
Go to Individual > Auto rejection (Sanctions match).
Click Run PassFort Test. The results are displayed.
Copy the URL under Create profile and paste it into a browser. This shows you the profile via the portal.
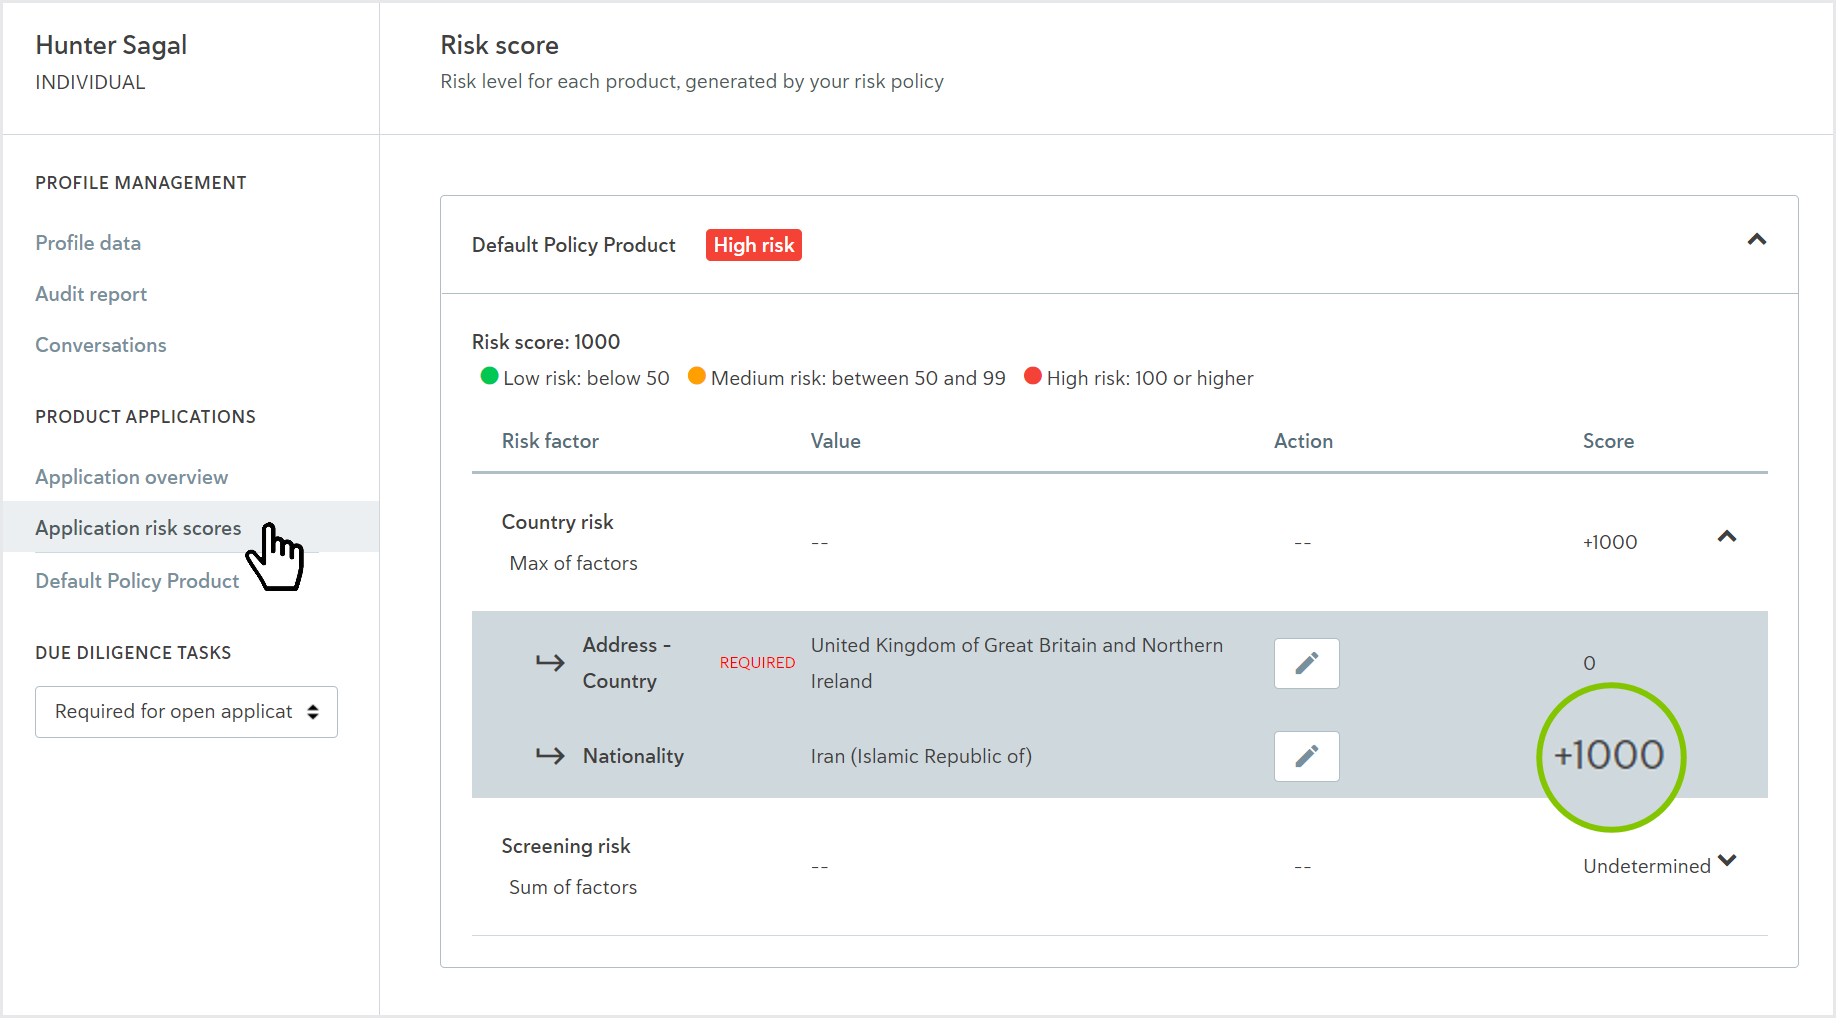
In the portal, notice that the application is High risk and has been Rejected because the smart policy risk score is higher than 999.
Click Application risk scores from the left-hand navigation and expand Country risk. Notice that the risk score is +1000 because of the Nationality.
In the Postman app, return to the list of individual tests.
Tests for companies
STP
Tests whether a company's application can be approved with straight-through processing (STP). In other words, the application does not have any manual intervention between the time it's created and the time it's approved.
To run the test:
Go to Company > STP.
Click Run PassFort Test. The results are displayed.
Copy the URL under Create company profile (e.g. https://identity.passfort.com/profiles/33bae6b8-5689-b96b-143c-06e93ab8527e).
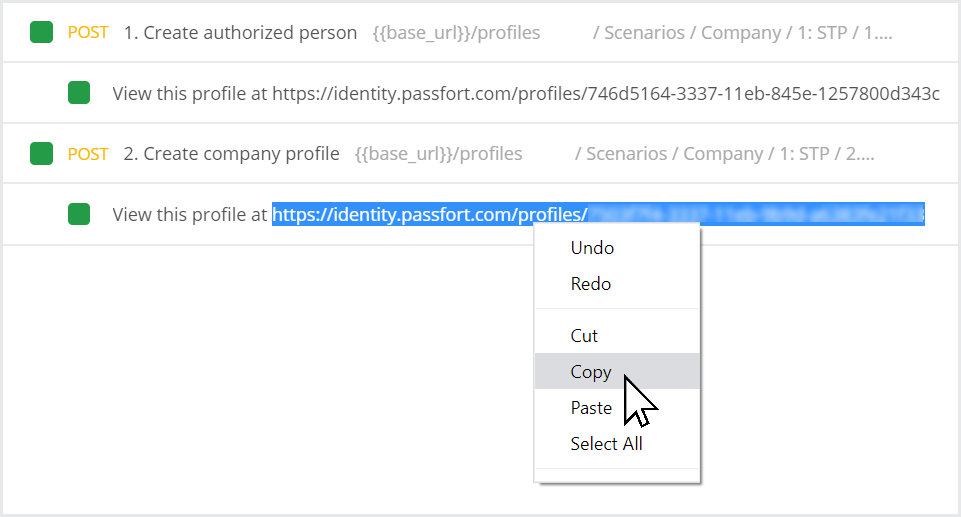
Make sure to copy the URL for Create company profile rather than Create authorized person.
Paste the URL into a browser. This shows you the profile via the portal.
In the portal, notice that the profile's application for Default Policy Product is Approved.

In the Postman app, return to the list of company tests.
Company data fail
Tests whether a company's application must be completed manually if the Company data check fails.
To run the test:
Go to Company > Company data fail.
Click Run PassFort Test. The results are displayed.
Copy the URL under Create company profile and paste it into a browser. This shows you the profile via the portal.
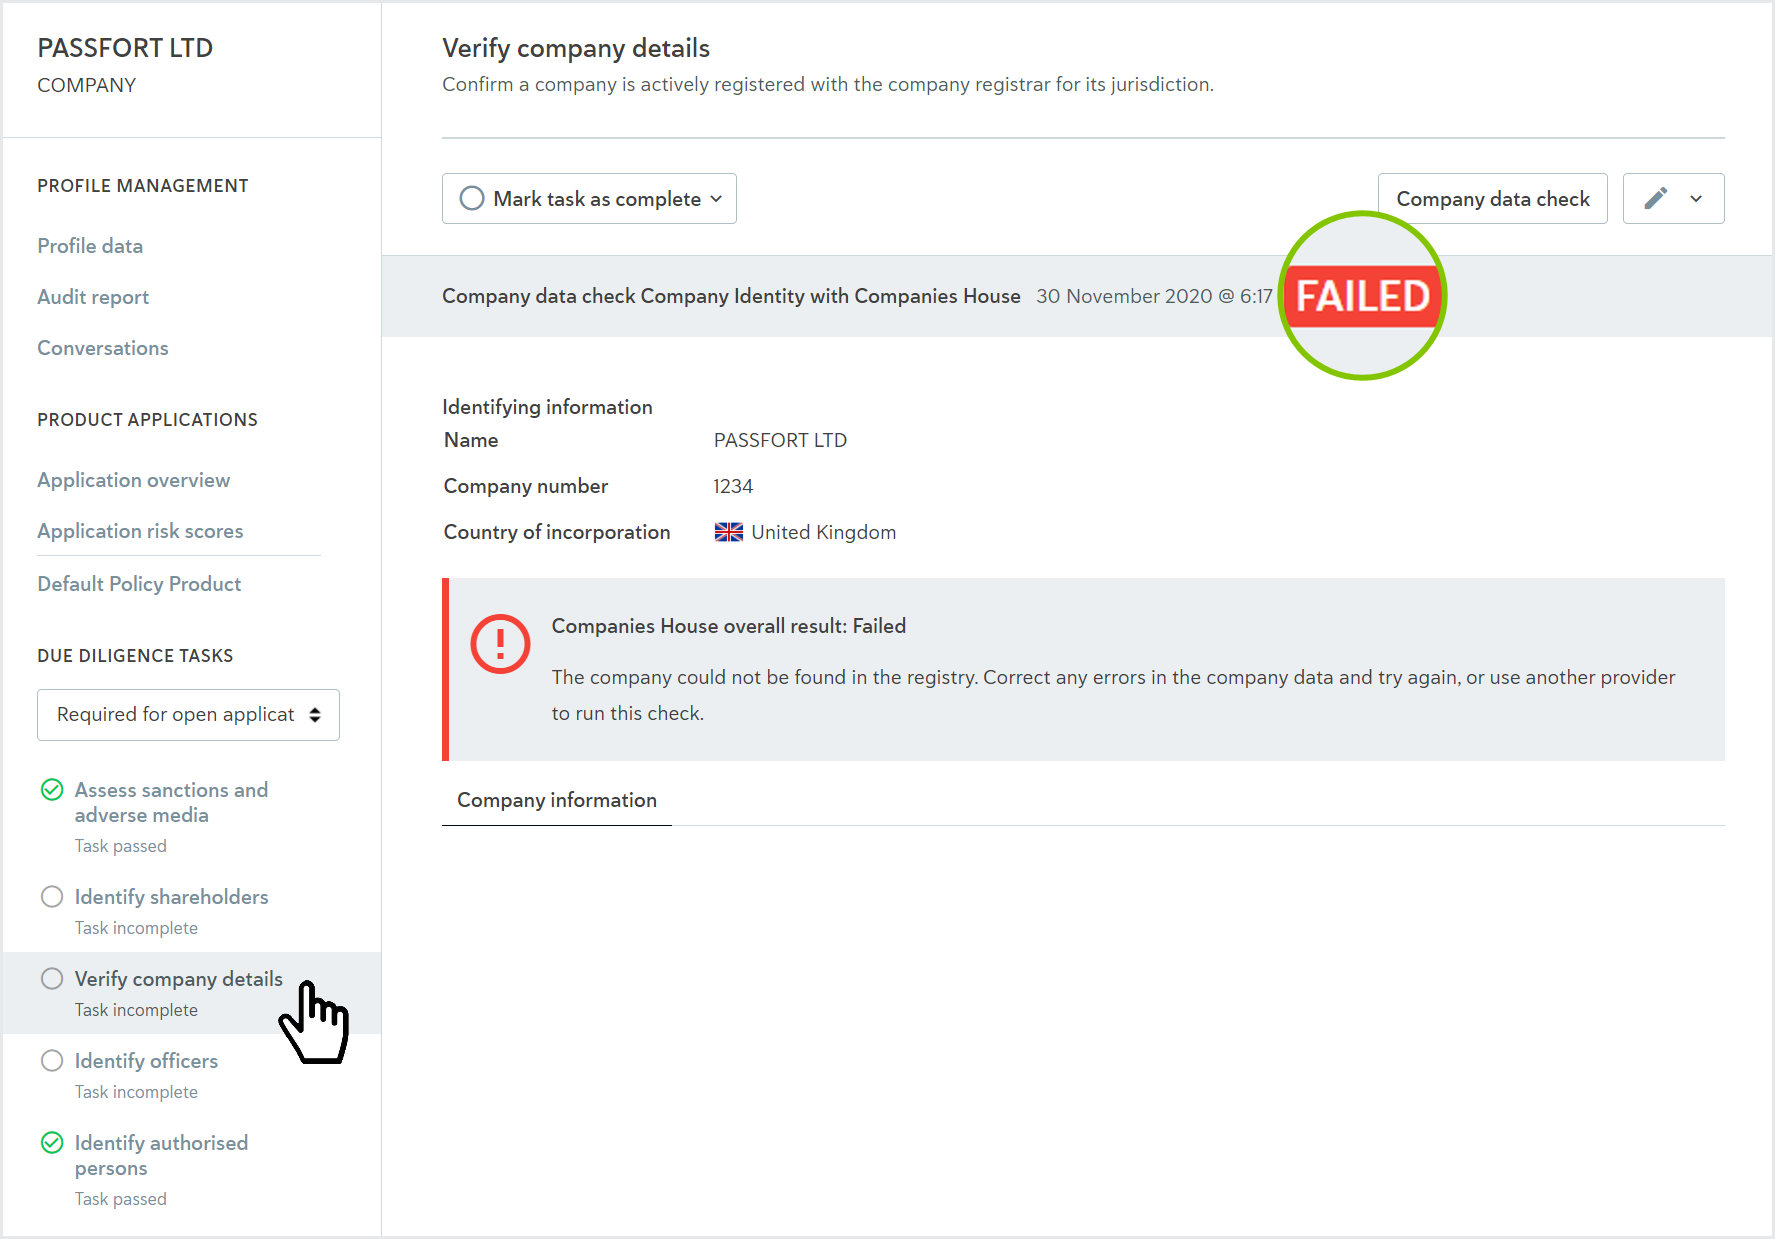
In the Portal, notice that the application is Needs manual completion.
Notice that the Identify shareholders, Verify company details, and Identify officers tasks are all incomplete because the check failed.
In the Postman app, return to the list of company tests.
Medium risk (Adverse media match)
Tests whether the application is classified as Medium risk when an Adverse media match is returned from a Sanctions and adverse media screening. When this test is complete, the only way to approve the application is with manual review.
To run the test:
Go to Company > Medium risk (Adverse media match).
Click Run PassFort Test. The results are displayed.
Copy the URL under Create company profile and paste it into a browser. This shows you the profile via the portal.
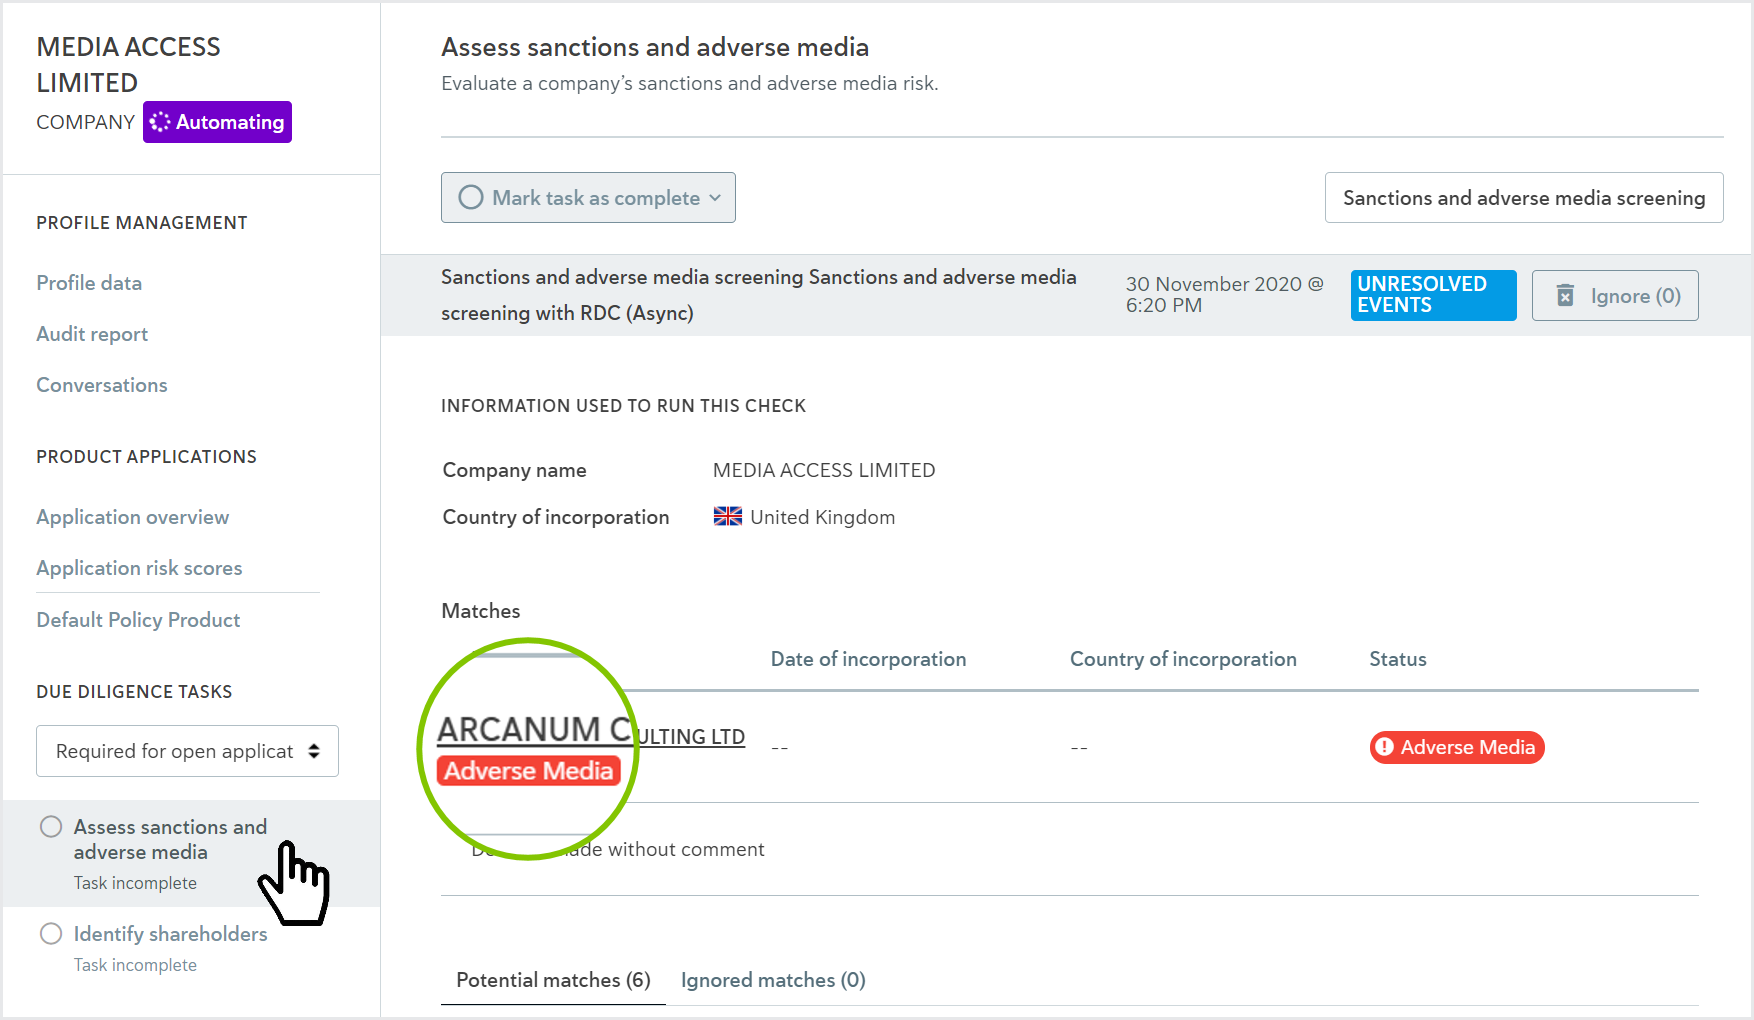
In the Portal, notice that the application is Medium risk and it has not been approved automatically.
Go to the Assess sanctions and adverse media task, and notice that there is one confirmed Adverse media match.
In the Postman app, return to the list of company tests.
High risk (Escalation)
Tests whether high risk applications can only be manually approved with oversight from a member of the Senior Team.
To run the test:
Go to Company > High risk (Escalation).
Click Run PassFort Test. The results are displayed.
Copy the URL under Create company profile and paste it into a browser. This shows you the profile via the portal.
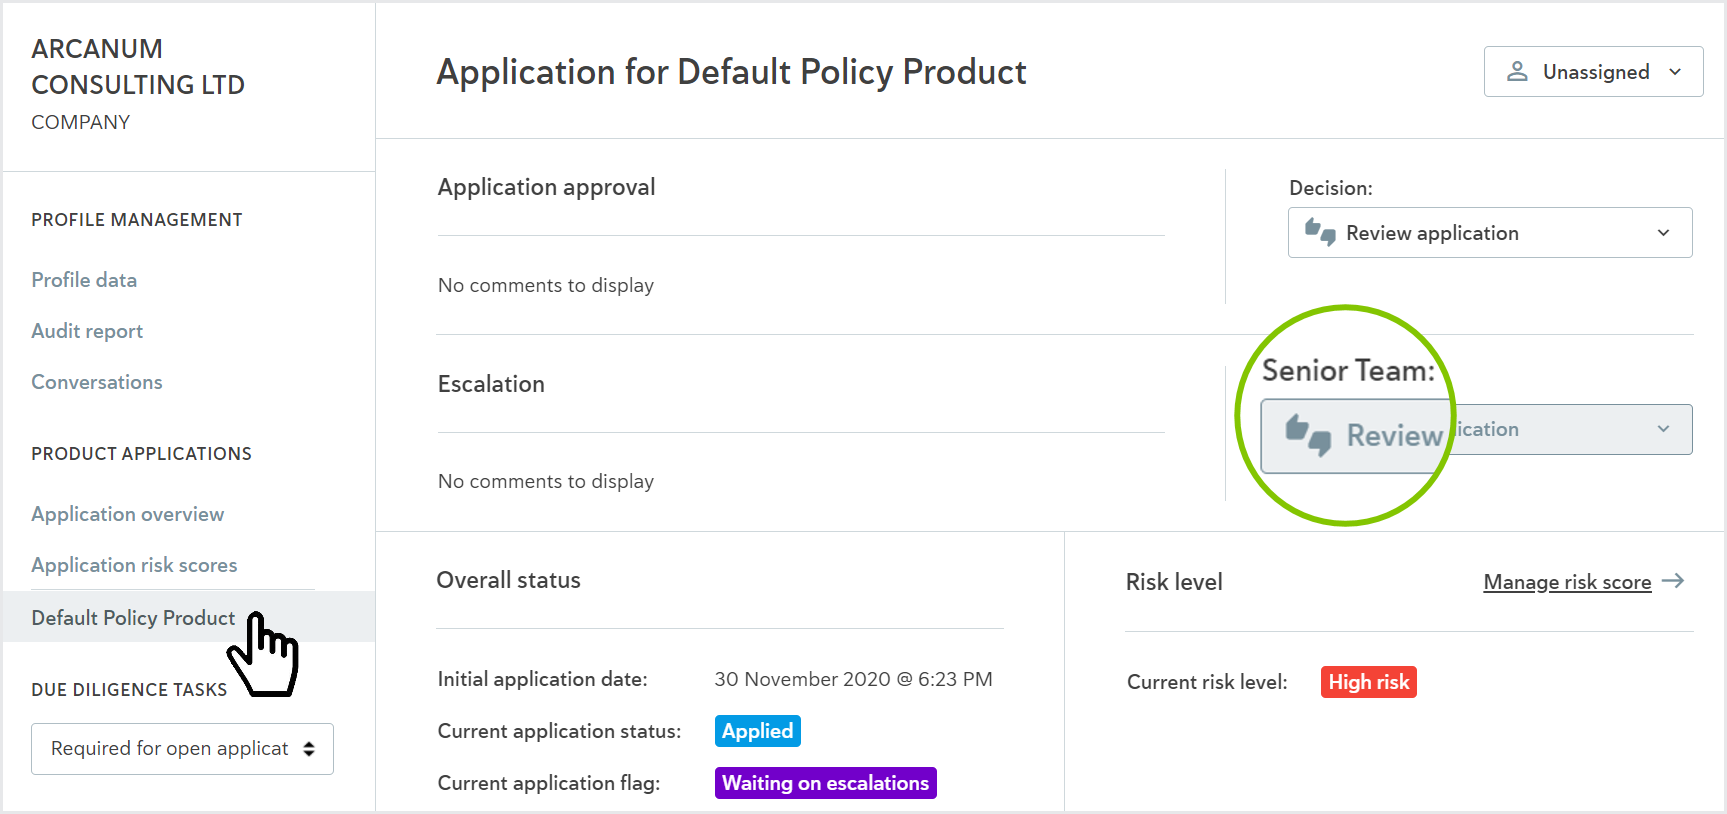
In the portal, notice that the application is High risk and it's Waiting on escalations.
Click Default Policy Product from the left-hand navigation and notice that the escalation is waiting on a member of the Senior Team.
I
You won't be able to select an option from the Senior Team drop-down in the Portal unless you are a member of the Senior Team. It's not important to select the drop-down for this test; it only matters that the drop-down is displayed.
5: Auto rejection (Sanction match)
Tests whether a company profile can be automatically rejected based on a confirmed sanctions match.
To run the test:
Go to Company > Auto rejection (Sanction match).
Click Run PassFort Test. The results are displayed.
Copy the URL under Create company profile and paste it into a browser. This shows you the profile via the portal.
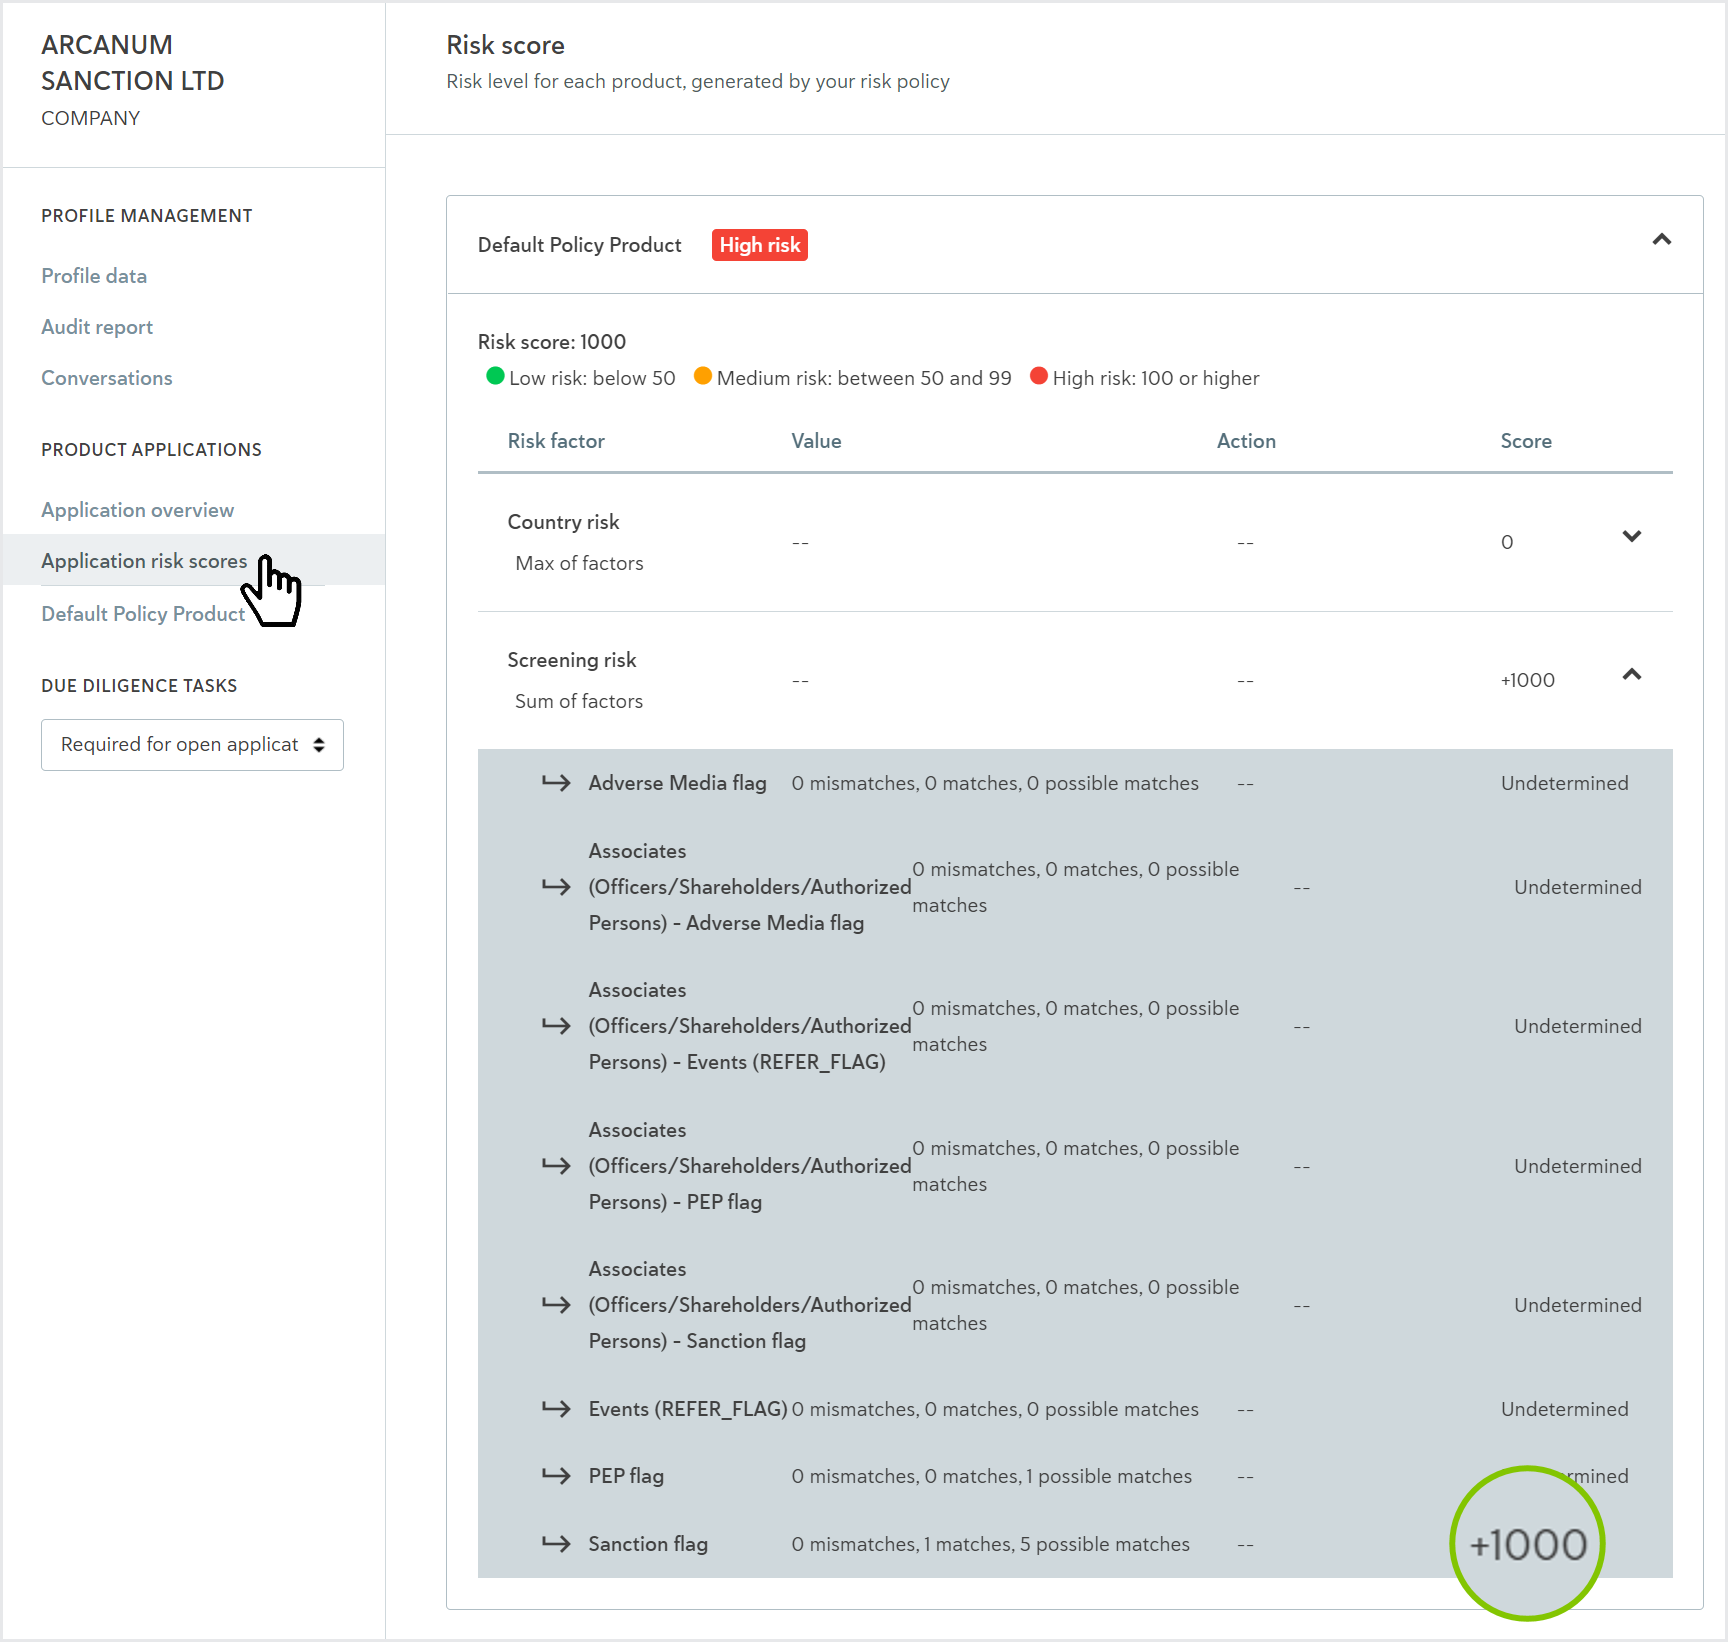
In the portal, notice that the application is High risk and it has been Rejected because the smart policy risk score is higher than 999.
Click Application risk scores from the left-hand navigation and expand Screening risk. Notice that the risk score is +1000 because of the Sanction flag.
In the Postman app, return to the list of company tests.
Auto rejection (Country)
Tests whether a company profile can be automatically rejected based on the country of incorporation.
To run the test:
Go to Company > Auto rejection (Country).
Click Run PassFort Test. The results are displayed.
Copy the URL under Create company profile and paste it into a browser. This shows you the profile via the portal.
Notice that the application is High risk and has been Rejected because the smart policy risk score is higher than 999.
Click Application risk scores from the left-hand navigation and expand Country risk. Notice that the risk score is +1000 because of the Country of Incorporation.

In the Postman app, return to the list of company tests.
Manually create officer and shareholder structure
Tests whether you can use the API to create authorised persons, directors, intermediary shareholders, and a UBO (through one of the intermediary shareholders). You may wish to use a scenario like this, for example, if your customer onboarding form requests this data and you do not want it to depend on data providers.
To run the test:
Go to Company > Manually create officer and shareholder structure.
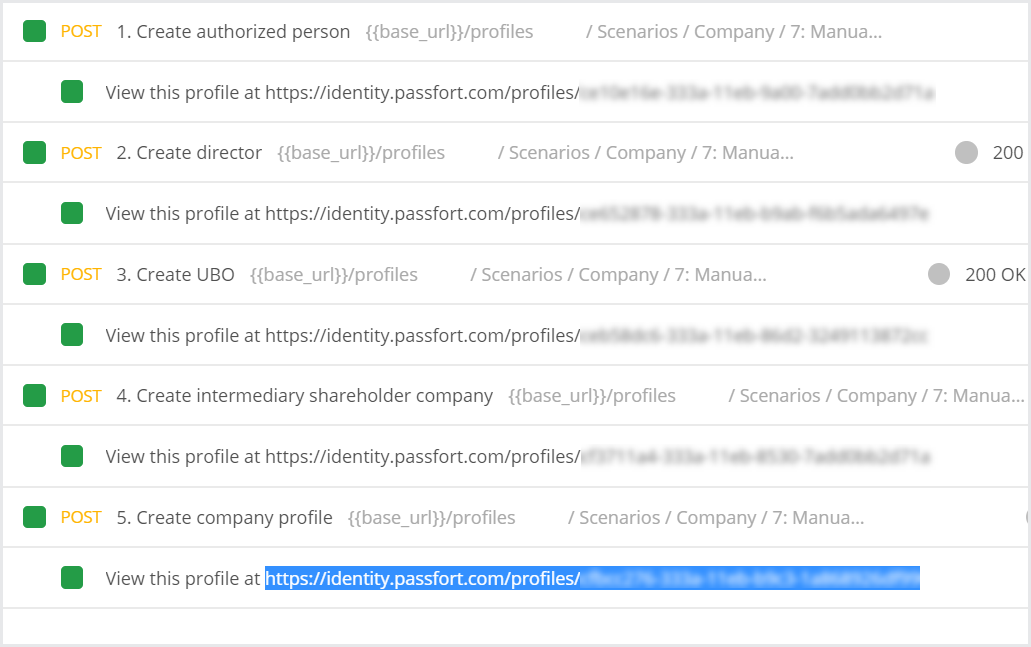
Click Run PassFort Test. The results are displayed.
Copy the URL under Create company profile and paste it into a browser. This shows you the profile via the portal.
In the Portal, go to the Identify authorised persons task and notice that there is an authorized person.
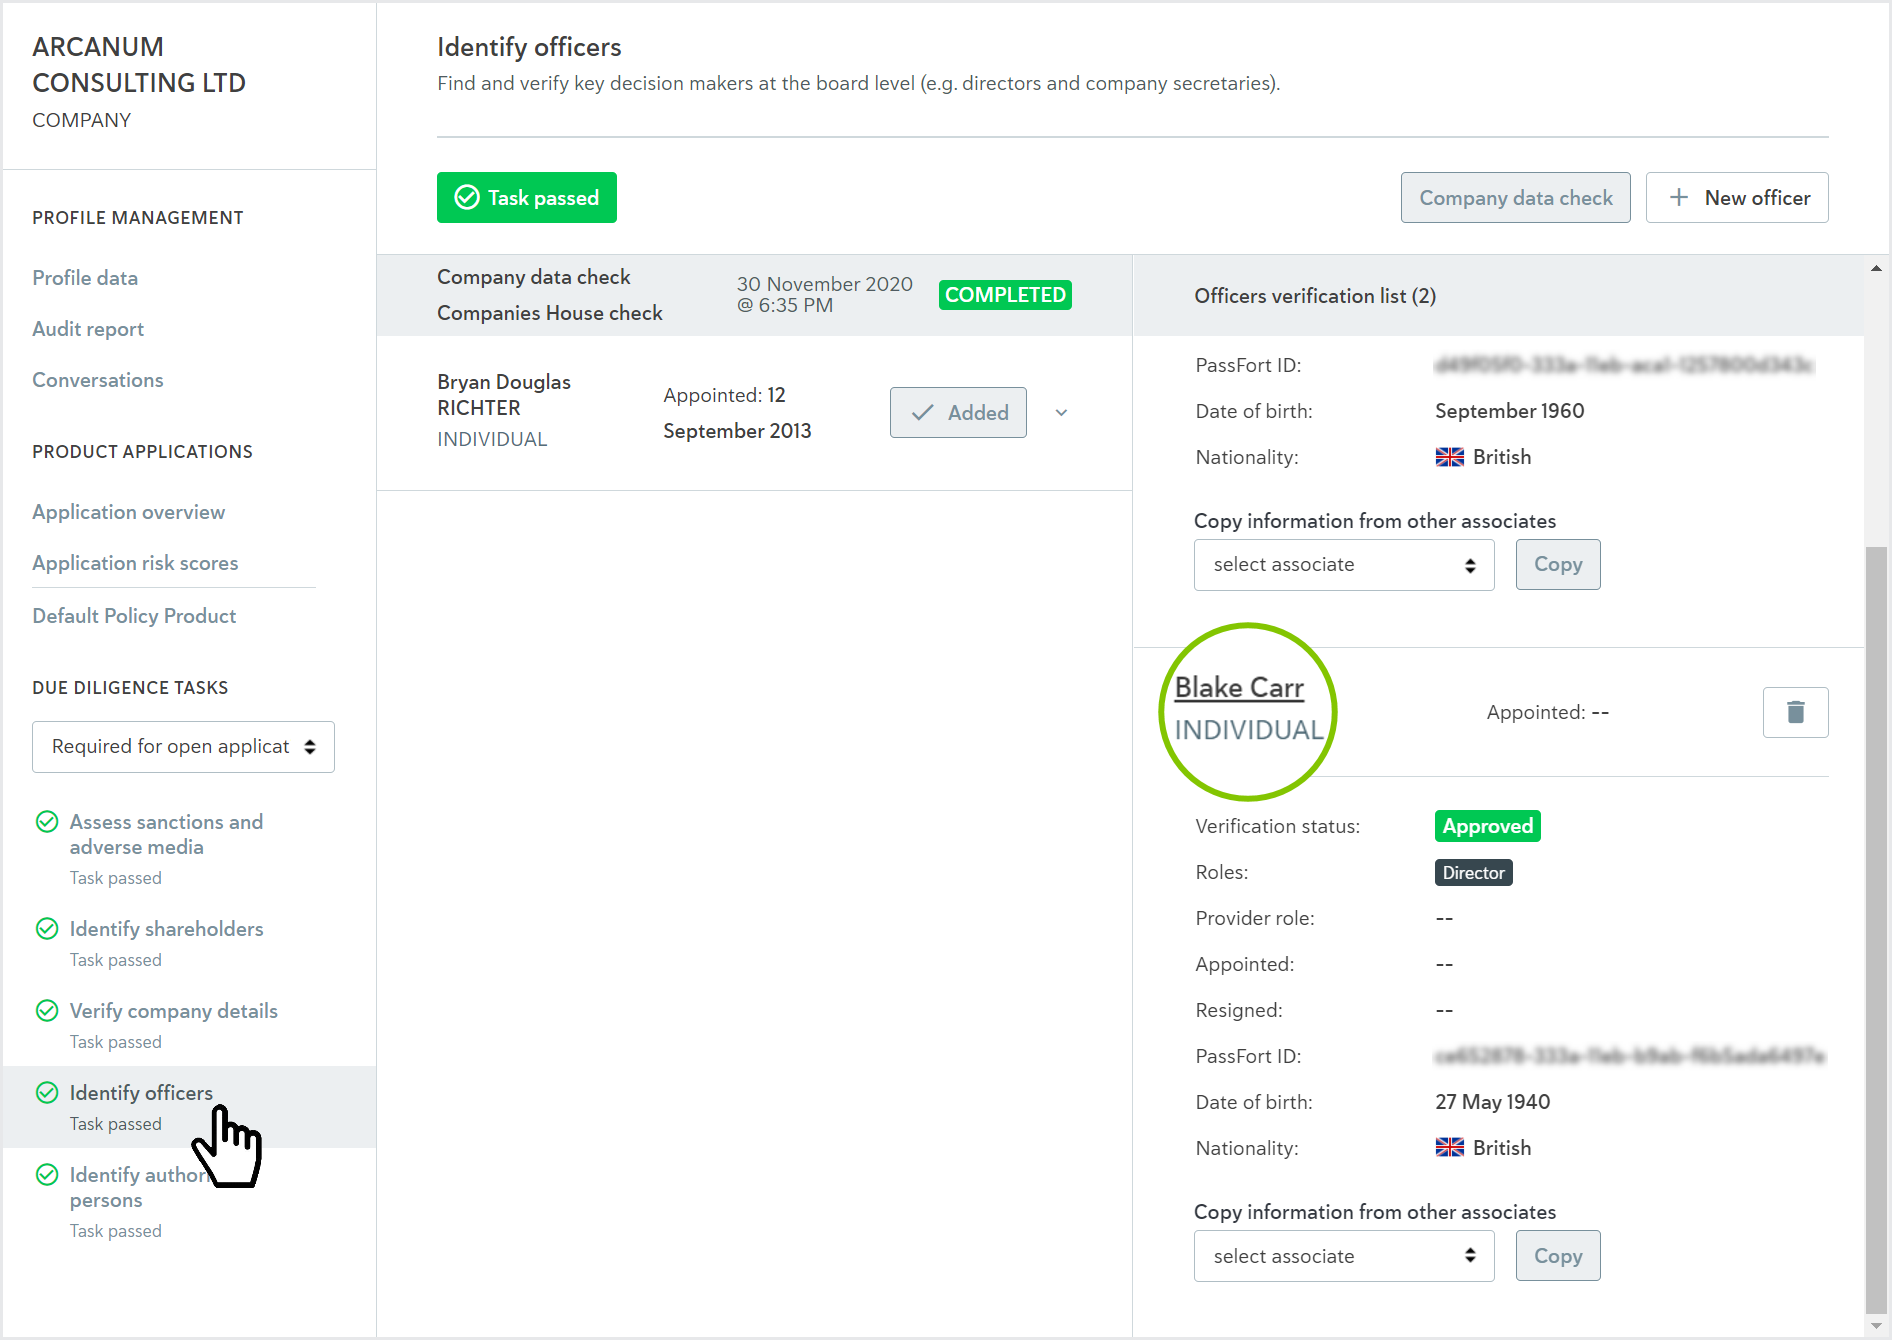
Go to the Identify officers task and notice that there is director, Blake Carr, in addition to the officer the data provider returned.
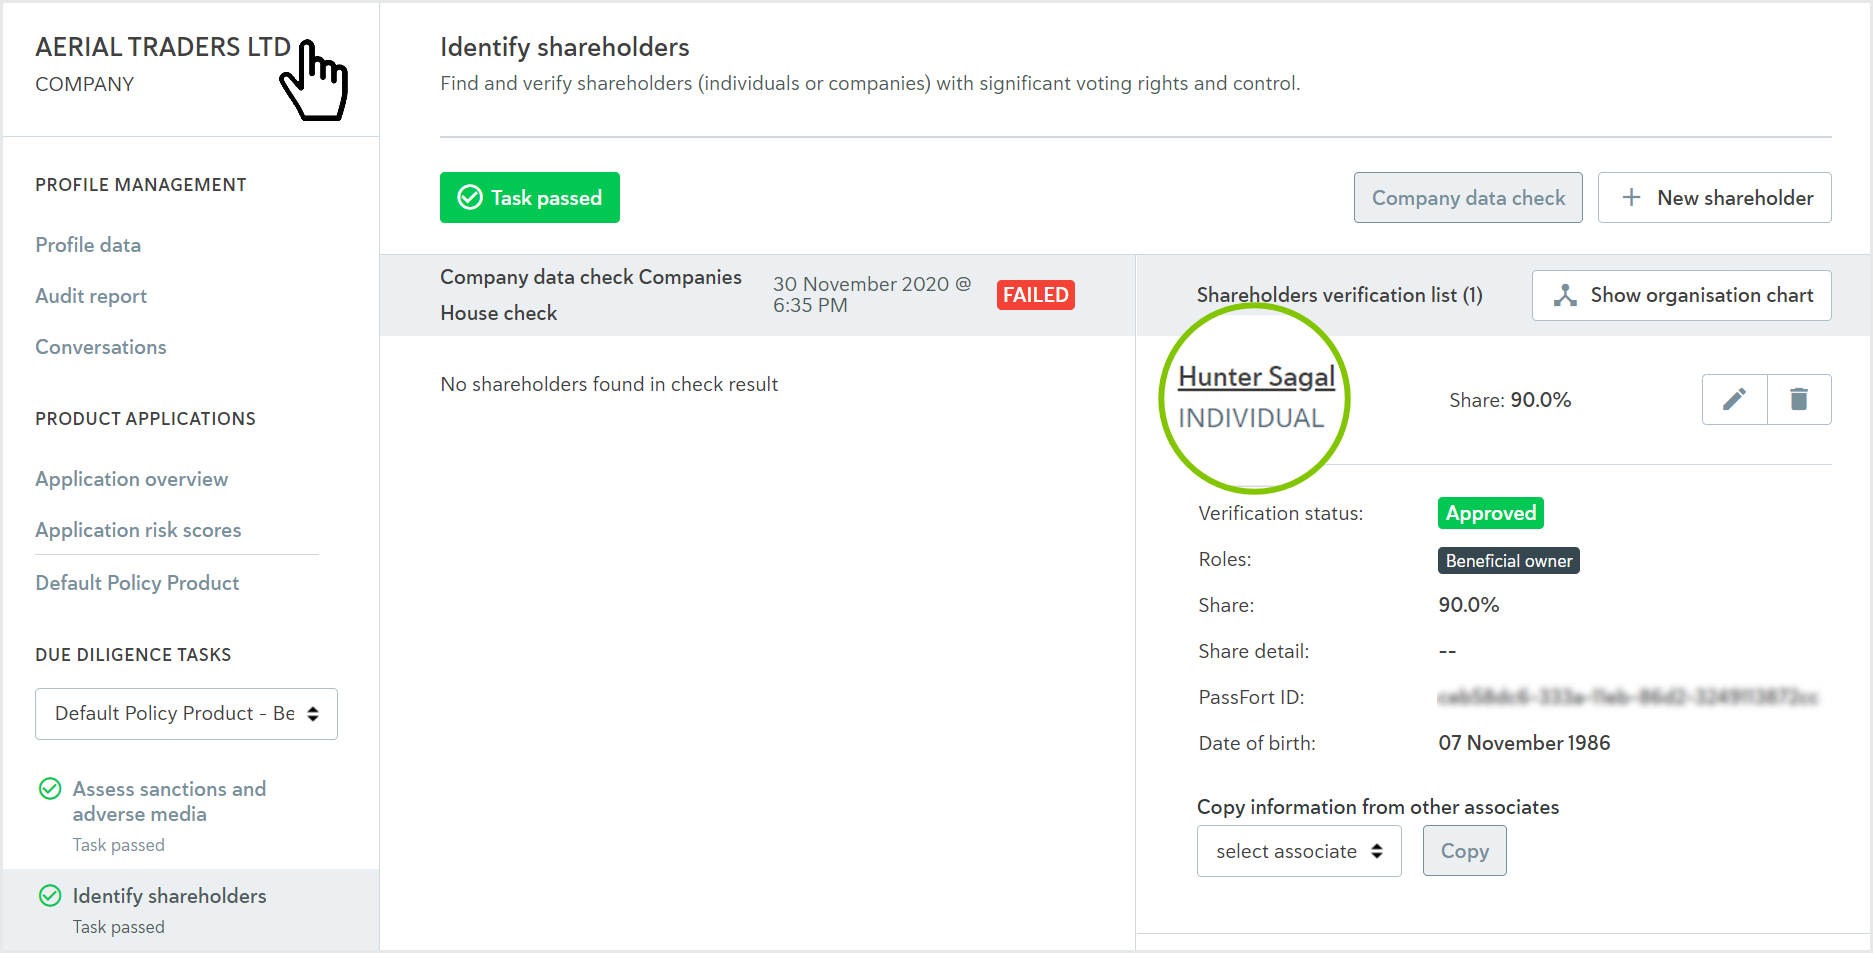
Go to the Identify shareholders task and notice that there is a shareholder, Aerial Traders Ltd, in addition to the shareholder the data provider returned.
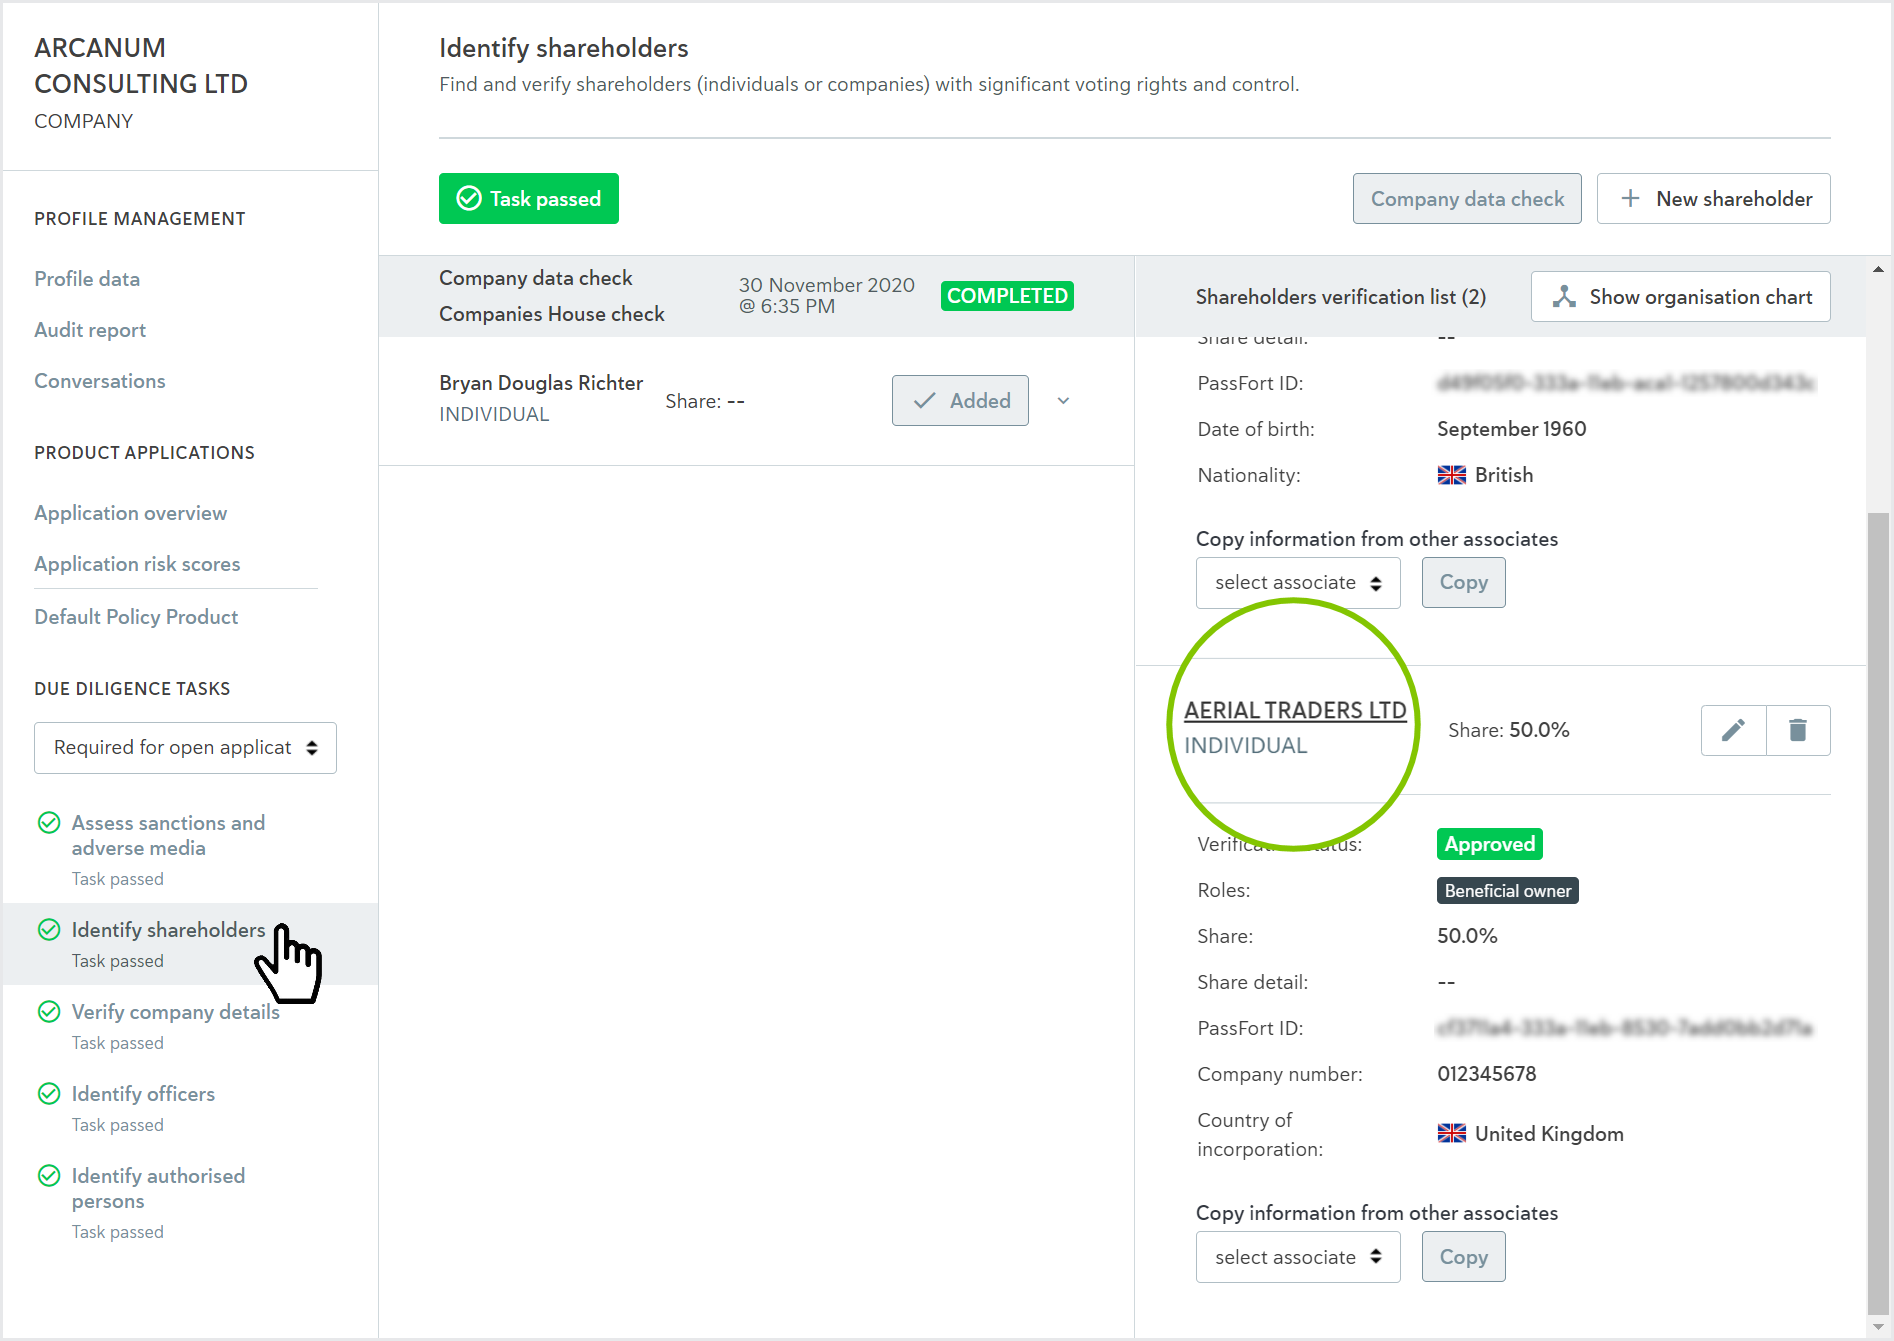
Click the name of the new shareholder, Aerial Traders Ltd. You're redirected to this shareholder's profile.
Click the Identify shareholders task and notice that there's a UBO, Hunter Sagal.
In the Postman app, return to the list of company tests.
Authorized person - Electronic identity fail and ID verification pass
Tests whether, when an Electronic identity check fails, you can pass the Verify identity and Verify address tasks with an ID verification check. This is useful to ensure that a company associate's application can still be processed when it's not possible to run an Electronic identity check.
To run the test:
Go to Company > Authorized person - Electronic identity fail and ID verification pass.
Click Run PassFort Test. The results are displayed.
Copy the URL under Create authorized person and paste it into a browser. This shows you the profile via the portal.
This is the only company test that uses the URL for the authorized person rather than the company profile.
In the Portal, click the Verify identity and Verify address tasks in the left-hand navigation. Notice that the tasks have been passed based on the result from an ID verification check.
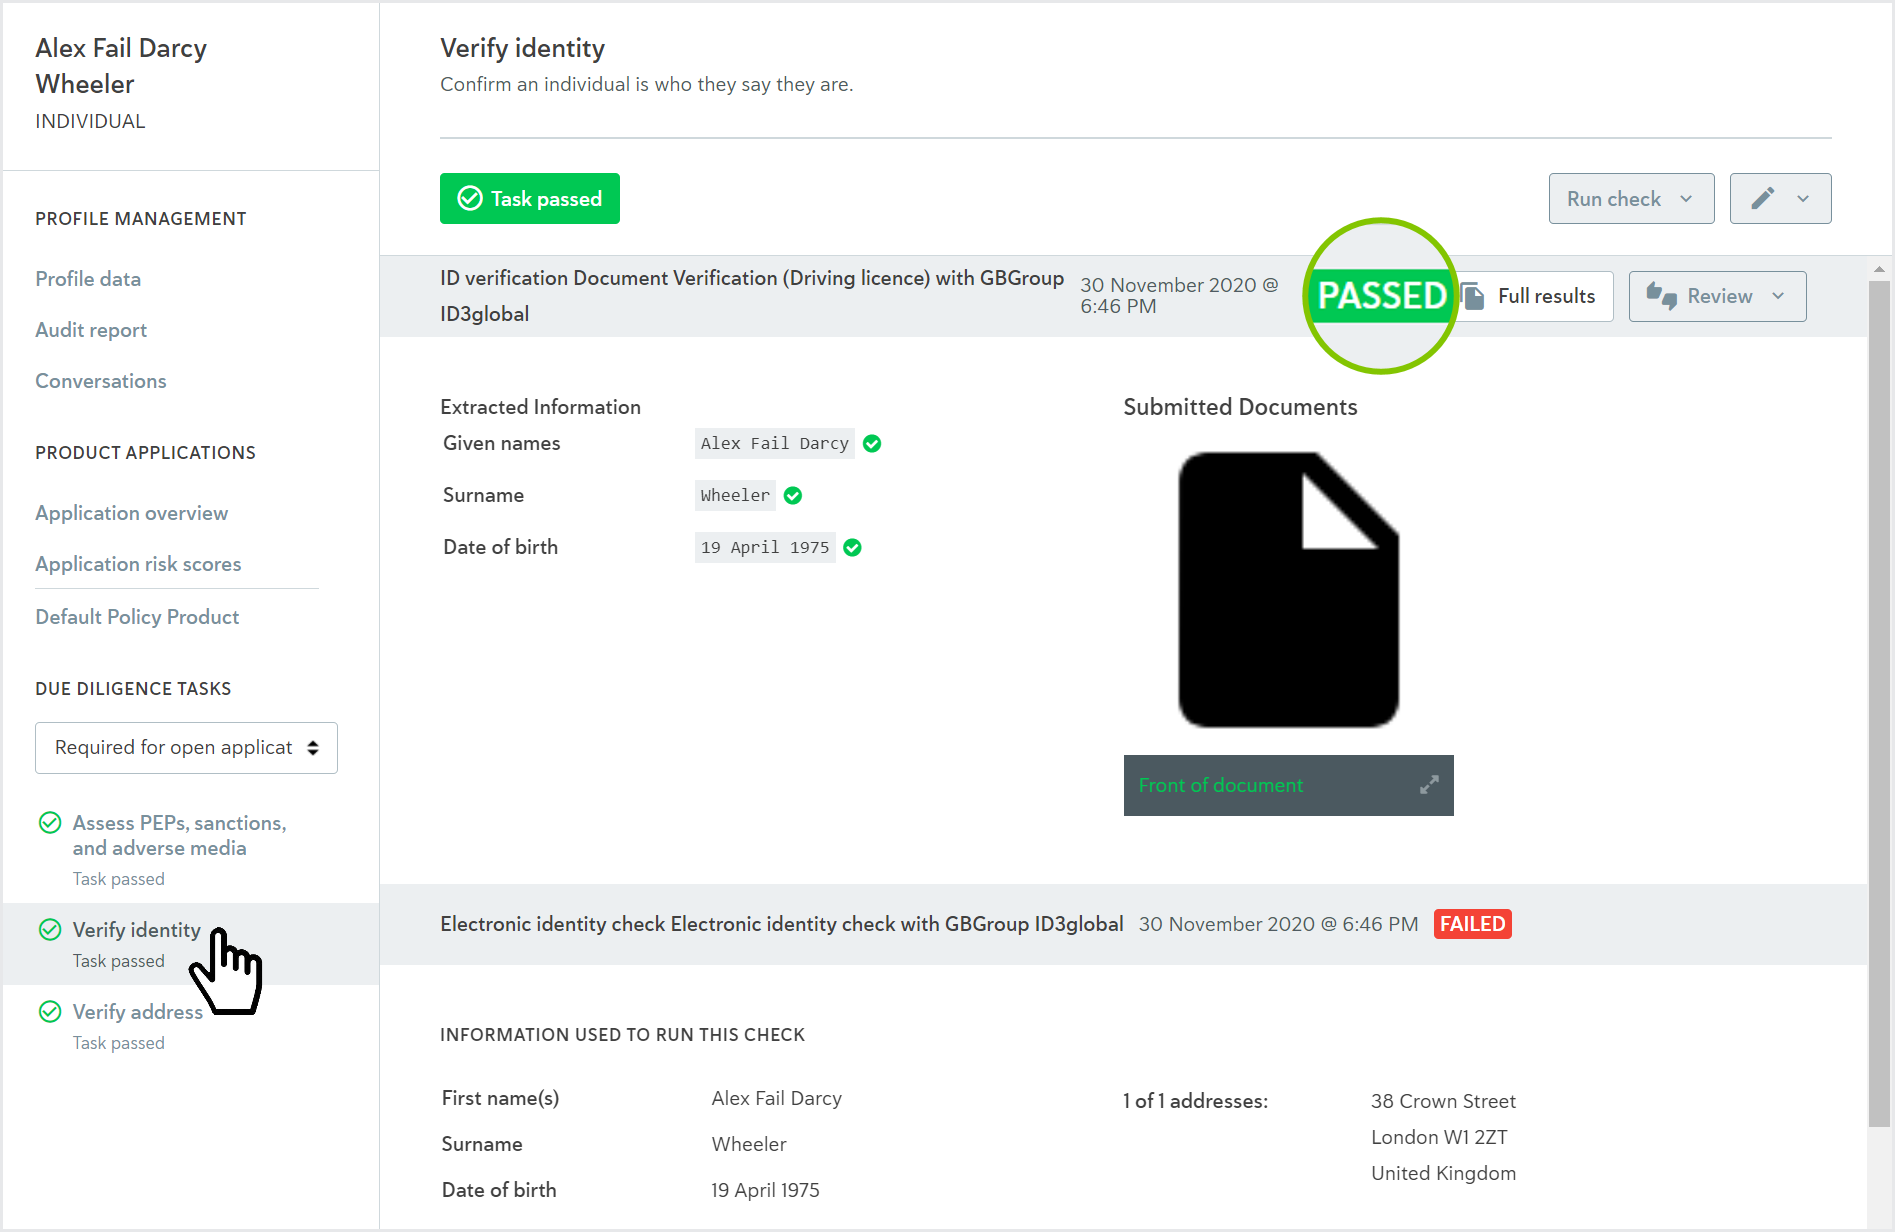
Scroll down the check results, for either task, and notice that an Electronic identity check was run on the task first, but it failed.
In the Postman app, return to the list of company tests.